> ## Documentation Index
> Fetch the complete documentation index at: https://docs.hitpayapp.com/llms.txt
> Use this file to discover all available pages before exploring further.
# V660P (All-in-One)
> Instructions on how to set up and use the V660P All-in-One terminal with HitPay.
All-in-One Terminal is available in Singapore, HongKong.
## Overview
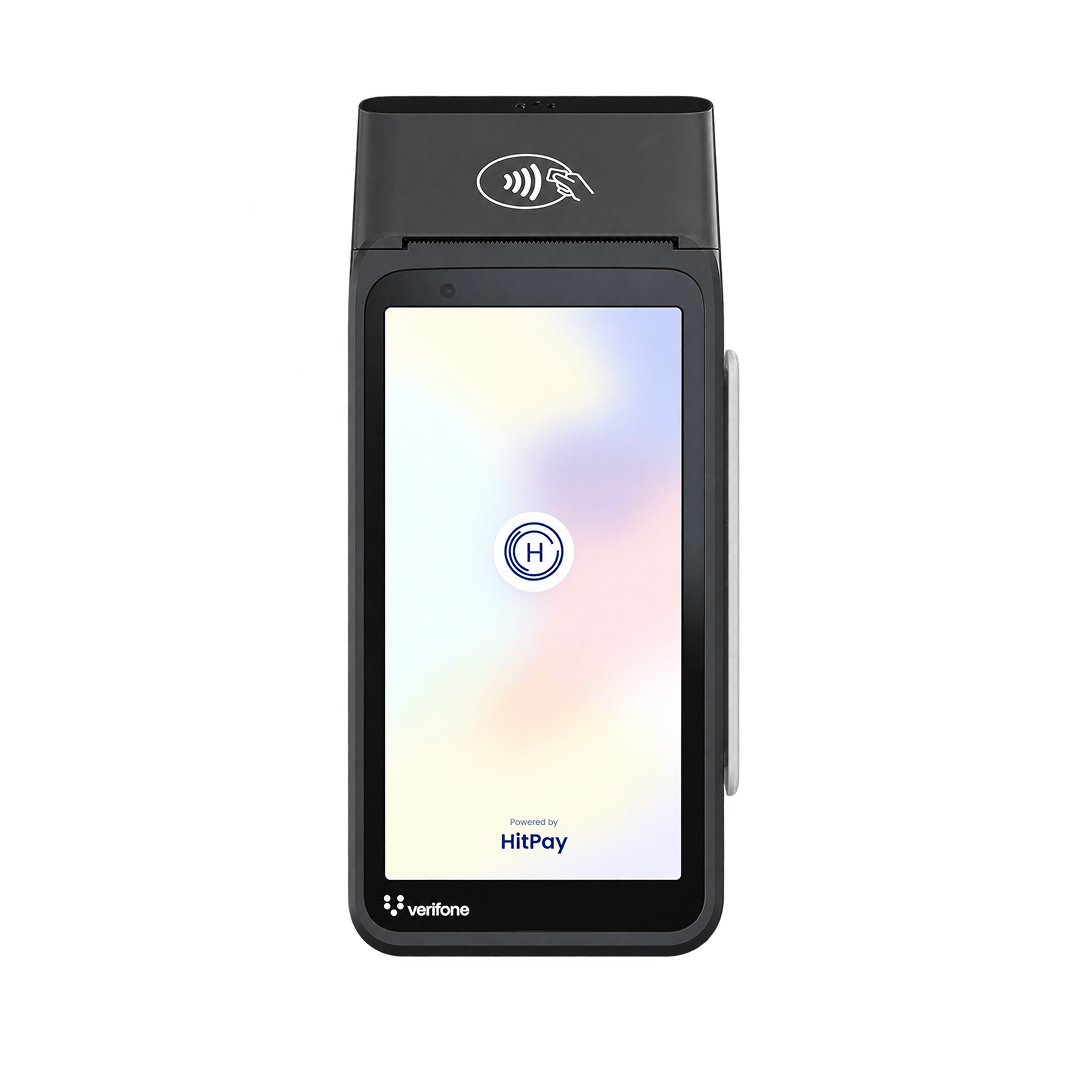
The HitPay V660P is a portable, all-in-one POS terminal with:
* Built-in card payments
* Integrated receipt printing
* Wi-Fi and cellular connectivity support
 ## Steps to get your All-in-One Terminal
1. [Sign up](https://dashboard.hit-pay.com/businesses) for a HitPay account
2. Complete your KYC and get approved.
3. [Contact Sales](https://hitpayapp.com/contact-us) to enable card payments.
4. In your HitPay Dashboard:
**Settings > Payment Methods > Select "Turn On" for Cards**
5. Complete card payment onboarding.
6. Purchase [the terminal](https://hitpay.shop/hitpayterminal/product/hitpay-all-in-one-supports-cellular-and-wifi)
7. Your terminal will be shipped to you — you're ready to go!
Questions? Email us at [support@hit-pay.com](mailto:support@hit-pay.com)
## Steps to Set Up
1. Plug the provided cable into the port with the lightning bolt symbol to power the reader. Press the Power button to switch on the device.
2. After switching on for the first time, you will be prompted to connect to a Wi-Fi network. Connect to your Wi-Fi network.
Your Wi-Fi network **MUST USE** WPA-Personal or WPA2-Personal encryption and be password protected. The V660P **DOES NOT SUPPORT** non-password-protected networks, enterprise networks, or IPV6 networks.
3. A pairing code (e.g., Tang-Peace-Man) should appear on the terminal upon startup.
4. Connect the reader to your account. Open the HitPay dashboard and navigate to **Point of Sales > Terminal > Register Terminal**. Insert the code under the Registration Label and connect.
## Steps to Accept a Payment
To accept payment, follow these steps below:
1. Complete the setup steps above.
2. Open the HitPay app and log in.
3. Enter the amount and tap Charge. (Optional) Add invoice number, remarks, or description.
4. Choose Card Terminal as the payment method.
5. Tap, swipe or insert the customer's card. Wait for success confirmation.
## Set Up your Printer Settings (Auto/Manual)
1. Open HitPay app.
2. Go to Settings > Printer.
3. Click on the Printer Settings (Gear Icon) on the top right of the page.
4. Choose to enable/disable the automatic receipt printing by turning on/off the toggle.
5. If you selected **Automatic**, select the number of receipts to be printed. If you are printing more than 1 receipt, you can set the time delay between each prints. If you selected **Manual**, tap "Print" after each transaction.
6. Once you've configured your preferences, click on the "Save" button to apply the changes.
Customize your receipts under **Settings > Receipt Customization.**
Receipt size has a paper roll diameter of 40mm, and a paper width of 57/58mm.
## Specifications
| Feature | Description |
| :------------------ | :------------------------------------------------ |
| User interface | 5.5" 720 x 1440 HD capacitive multi-touch display |
| Paper roll diameter | 40mm |
| Paper width | 57/58mm |
| Battery | 2500mAh, replaceable, USB-C charging |
| Processor | Quad-core, 2.0 GHz, ARM Cortex-A53 |
| Memory | 2GB RAM |
| Connectivity | 4G LTE (CAT 4), dual-band Wi-Fi (2.4 GHz + 5 GHz) |
| Security | PCI PTS 7.x |
## Expected sounds during payment
The following table describes sounds that occur during successful and failed payments on the V660P reader.
| | Tap | Chip | Swipe |
| :------ | :------------ | :------------ | :------------ |
| Success | 1 long beep | 1 long beep | 1 long beep |
| Failure | 2 short beeps | 2 short beeps | 2 short beeps |
## Connectivity
### Connecting via Wi-Fi
To connect to Wi-Fi or switch networks, open Settings using one of the following paths, then select **Network > Wi-Fi** and connect to your network:
* **If logged into the HitPay app:** Go to **More > Check Reader Settings**, then enter the admin passcode `07139`.
* **If not in the HitPay app:** Press the **⋯** button at the top right, then select **Settings**.
Your Wi-Fi network **MUST USE** WPA-Personal or WPA2-Personal encryption and be password protected. The V660P **DOES NOT SUPPORT** non-password-protected networks, enterprise networks, or IPV6 networks.
### Troubleshooting Wi-Fi Connection
#### Reader is unable to connect
To check connectivity, open Settings using the paths above, then select **Network > Wi-Fi** and verify the connection.
* Make sure the Wi-Fi network is connected and has internet access.
* The signal strength is good.
* The Wi-Fi network is a WPA/WPA2/WPA3-Personal or WPA2/WPA3 EAP-PEAP Enterprise encryption.
* The Wi-Fi network is password protected.
* The device has an IP address assigned.
#### How to identify your Wi-Fi network's security type
**Windows 10**
* Find the Wi-Fi connection icon in the taskbar and click on it.
* Click Properties underneath your current Wi-Fi connection.
* Scroll down and look for the Wi-Fi details under Properties.
* Under that, look for Security Type, which shows your Wi-Fi protocol.
**MacOS**
* Hold down the Option key.
* Click on the Wi-Fi icon in the toolbar.
* This will show your network details, including your Wi-Fi security type.
**Android**
* On your Android phone, go into Settings.
* Open the Wi-Fi category.
* Select the router you are connected to and view its details.
* This will show what Wi-Fi security type your connection is.
* The path to this screen may differ depending on your device.
**iPhone**
* Unfortunately, there is no way within iOS to check your Wi-Fi security. If you want to check your Wi-Fi's security strength, you can either use a computer or log into the router through the phone. Each router may be different, so you may need to refer to the documentation that came with the device. Alternatively, if your internet service provider set up the router, you could contact them for assistance.
#### How do I change my Wi-Fi security encryption?
The steps to configure Wi-Fi security encryption might vary depending on your specific router model and provider. Please refer to your router's manual or the support resources provided by your internet service provider (ISP) for detailed and accurate instructions tailored to your device.
**1. Log into your router console**
* Using the browser of your choice, log into the admin console of your home router. The most common method is to enter `http://192.168.1.1` or `http://10.0.0.1/` into the browser address bar and press Enter.
**2. Navigate to the Wireless Security section**
**3. Select Encryption Option**
* Select WPA/WPA2/WPA3-Personal or WPA2/WPA3 EAP-PEAP Enterprise encryption.
**4. Set Your Network Password**
* Create a strong network password.
**5. Save Changes & Reboot**
* Upon saving, reconnect all your wireless devices.
* Select your new WiFi SSID and enter the new WiFi password.
#### How do I check the IP address of my V660P Terminal?
* Ensure your V660P device is powered on and connected to the Wi-Fi network.
* Open Settings using the paths above, then go to **Network > Wi-Fi**.
* Your device should display the connected network and the assigned IP address.
### Connecting via Ethernet
Ethernet connectivity requires the use of an optional dock, which provides wired Ethernet connectivity and keeps your terminal fully charged. You can purchase the dock separately through the [HitPay online store](https://hitpay.shop/hitpayterminal) or contact [support@hit-pay.com](mailto:support@hit-pay.com).
To set up the dock:
* Connect the Ethernet cable from your dock to your router.
* Connect the dock to power using the included charging cable, plugged into any USB-A power adapter (not included). Minimum power requirement: 5V-2A (10W).
* When both cables are connected, insert the terminal into the dock.
To confirm that the terminal is properly docked, verify the terminal is charging and the Ethernet icon is visible in the status bar.
## FAQs
1. What do I do if I get the error "Could not process the payment. Please check the connection."
> Make sure terminal is connected to WiFi (preferably, since there's connection issue)/Hotspot using a mobile device instead of using the cellular. Go to Settings > Configuration > Update. Passcode is "07139".
Please contact us [support@hit-pay.com](mailto:support@hit-pay.com) if you have any questions.
## Steps to get your All-in-One Terminal
1. [Sign up](https://dashboard.hit-pay.com/businesses) for a HitPay account
2. Complete your KYC and get approved.
3. [Contact Sales](https://hitpayapp.com/contact-us) to enable card payments.
4. In your HitPay Dashboard:
**Settings > Payment Methods > Select "Turn On" for Cards**
5. Complete card payment onboarding.
6. Purchase [the terminal](https://hitpay.shop/hitpayterminal/product/hitpay-all-in-one-supports-cellular-and-wifi)
7. Your terminal will be shipped to you — you're ready to go!
Questions? Email us at [support@hit-pay.com](mailto:support@hit-pay.com)
## Steps to Set Up
1. Plug the provided cable into the port with the lightning bolt symbol to power the reader. Press the Power button to switch on the device.
2. After switching on for the first time, you will be prompted to connect to a Wi-Fi network. Connect to your Wi-Fi network.
Your Wi-Fi network **MUST USE** WPA-Personal or WPA2-Personal encryption and be password protected. The V660P **DOES NOT SUPPORT** non-password-protected networks, enterprise networks, or IPV6 networks.
3. A pairing code (e.g., Tang-Peace-Man) should appear on the terminal upon startup.
4. Connect the reader to your account. Open the HitPay dashboard and navigate to **Point of Sales > Terminal > Register Terminal**. Insert the code under the Registration Label and connect.
## Steps to Accept a Payment
To accept payment, follow these steps below:
1. Complete the setup steps above.
2. Open the HitPay app and log in.
3. Enter the amount and tap Charge. (Optional) Add invoice number, remarks, or description.
4. Choose Card Terminal as the payment method.
5. Tap, swipe or insert the customer's card. Wait for success confirmation.
## Set Up your Printer Settings (Auto/Manual)
1. Open HitPay app.
2. Go to Settings > Printer.
3. Click on the Printer Settings (Gear Icon) on the top right of the page.
4. Choose to enable/disable the automatic receipt printing by turning on/off the toggle.
5. If you selected **Automatic**, select the number of receipts to be printed. If you are printing more than 1 receipt, you can set the time delay between each prints. If you selected **Manual**, tap "Print" after each transaction.
6. Once you've configured your preferences, click on the "Save" button to apply the changes.
Customize your receipts under **Settings > Receipt Customization.**
Receipt size has a paper roll diameter of 40mm, and a paper width of 57/58mm.
## Specifications
| Feature | Description |
| :------------------ | :------------------------------------------------ |
| User interface | 5.5" 720 x 1440 HD capacitive multi-touch display |
| Paper roll diameter | 40mm |
| Paper width | 57/58mm |
| Battery | 2500mAh, replaceable, USB-C charging |
| Processor | Quad-core, 2.0 GHz, ARM Cortex-A53 |
| Memory | 2GB RAM |
| Connectivity | 4G LTE (CAT 4), dual-band Wi-Fi (2.4 GHz + 5 GHz) |
| Security | PCI PTS 7.x |
## Expected sounds during payment
The following table describes sounds that occur during successful and failed payments on the V660P reader.
| | Tap | Chip | Swipe |
| :------ | :------------ | :------------ | :------------ |
| Success | 1 long beep | 1 long beep | 1 long beep |
| Failure | 2 short beeps | 2 short beeps | 2 short beeps |
## Connectivity
### Connecting via Wi-Fi
To connect to Wi-Fi or switch networks, open Settings using one of the following paths, then select **Network > Wi-Fi** and connect to your network:
* **If logged into the HitPay app:** Go to **More > Check Reader Settings**, then enter the admin passcode `07139`.
* **If not in the HitPay app:** Press the **⋯** button at the top right, then select **Settings**.
Your Wi-Fi network **MUST USE** WPA-Personal or WPA2-Personal encryption and be password protected. The V660P **DOES NOT SUPPORT** non-password-protected networks, enterprise networks, or IPV6 networks.
### Troubleshooting Wi-Fi Connection
#### Reader is unable to connect
To check connectivity, open Settings using the paths above, then select **Network > Wi-Fi** and verify the connection.
* Make sure the Wi-Fi network is connected and has internet access.
* The signal strength is good.
* The Wi-Fi network is a WPA/WPA2/WPA3-Personal or WPA2/WPA3 EAP-PEAP Enterprise encryption.
* The Wi-Fi network is password protected.
* The device has an IP address assigned.
#### How to identify your Wi-Fi network's security type
**Windows 10**
* Find the Wi-Fi connection icon in the taskbar and click on it.
* Click Properties underneath your current Wi-Fi connection.
* Scroll down and look for the Wi-Fi details under Properties.
* Under that, look for Security Type, which shows your Wi-Fi protocol.
**MacOS**
* Hold down the Option key.
* Click on the Wi-Fi icon in the toolbar.
* This will show your network details, including your Wi-Fi security type.
**Android**
* On your Android phone, go into Settings.
* Open the Wi-Fi category.
* Select the router you are connected to and view its details.
* This will show what Wi-Fi security type your connection is.
* The path to this screen may differ depending on your device.
**iPhone**
* Unfortunately, there is no way within iOS to check your Wi-Fi security. If you want to check your Wi-Fi's security strength, you can either use a computer or log into the router through the phone. Each router may be different, so you may need to refer to the documentation that came with the device. Alternatively, if your internet service provider set up the router, you could contact them for assistance.
#### How do I change my Wi-Fi security encryption?
The steps to configure Wi-Fi security encryption might vary depending on your specific router model and provider. Please refer to your router's manual or the support resources provided by your internet service provider (ISP) for detailed and accurate instructions tailored to your device.
**1. Log into your router console**
* Using the browser of your choice, log into the admin console of your home router. The most common method is to enter `http://192.168.1.1` or `http://10.0.0.1/` into the browser address bar and press Enter.
**2. Navigate to the Wireless Security section**
**3. Select Encryption Option**
* Select WPA/WPA2/WPA3-Personal or WPA2/WPA3 EAP-PEAP Enterprise encryption.
**4. Set Your Network Password**
* Create a strong network password.
**5. Save Changes & Reboot**
* Upon saving, reconnect all your wireless devices.
* Select your new WiFi SSID and enter the new WiFi password.
#### How do I check the IP address of my V660P Terminal?
* Ensure your V660P device is powered on and connected to the Wi-Fi network.
* Open Settings using the paths above, then go to **Network > Wi-Fi**.
* Your device should display the connected network and the assigned IP address.
### Connecting via Ethernet
Ethernet connectivity requires the use of an optional dock, which provides wired Ethernet connectivity and keeps your terminal fully charged. You can purchase the dock separately through the [HitPay online store](https://hitpay.shop/hitpayterminal) or contact [support@hit-pay.com](mailto:support@hit-pay.com).
To set up the dock:
* Connect the Ethernet cable from your dock to your router.
* Connect the dock to power using the included charging cable, plugged into any USB-A power adapter (not included). Minimum power requirement: 5V-2A (10W).
* When both cables are connected, insert the terminal into the dock.
To confirm that the terminal is properly docked, verify the terminal is charging and the Ethernet icon is visible in the status bar.
## FAQs
1. What do I do if I get the error "Could not process the payment. Please check the connection."
> Make sure terminal is connected to WiFi (preferably, since there's connection issue)/Hotspot using a mobile device instead of using the cellular. Go to Settings > Configuration > Update. Passcode is "07139".
Please contact us [support@hit-pay.com](mailto:support@hit-pay.com) if you have any questions.