The HitPay Soundbox is currently only available in Singapore & Phillipines
Overview
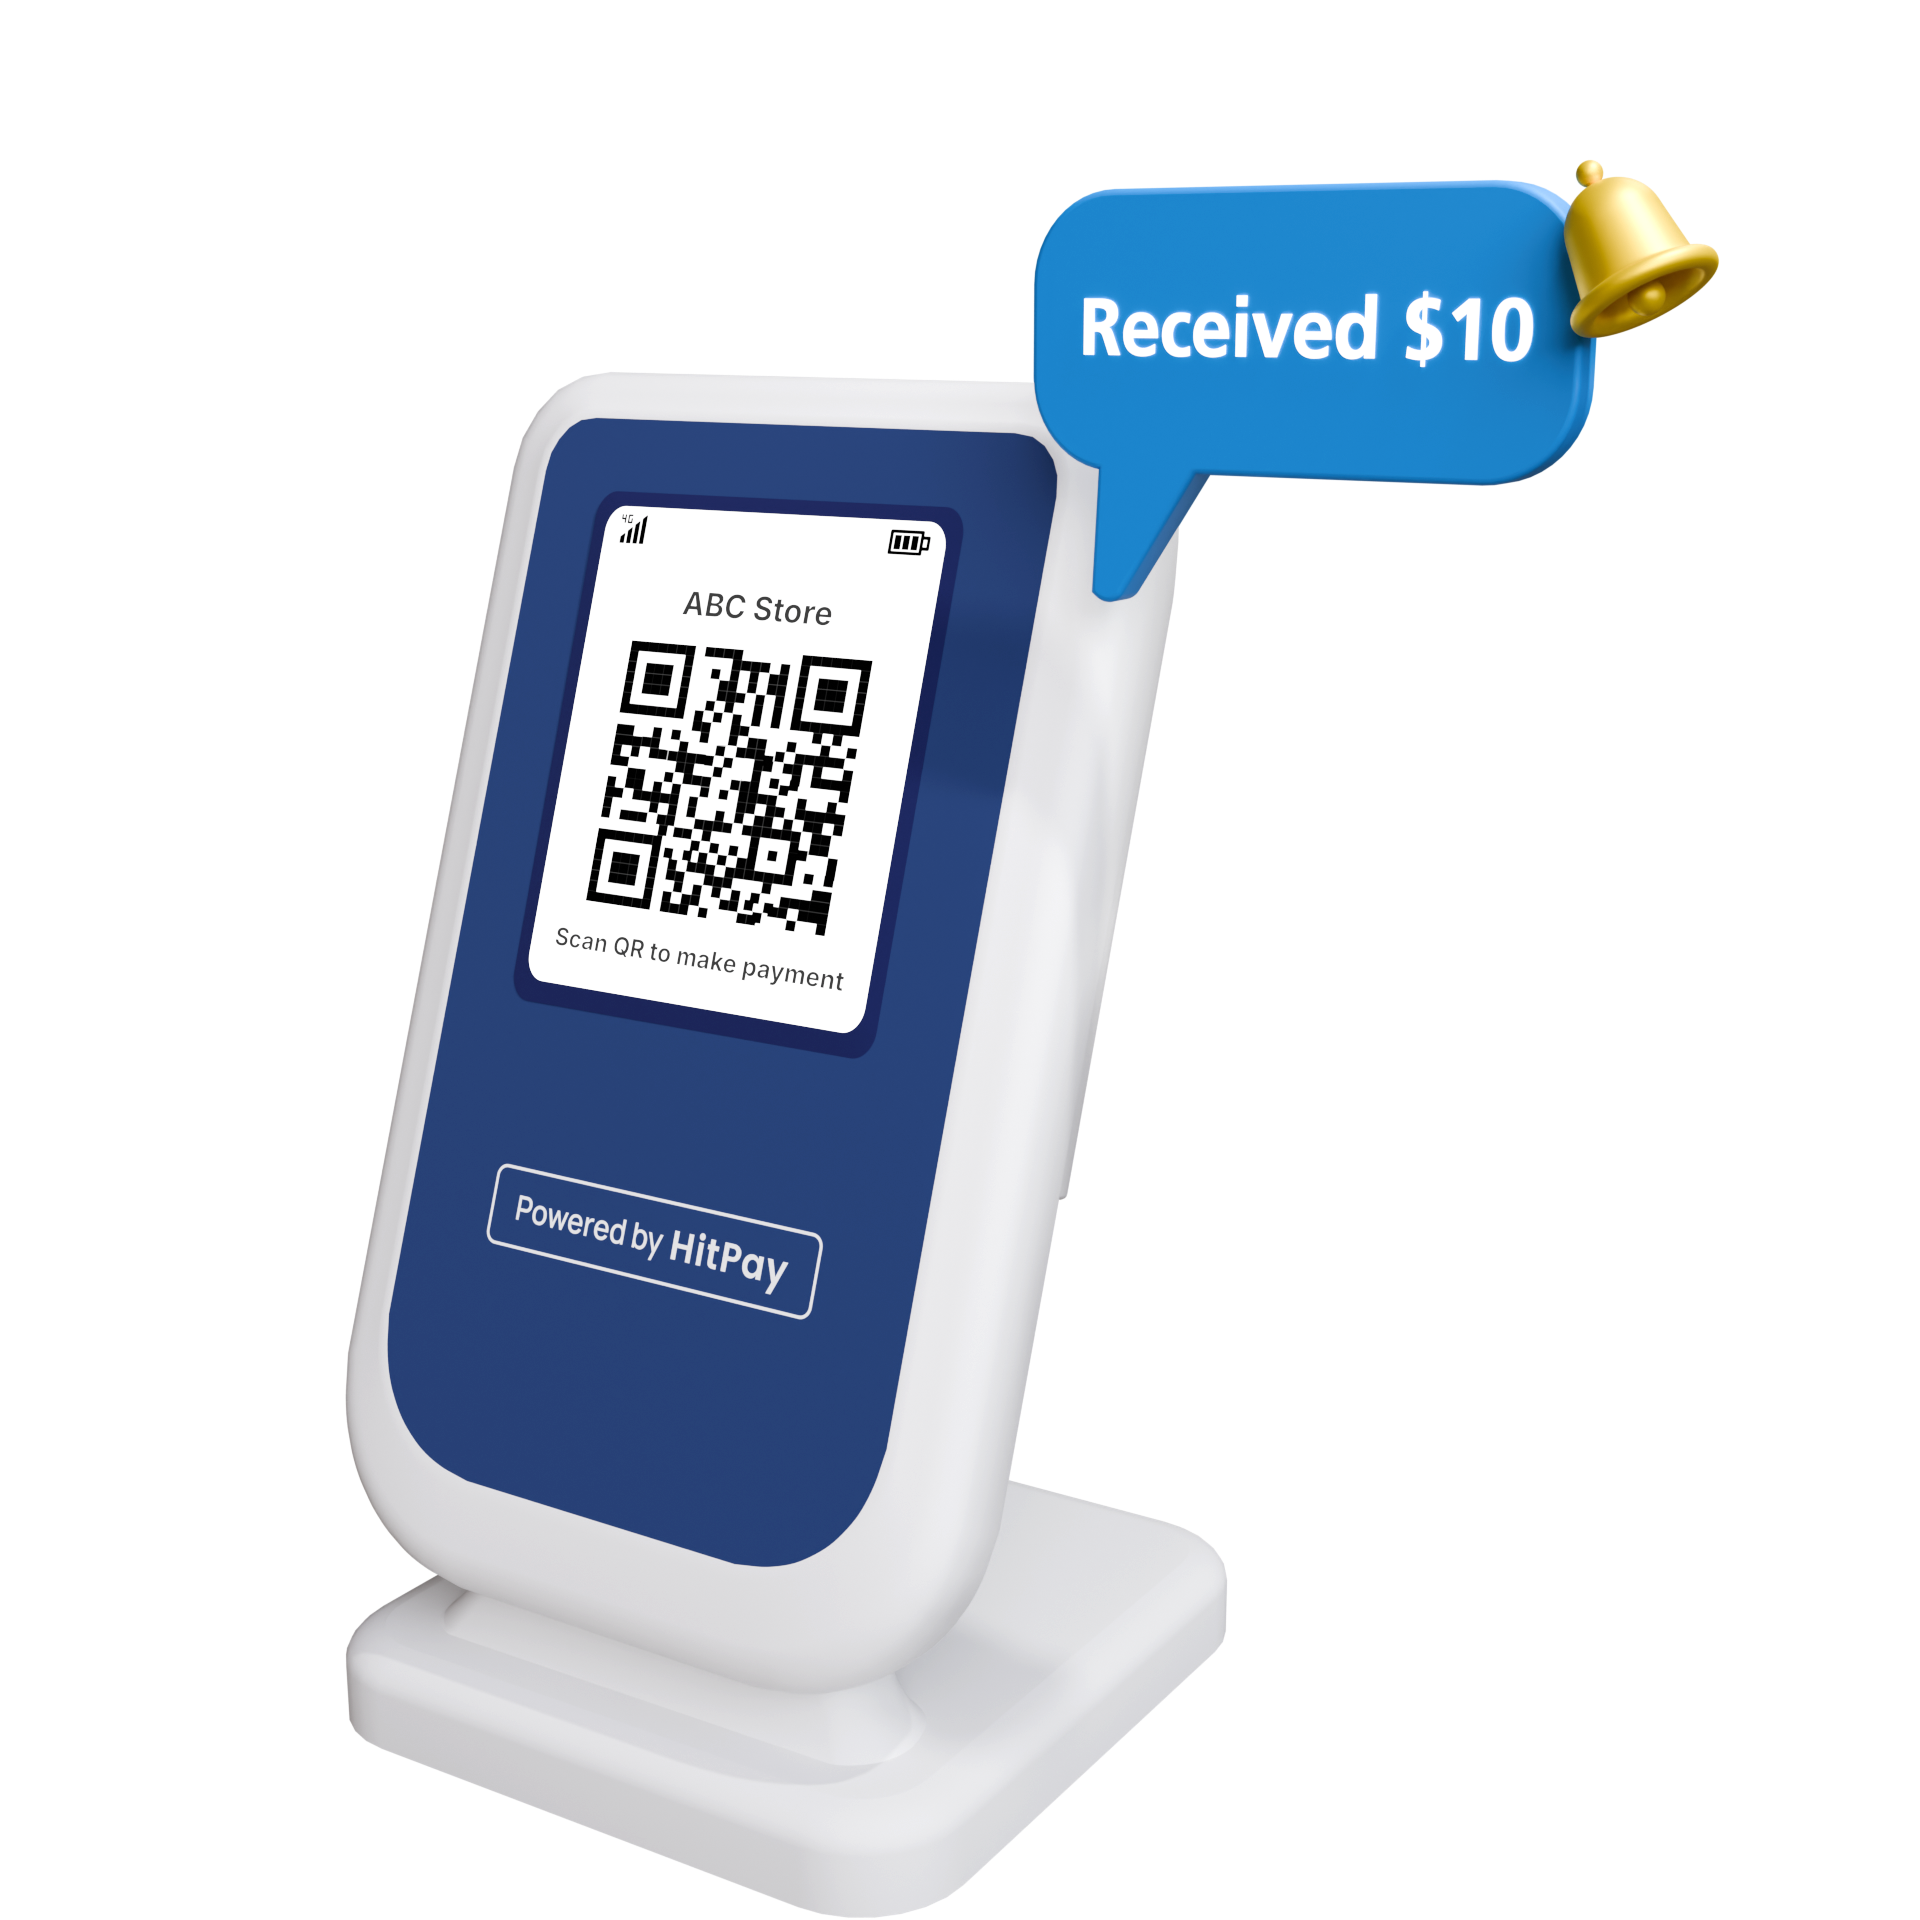
The Soundbox is an advanced QR payment terminal designed to offer a secure and seamless in-store payment experience. It features real-time voice confirmations that announce the amount received, giving both merchants and customers added confidence and clarity with every transaction.Value Proposition
Instant Alerts
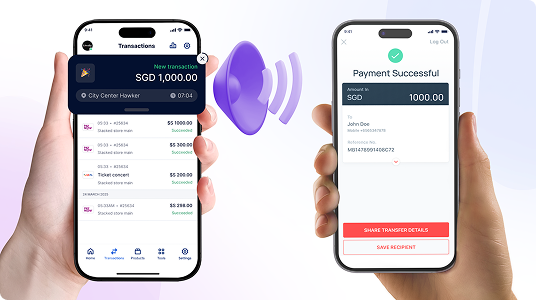
Receive real-time audio and on-screen notifications for every payment, so you never miss a transaction
Hassle-Free & Hands-Free
No more juggling multiple screens or devices - just listen and focus on serving your customers
Prevent Fraud
Protect your business from fake payment screen scams with instant, reliable audio notifications.
How to Set Up the HitPay Soundbox
Step 1: Set Up the Network Configuration
Choose between 4G or WiFi connectivity for your Soundbox:4G
4G
- Long press the “M” key for 2 seconds to enter the “Configure the Network” mode
- In this mode, press ”-” to set to “GPRS Network Mode” (please insert the SIM card to use)
- Locate the SIM card slot on the side of the Soundbox as shown.
- Open up the slot cover to insert the Standard SIM card into Soundbox and close the slot cover.
- Insert a Standard size SIM card to allow for internet connectivity
- When inserting the micro SIM card, make sure that the main screen of the Soundbox and the micro SIM card chip are facing you for the correct orientation of insertion as shown
- After the setting is complete, restart the speaker and the network mode setting is successful
WiFi
WiFi
- Android
- iOS
- Install MFApLink from Google Play Store, and accept all the permission requirements of this APK
- Long press the “M” key for 2 seconds to enter the “Configure Network Mode”
- In this mode, press ”+” to set to “WIFI Network Mode” and enter WIFI configuration
- Connect your mobile phone to the WiFi network you want to configure (only supports 2.4GHz, does not support 5GHz)
- Open the MFApLink app, click “CONNECT” button
- Input the correct password of the connected WiFi for configuration and make sure it is connected to the same WiFi as your phone
- Click “CONNECT” button to continue
- In “Search device list”, find the corresponding AP name (the AP name is usually device sn or Default device)
- Select corresponding AP name and click “CONFIRM” button
- Click Connect in the pop-up prompt box
- When APK prompts “AP link success!”, it indicates that the WiFi configuration is complete
- Wait for the device to restart and confirm the WiFi network status
Step 2: Pair the Soundbox to your HitPay Account
- Locate the power button at the back of the Soundbox
- Press and hold the power button for 3 seconds until the screen lights up
- If network connection is configured properly, the Soundbox Device will announce “Connect Successfully” & display a pairing QR code
- Open the HitPay app > QR Soundbox > Add Device
- Scan the pairing QR code until it announces “The Soundbox device is successfully registered to your HitPay account”
- After successfuly pairing, the Soundbox it will promptly display the “Display Name” along with the payment method QR code, indicating that the Soundbox is now ready for immediate use.
How to Use the HitPay Soundbox
Accepting payments with the HitPay Soundbox- Customers can simply scan the QR code shown on the Soundbox’s main screen to pay using any supported banking app.
- Once a payment is completed, the Soundbox will announce the received amount aloud and display it briefly (for 3 seconds) on both the front and rear screens.
- The smaller digits on the left side of the back digital screen represent a transaction counter, which will reset every time the Soundbox is powered off.
- The larger digit on the right side will display the amount received.
- You can view transactions received from the Soundbox by logging in to your HitPay App > Transactions / web Dashboard > Transactions
- Locate the USB-C port at the side of the Soundbox and plug in the charging cable in to charge.
FAQs
What payment methods are supported on the Soundbox?
What payment methods are supported on the Soundbox?
The Soundbox device supports payment method supported under the HitPay Static QRs. Hence, it only supports PayNow (Singapore) & QRPH (Phillipines) at the moment.
What is the battery time limit?
What is the battery time limit?
Battery time limit depends on the usage of the soundbox & the volume of transactions it receiveFor example :
- Volume level 1, push amount:9.9 every 10 seconds, 4200 transactions, 12 hours
- Volume level 9, push amount:9.9 every 10 seconds, 2800 transactions, 8 hours
- Volume level 11, push amount:9.9 every 10 seconds, 1800 transactions, 5 hours
Does the business receive a notification when a payment is made?
Does the business receive a notification when a payment is made?
Yes, when a payment is made, you will receive incoming notifications as well. You can verify incoming transactions fromm the HitPay dashboard or Mobile app.