Overview
HitPay Payment Links is a versatile payment solution that enables you to accept payments on various sales channels with ease. Payment links can be created using the HitPay Mobile App or the HitPay Dashboard. This documentation focuses on creating and customizing payment links through the HitPay Dashboard.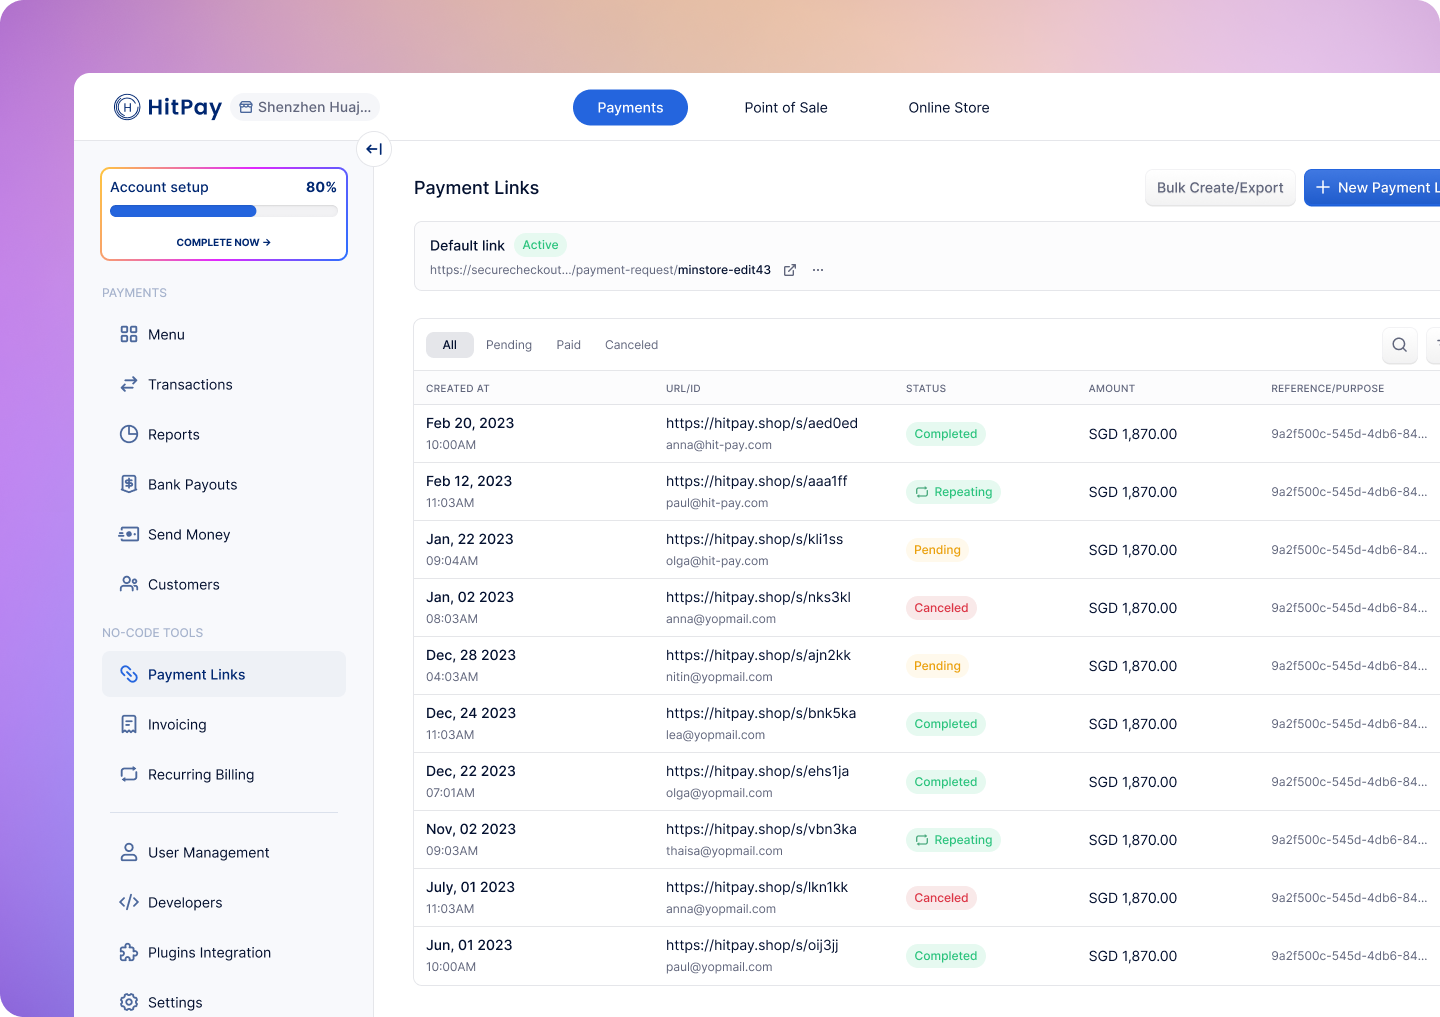
Creating a Payment Link
- Web Dashboard
- Mobile App
Navigate to Payment Links
- Log in to your HitPay Dashboard.
- From the left-hand menu, click on Payment Links.
Create Payment Link
- Click on the Create Payment Link button.
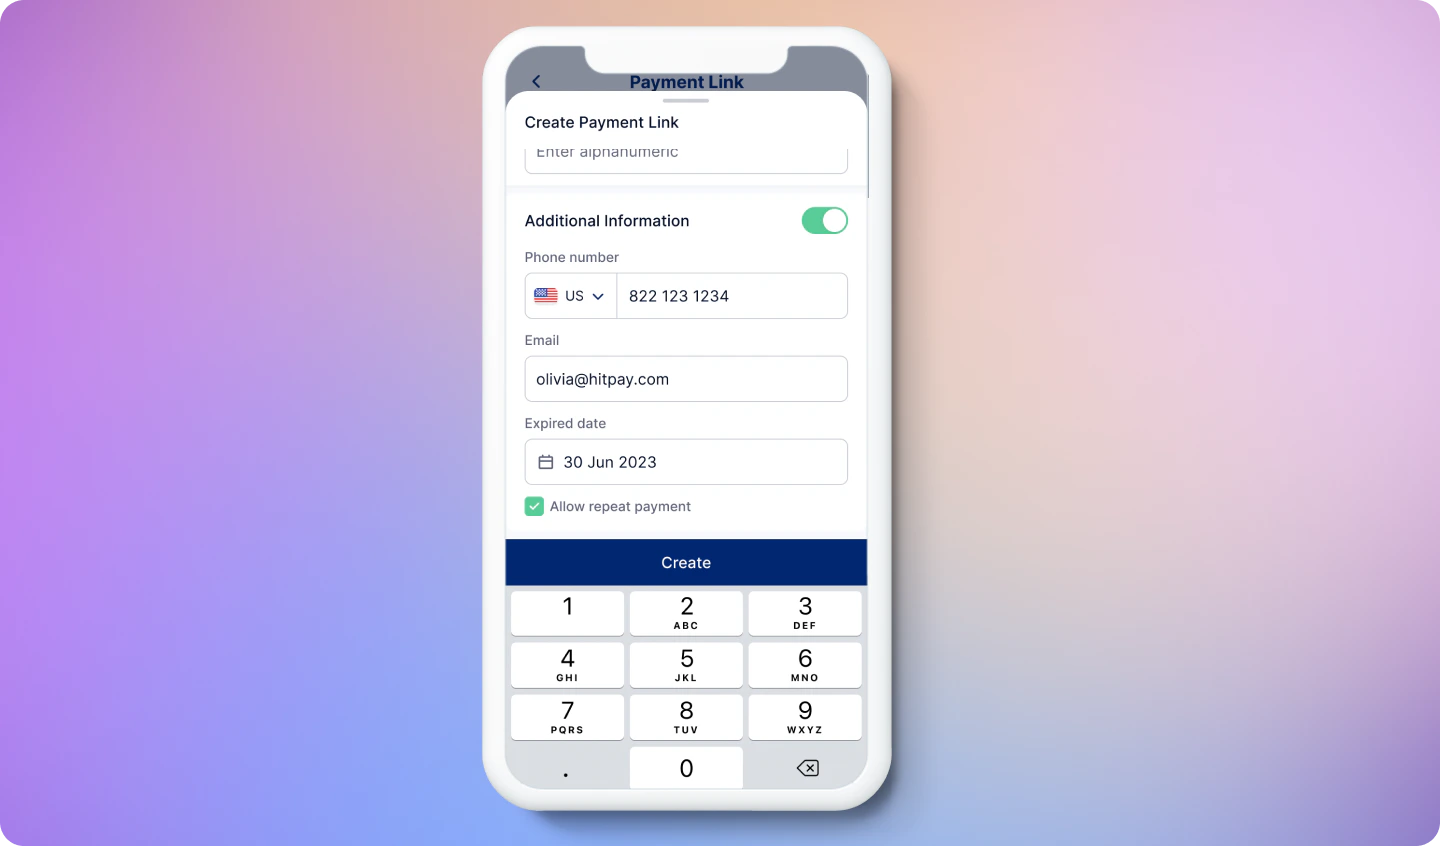
- Fill in the necessary details for the payment link, as shown below:
- Location: If you have more than one location, you will be able to select the specific location for the payment link. If you only have one location, this field will not appear, and the payment link will default to your main location.
-
Note: Leave the amount field empty to allow your customer to choose their payment amount. Alternatively, select ‘Any amount’ to enable customers to pick their preferred currency.
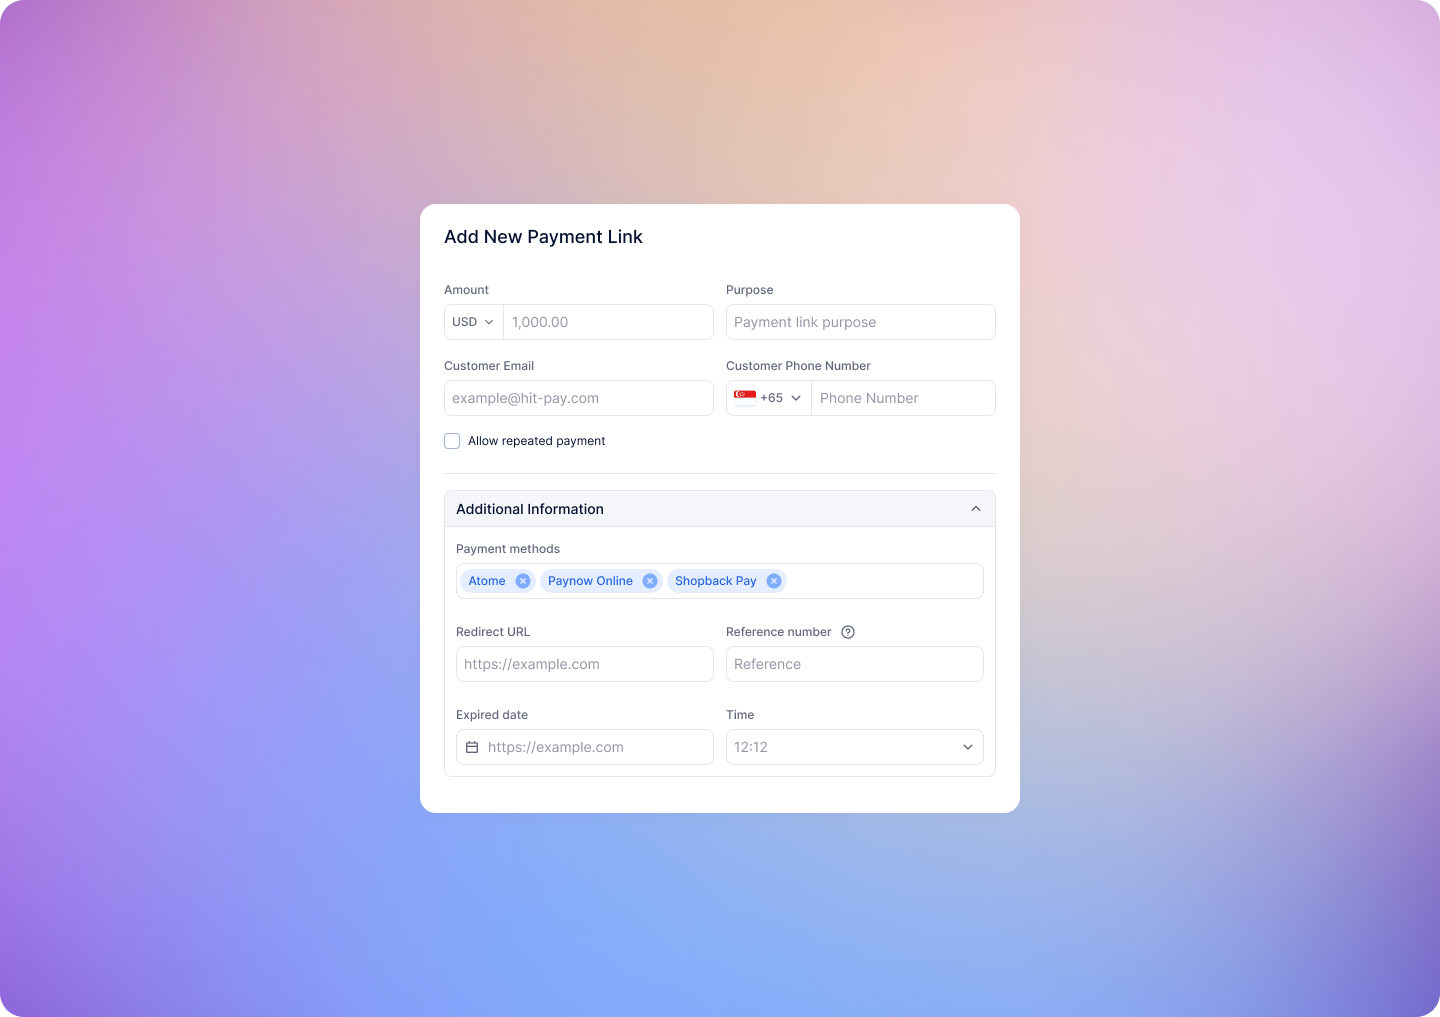
- You can choose to create the payment link in any currency that’s supported by the payment methods that you have setup
- Click on Create Link when done.
Share Payment Link
- Once the payment link is generated, you can copy/paste or share it directly with your customer.
- When the customer clicks the payment link, available payment methods linked to your HitPay account will be displayed.
You can set payment methods for the payment links by following the guide here.
Editing Payment Link
Editing a payment link allows you to make changes to its details, ensuring that it remains up-to-date and accurate.- Locate the Payment Link: In the payment links table, identify the payment link that you wish to edit.
- Access Edit Mode: Click on the associated icon, followed by “Edit.” This action will open the editing interface for the selected payment link.
- Modify Payment Details: In the edit interface, you can make changes to various fields of the payment link. This includes updating the amount, reference number, expiry date, and more.
- Save Changes: After making the necessary edits, be sure to click the “Edit Link” button to confirm and save your modifications.
Viewing Payment Link Details
You can access a comprehensive overview of each payment link by following these steps:- Locate the Payment Link: In the table, identify the payment link and click on the associated icon, followed by “View Details.”
- Explore Insights: On the View Details page, you will discover a wealth of information, including payment link information, customer details, and payment history.
- Sharing: To share a payment link, click the “Share” button. You can copy the URL or directly share it on WhatsApp, Facebook, Twitter, or Gmail.
- QR Code Generation: Conveniently generate a QR code by clicking on the QR code icon. You can then copy it to the clipboard or download the image.
Managing Default Links
You get access to a default Payment Link in the HitPay dashboard under Payment Links. This default link, when shared to customers, will allow them to manually enter the amount they want to send/pay to you. Below are the steps involved in managing the Default Payment Links- HitPay Dashboard
- Mobile App
- Click on Payment Links in the left menu. You can copy the default link from here, which can then be directly shared with any customer. Additionally, you can add the link to any order-taking form (e.g., Google Forms) or embed it as a button on your website.
Locating QR Code, Deactivate Button, and View Details Page
- View QR Code: To access the QR code for the default link, click the vertical three-dot icon next to the link. This QR code simplifies mobile payments and in-store transactions.
- Deactivate Default Link: If you wish to temporarily disable the default payment link and prevent further access, simply click on the three-dot icon, followed by selecting “Deactivate”. This can be valuable when you need to suspend the link temporarily.
- View Details Page: For a deeper understanding of your default payment link, click the three-dot icon, then select the “View Details” option. This action will navigate you to the Details Page, where you can explore revenue insights and access a complete payment history.
Collect Customer Name
You have the option to collect your customer’s full name on the checkout page for all payment links.Enabling the Setting
- Go to Settings > Checkout Customisation > Customer Information
- Toggle Collect Customer Name to enable this setting
- A required Customer Full Name field will appear on all checkout pages, including:
- Payment Links
- Plugin-integrated checkouts (e.g., Shopify, WooCommerce)
- No-code tools (e.g., Online Store, Invoicing)
This setting applies globally to all checkout pages linked to your account.