

Create a Subscription Plan
The first step is to create a subscription plan with details and pricing.
Set Up Recurring Billing
Once the subscription plan is defined, set up recurring billing for the customer.
Present the Checkout UI
Present the checkout user interface to the customer for subscription confirmation.
Handle Payment Processing
After the customer confirms, handle payment processing and schedule recurring charges.
Step 1 - Create a subscription plan
A subscription plan consists of basic information like plan name, amount, and frequency. An example of a subscription plan could be “Spotify Premium” which is SGD 9.90 monthly.HTTP Request
Query Parameters
Mandatory fields are
name, cycle and amount. Remember to include header Content-Type: application/x-www-form-urlencodedResponse
Step 2 - Create a recurring billing for the customer
Once your customer has decided to start the subscription this endpoint will create the recurring billing request.Since this is a server-to-server communication, if you have a mobile or Web client that communicates with your REST API, you must have a new endpoint E.g. /create-subscription or reuse an existing endpoint. This endpoint will be responsible for making the recurring billing API call to hitpay.
HTTP Request
Query Parameters
Mandatory fields are
plan_id, customer_email, and start_date.
If you would like to create a subscription without a plan, you need to send plan_id = null and the following mandatory fields: name, cycle, amount, customer_email, and start_date. Remember to include the header Content-Type: application/x-www-form-urlencoded.Step 3 - Redirect customer to recurring billing page (One time set up)
Redirect the customer to the “url” value.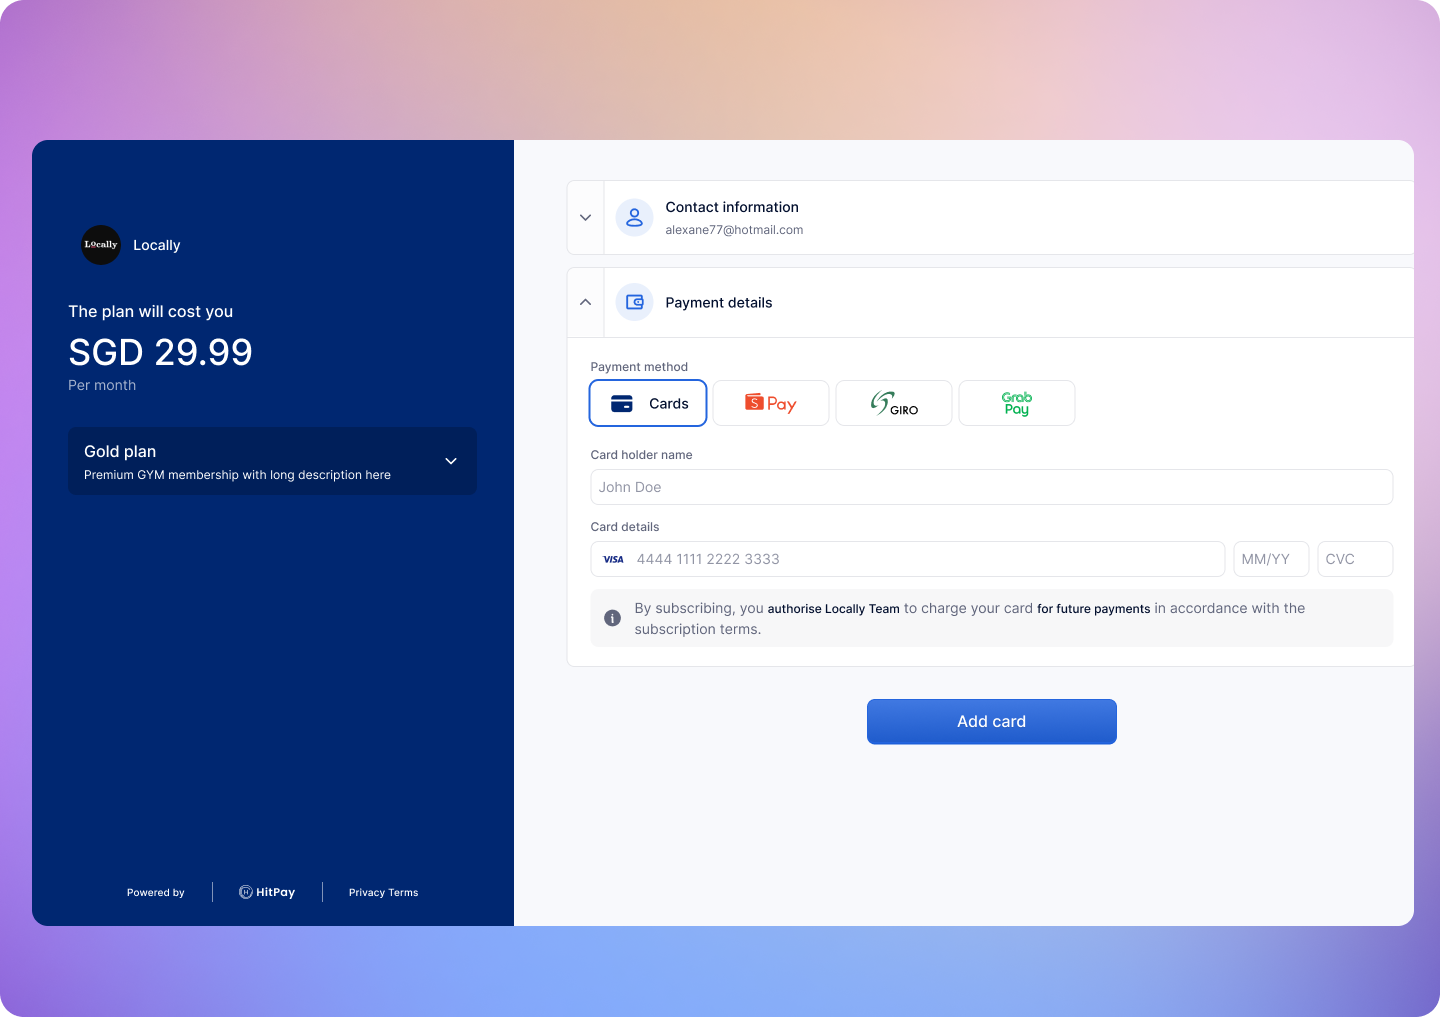
Step 4: Handle Successful Payment
Webhooks
HitPay will send a Webhook POST request when there is a new charge or if there is an error charging the payment method.If you are using HitPay APIs to integrate into your app you must mark your order as paid ONLY after the webhook is received and validated.
Register Your Webhook
- Navigate to Developers > Webhook Endpoints in your dashboard
- Click on New Webhook
- Enter a name and your webhook URL
-
Select the recurring billing events you want to receive:
charge.created— When a recurring charge is successfully completedrecurring_billing.method_attached— When a payment method (card or APM) is attachedrecurring_billing.method_detached— When a payment method is detachedrecurring_billing.subscription_updated— When a subscription is updated, including status changes (active, cancelled, paused, expired)
- Save your webhook configuration
Webhook Payload
When a payment is completed, HitPay sends a JSON payload to your registered webhook URL with the following headers:Sample Webhook Payload
Validating the Webhook
To ensure the webhook is authentic, validate theHitpay-Signature header:
- Receive the JSON payload and
Hitpay-Signaturefrom the request - Use your salt value (from the dashboard) as the secret key
- Compute HMAC-SHA256 of the JSON payload using your salt
- Compare the computed signature with
Hitpay-Signature- they must match
FAQs
What happens if an attached card associated with an active plan gets declined?
What happens if an attached card associated with an active plan gets declined?
If an attached card associated with a plan gets declined on the scheduled charge date of the plan, the customer is immediately sent an email requesting them to update their card details using the link.
At the same time, the merchant is also notified by email about the failed charge.
If the customer fails to attach a valid card within 7 days from the failed charge date, the subscription will move to an inactive status.
When will a scheduled customer subscription be canceled?
When will a scheduled customer subscription be canceled?
The scheduled customer subscription will be canceled if the customer hasn’t entered their payment details by the billing start date.
If a customer's subscription is canceled, should I reuse the same one?
If a customer's subscription is canceled, should I reuse the same one?
Yes, you can reuse the same subscription by calling the Update recurring billing API and setting a future start date.
Webhook Signature Mismatch?
Webhook Signature Mismatch?
Possible reasons for wrong hmac value generated
- Ensure that you are using the correct salt value from the correct environment (Sandbox or Production)
- Make sure NOT to include the hamc value when calculating the hmac
- Make sure all the values stated above are included in the payload including reference_number. Use an empty string if the value does not exist
Facing Invalid Business API Key Error
Facing Invalid Business API Key Error
Possible reasons for this error:
- You are using a production key in the sandbox or a sandbox key in production. Make sure the API base URL is correct.
- You are missing headers. Ensure that you include both the ‘Content-Type’ and ‘X-Requested-With’ headers. Refer to this section again.
Product Checklist
Product Checklist
Ensure the following before moving to production
- Change the base URL for all API calls to https://api.hit-pay.com/v1/
- Update API keys and Salt values from the production dashboard
What about the 'webhook' parameter in the API?
What about the 'webhook' parameter in the API?
The
webhook parameter in the API is deprecated but still functional. We recommend registering your webhook URL in the dashboard instead for richer JSON payloads and support for multiple event types.