Account Setup
Before you begin integrating HitPay payments into your WooCommerce store, you need to set up your HitPay account and ensure some prerequisites are met:- If you haven’t already, create an account on HitPay.
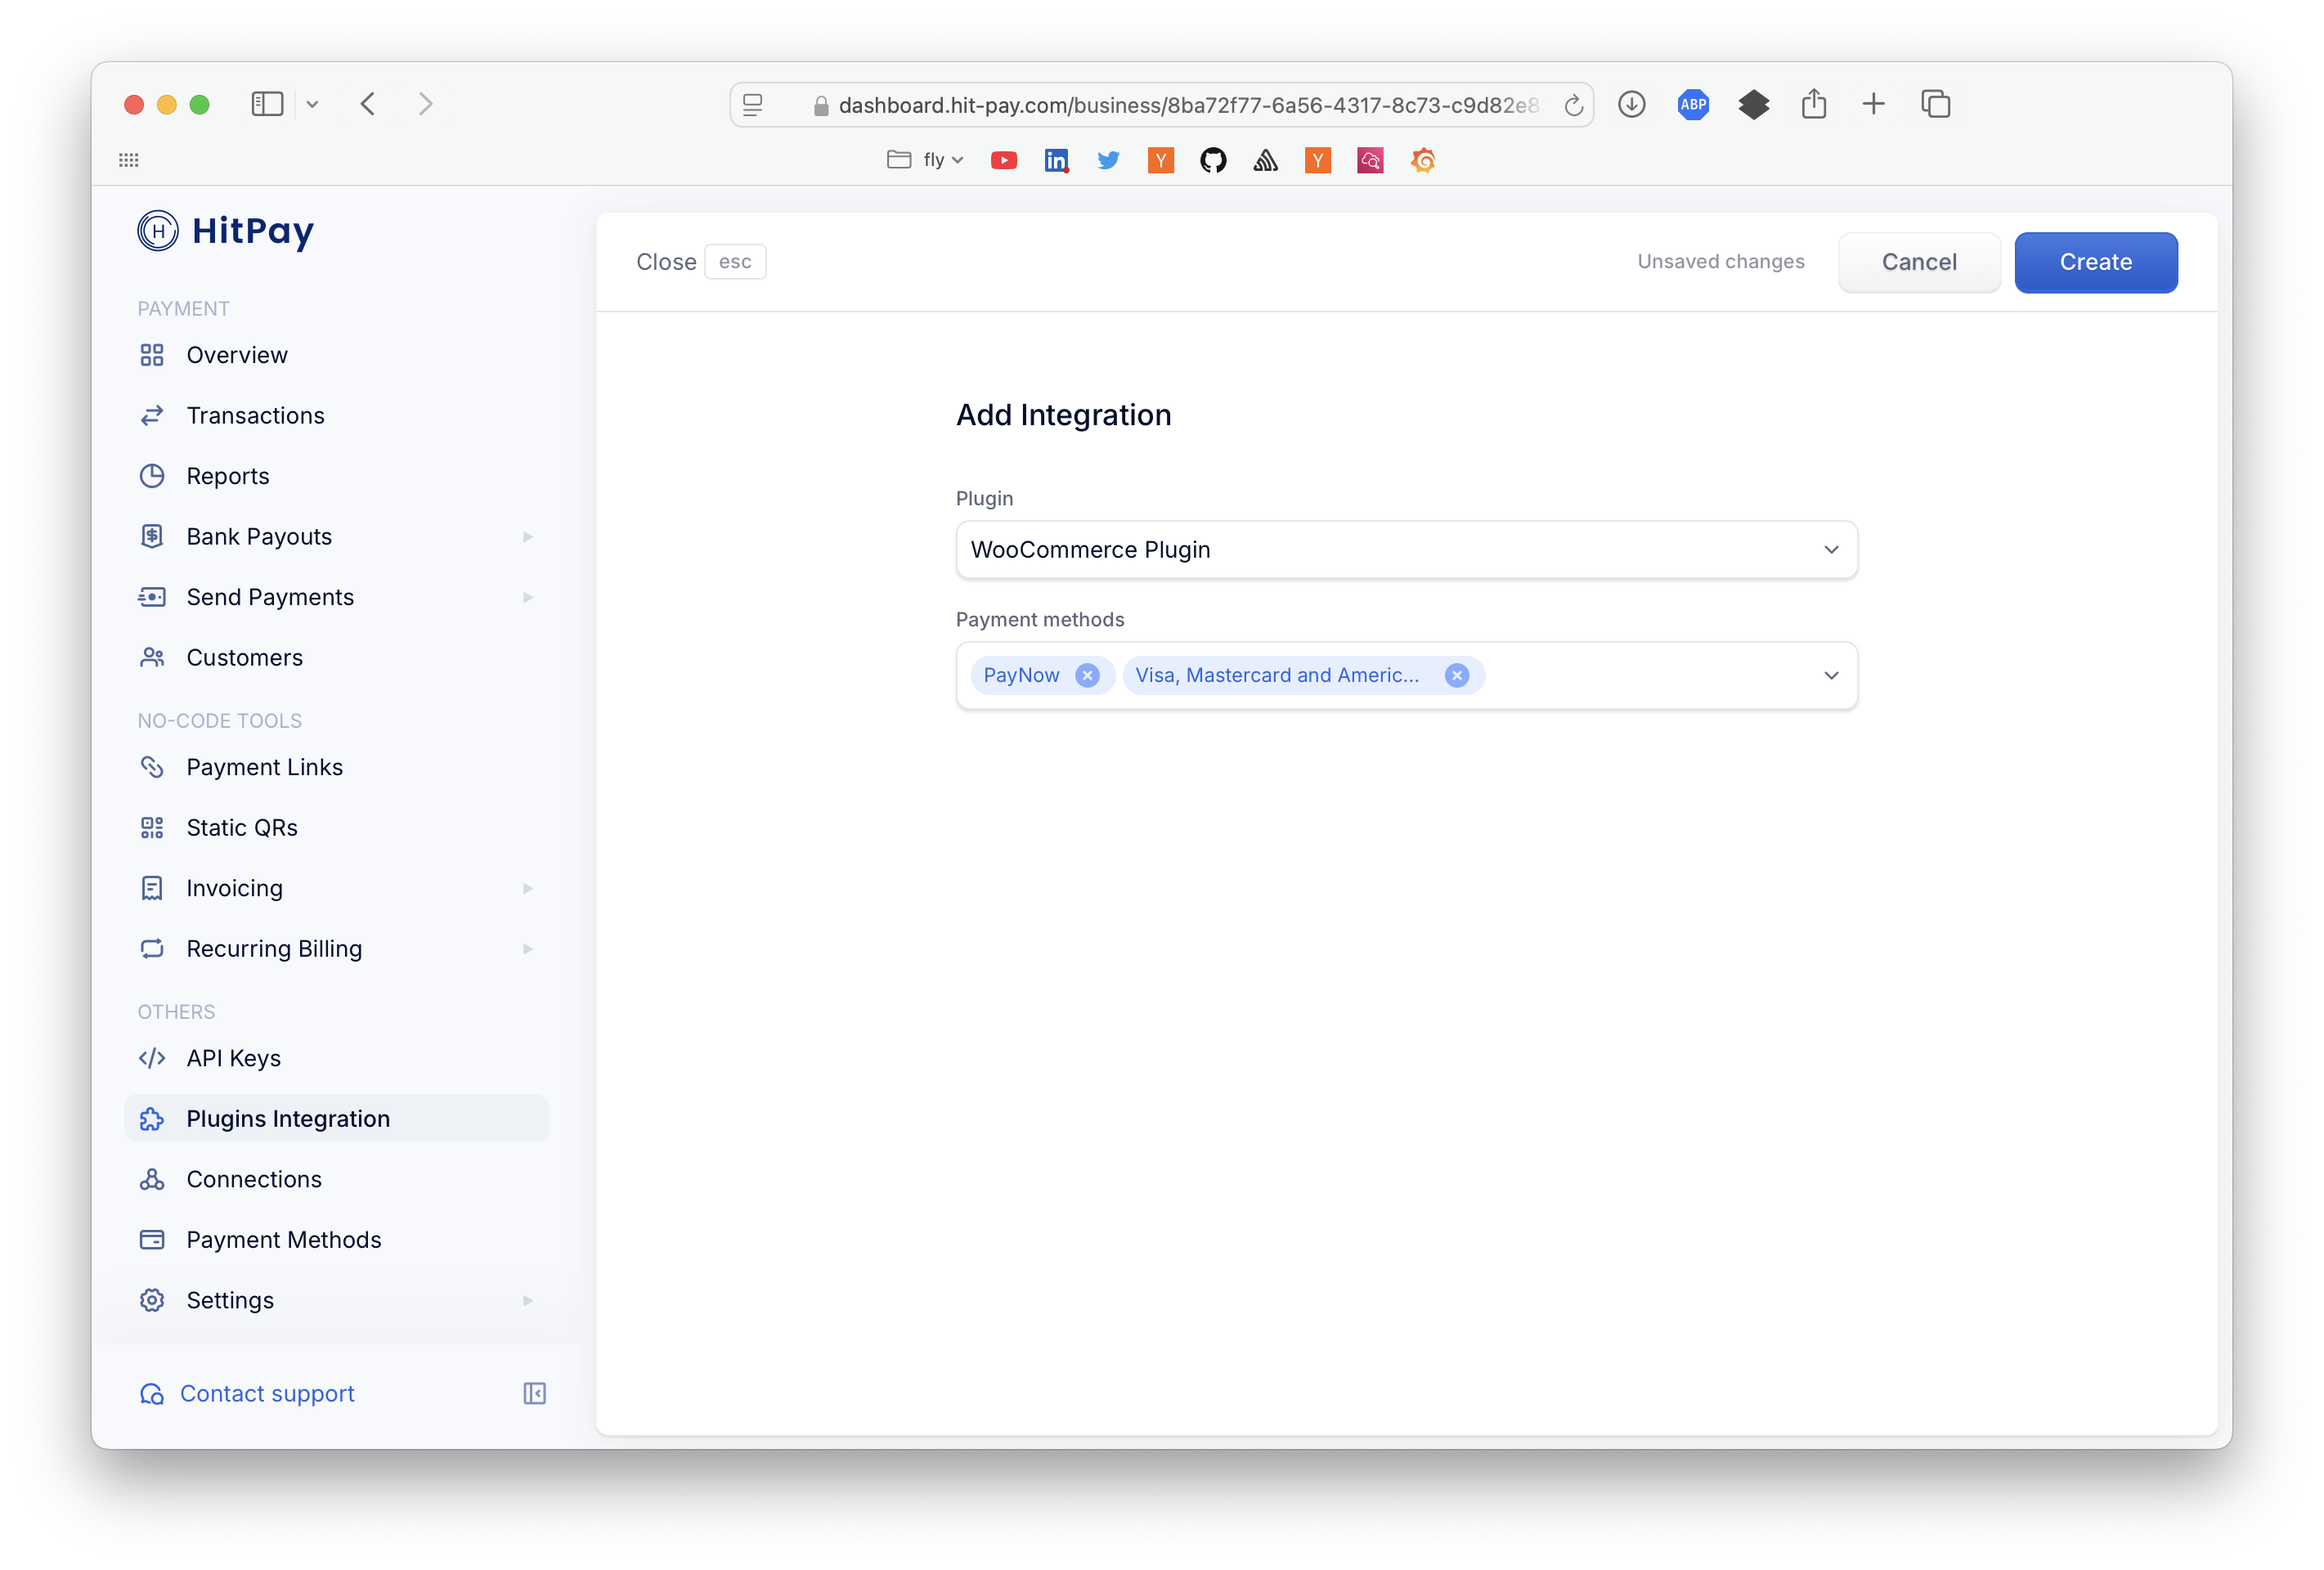
- Ensure that you have the necessary payment methods activated in your HitPay account.
- Make sure the payment methods you want to offer are enabled in your WooCommerce sales channel.
Integration Guide
Install HitPay WooCommerce Plugin
Search for HitPay in the plugin search field from your WordPress admin dashboard and install the plugin.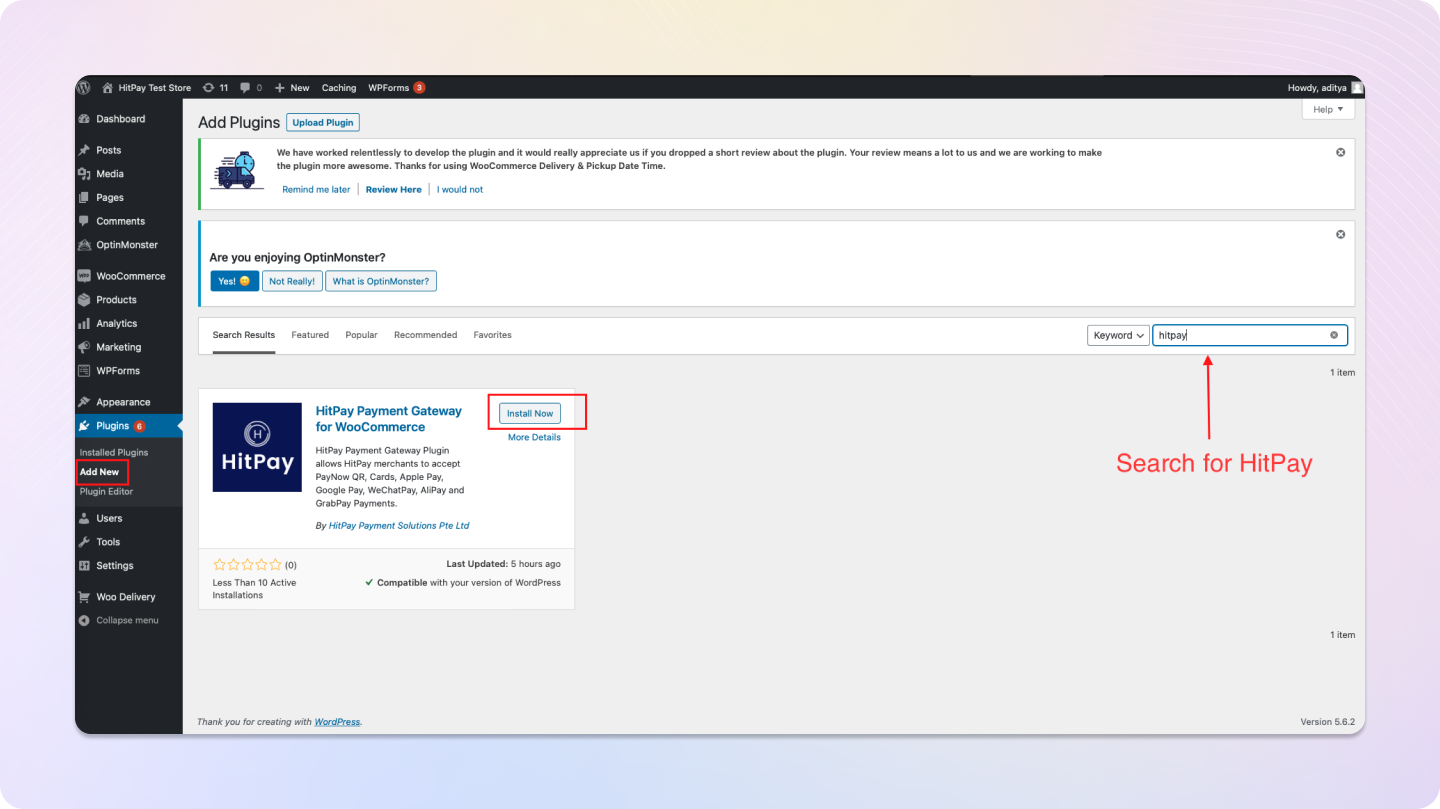
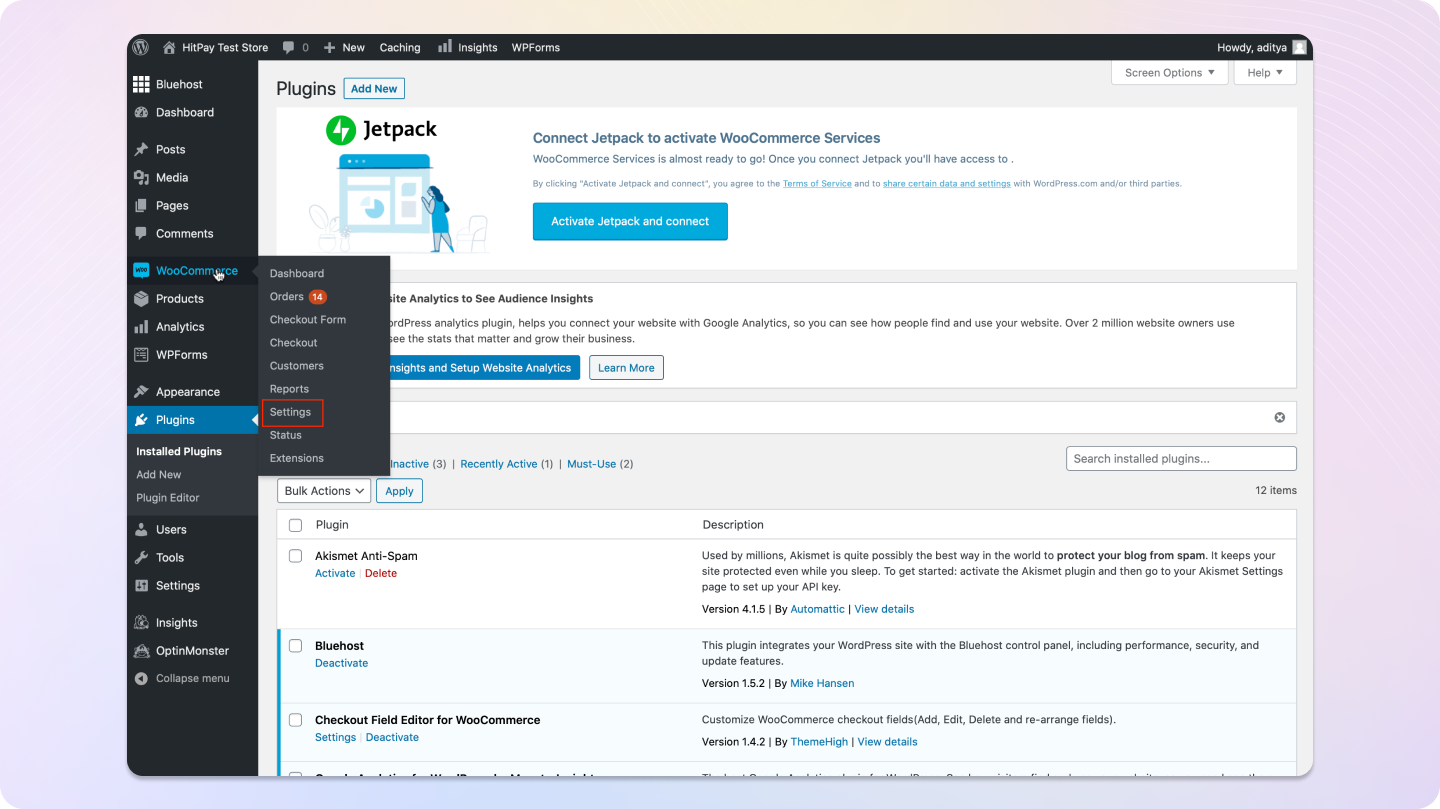
Activate the Plugin
Once installed, click on Activate Plugin.
Enable auto-updates for the plugin to ensure you always have the latest version.
Copy Your API Keys and Salt
You can find your API credentials in the HitPay dashboard under Developers > API and Salt Keys. Copy both the API Key and Salt and paste them into the appropriate fields in your WooCommerce plugin settings.
Enable Live Mode only if you are using production API keys and Salt.
If you’re testing, uncheck Live Mode and use the sandbox credentials from HitPay Sandbox dashboard.
If you’re testing, uncheck Live Mode and use the sandbox credentials from HitPay Sandbox dashboard.
Test the Connection
Click Test Connection to verify that your credentials are correct.
If successful, you’ll see a confirmation. If it fails, click View Details to understand the issue.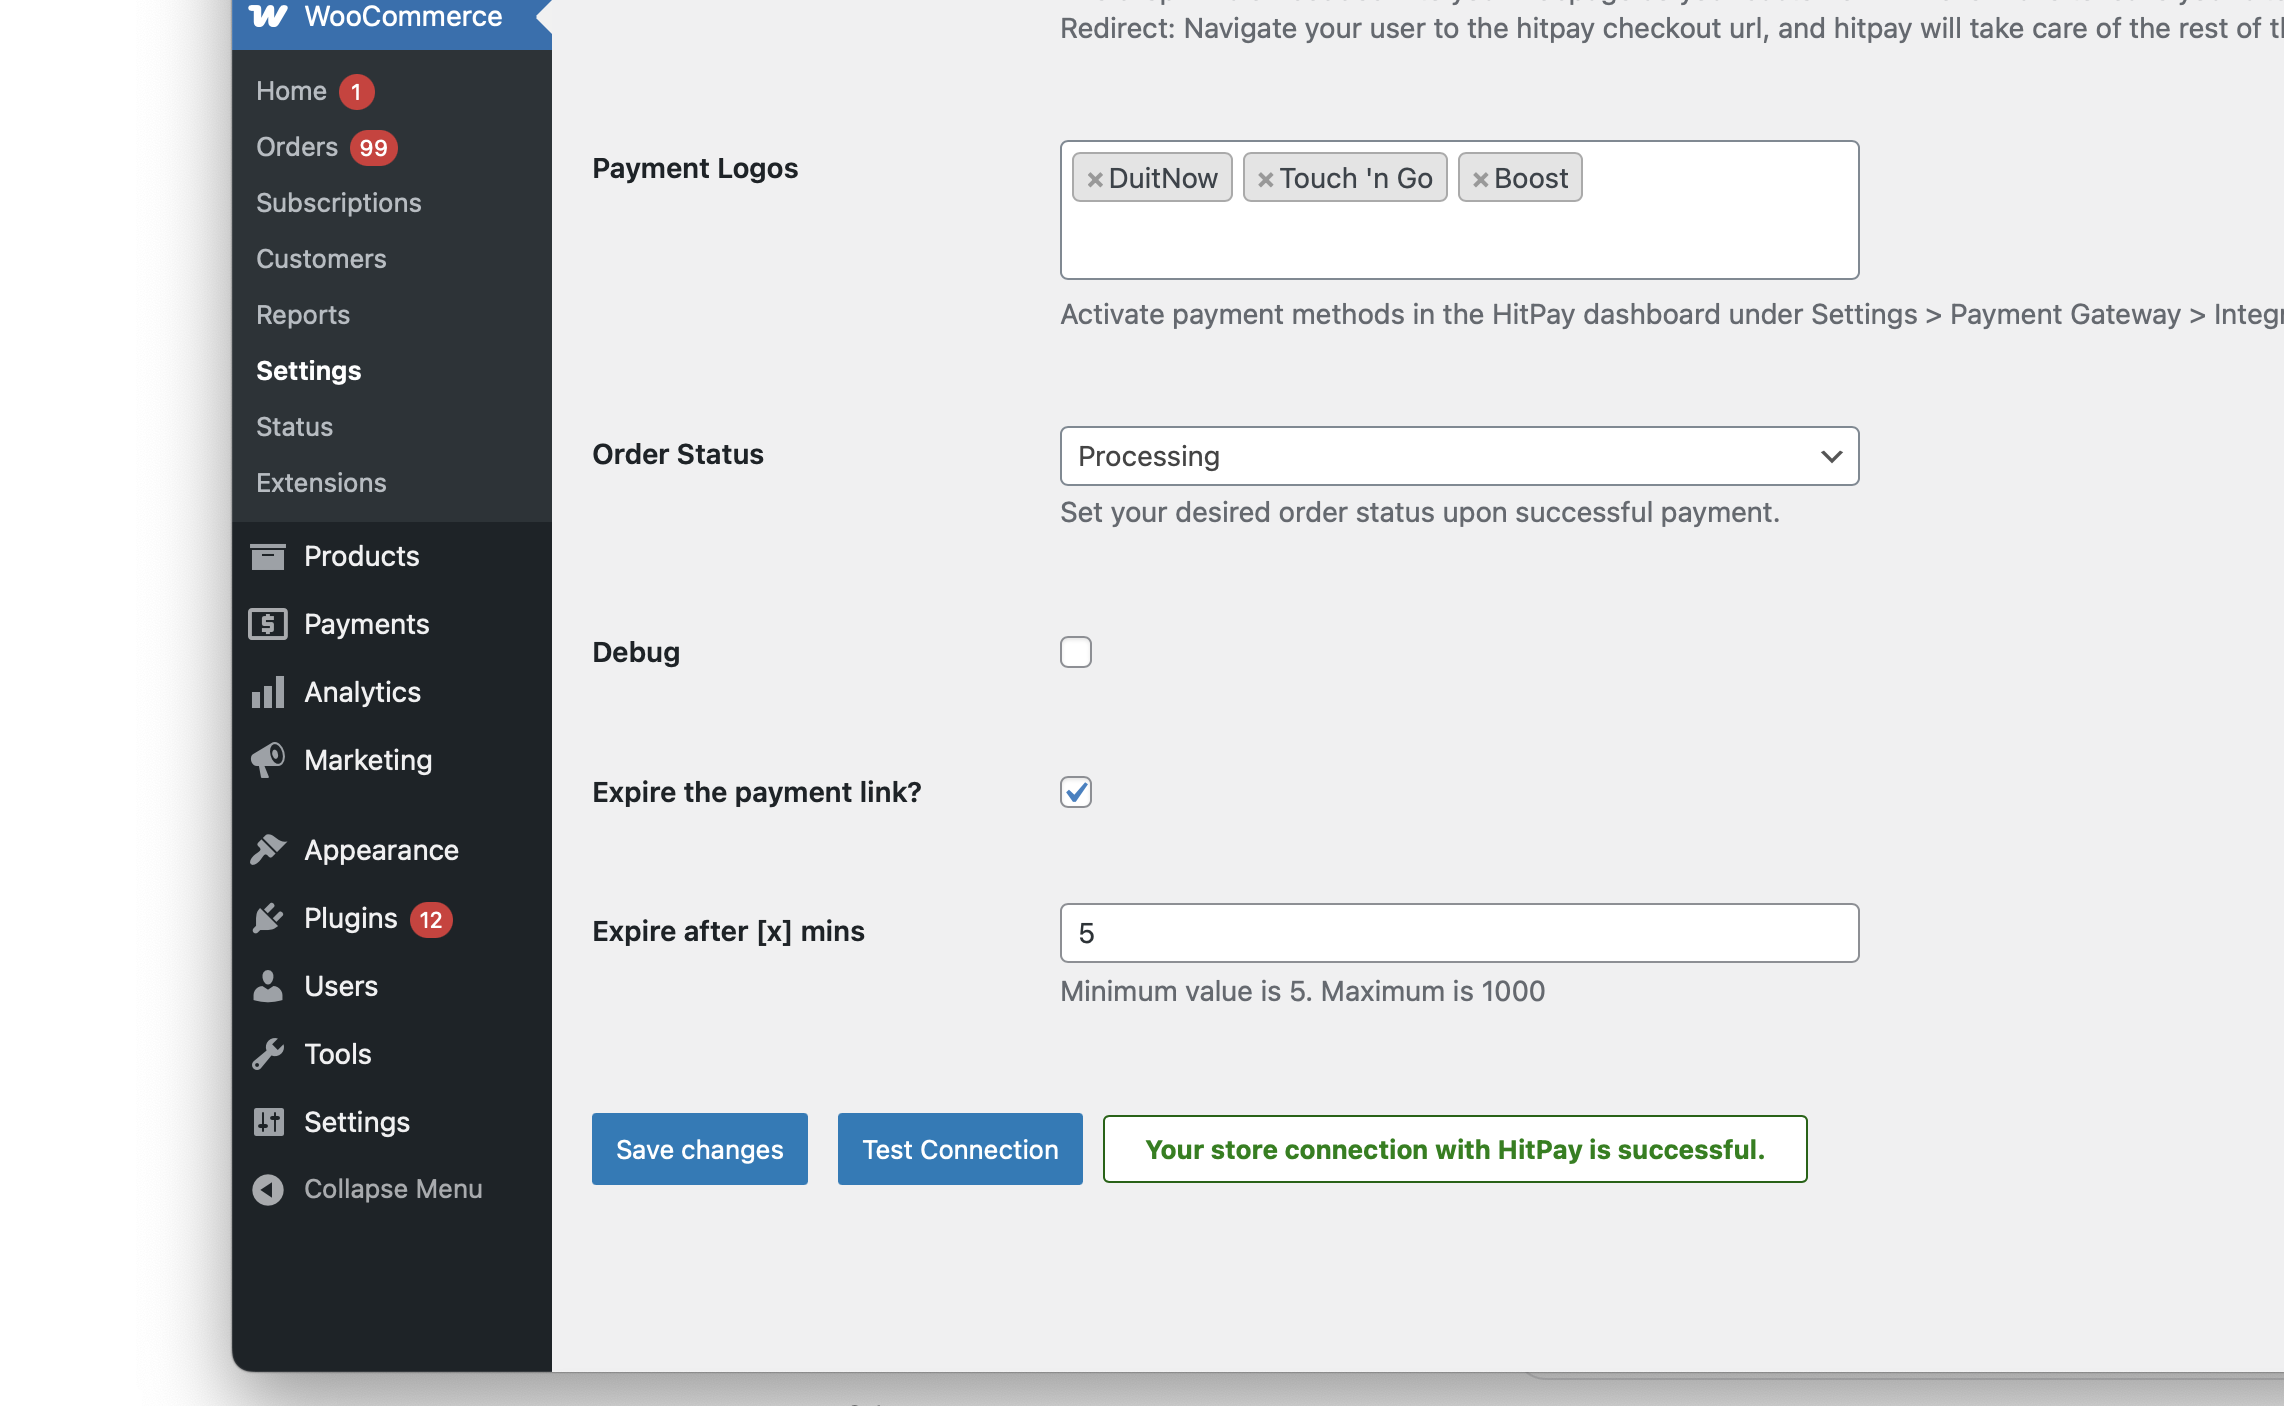
If successful, you’ll see a confirmation. If it fails, click View Details to understand the issue.
Refunds
Refunds are fully integrated into the WooCommerce dashboard, so you can directly proceed to refund an order from the WooCommerce dashboard, and it will automatically refund the payment back to the customer.Refunds will only be successful if they meet the criteria of the payment method used. Click Here for more details.
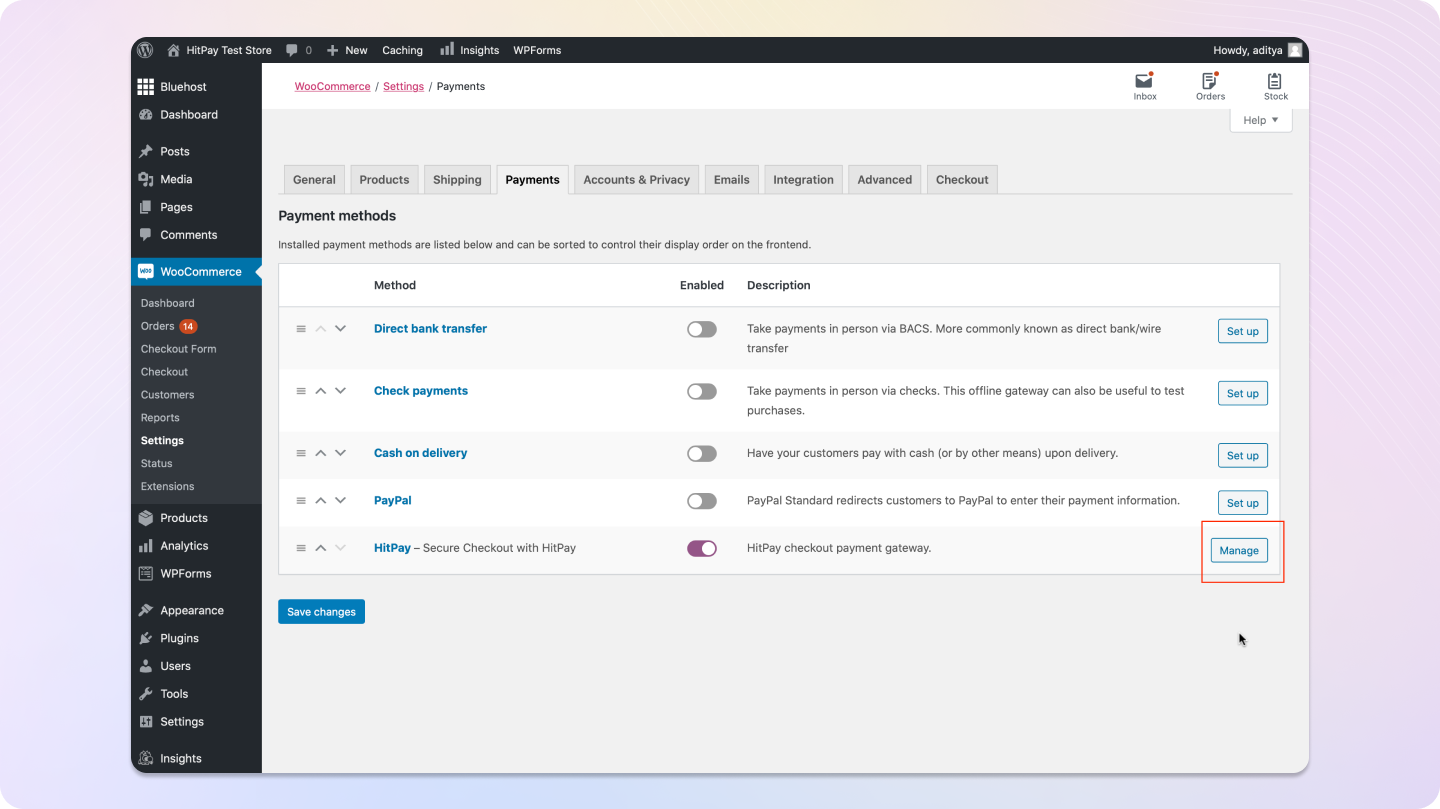
If the refund fails, please try to refund directly from the Hitpay dashboard under “Transactions > Select > Refund” to know the exact error.
- Log in to the Admin panel.
- Navigate to WooCommerce by clicking on “WooCommerce” in the menu.
- Select “Orders” from the WooCommerce menu.
- Find the order you want to process a refund for and click on the “View” icon or the row associated with that order. This action will take you to the Admin Order Details page.
- Scroll down on the Admin Order Details page to locate the “Refund” button. It should be displayed on the page.
- If the order was paid using the ‘HitPay Payment Gateway,’ WooCommerce will, by default, display a button that says ‘Refund xx via HitPay Payment Gateway’ on the screen.
- If the payment gateway accepts the refund request, the refund details will be automatically added to the order’s history.
- Please note that only one refund is allowed per transaction.
Support for Drop-In UI
This plugin supports Drop-In UI. Drop-In allows your customers to complete the payment without a redirect; it is embedded into your webpage, so your customers will never have to leave your site. This is recommended if you have payment methods like Cards and Native QR Code payments (e.g., PayNow).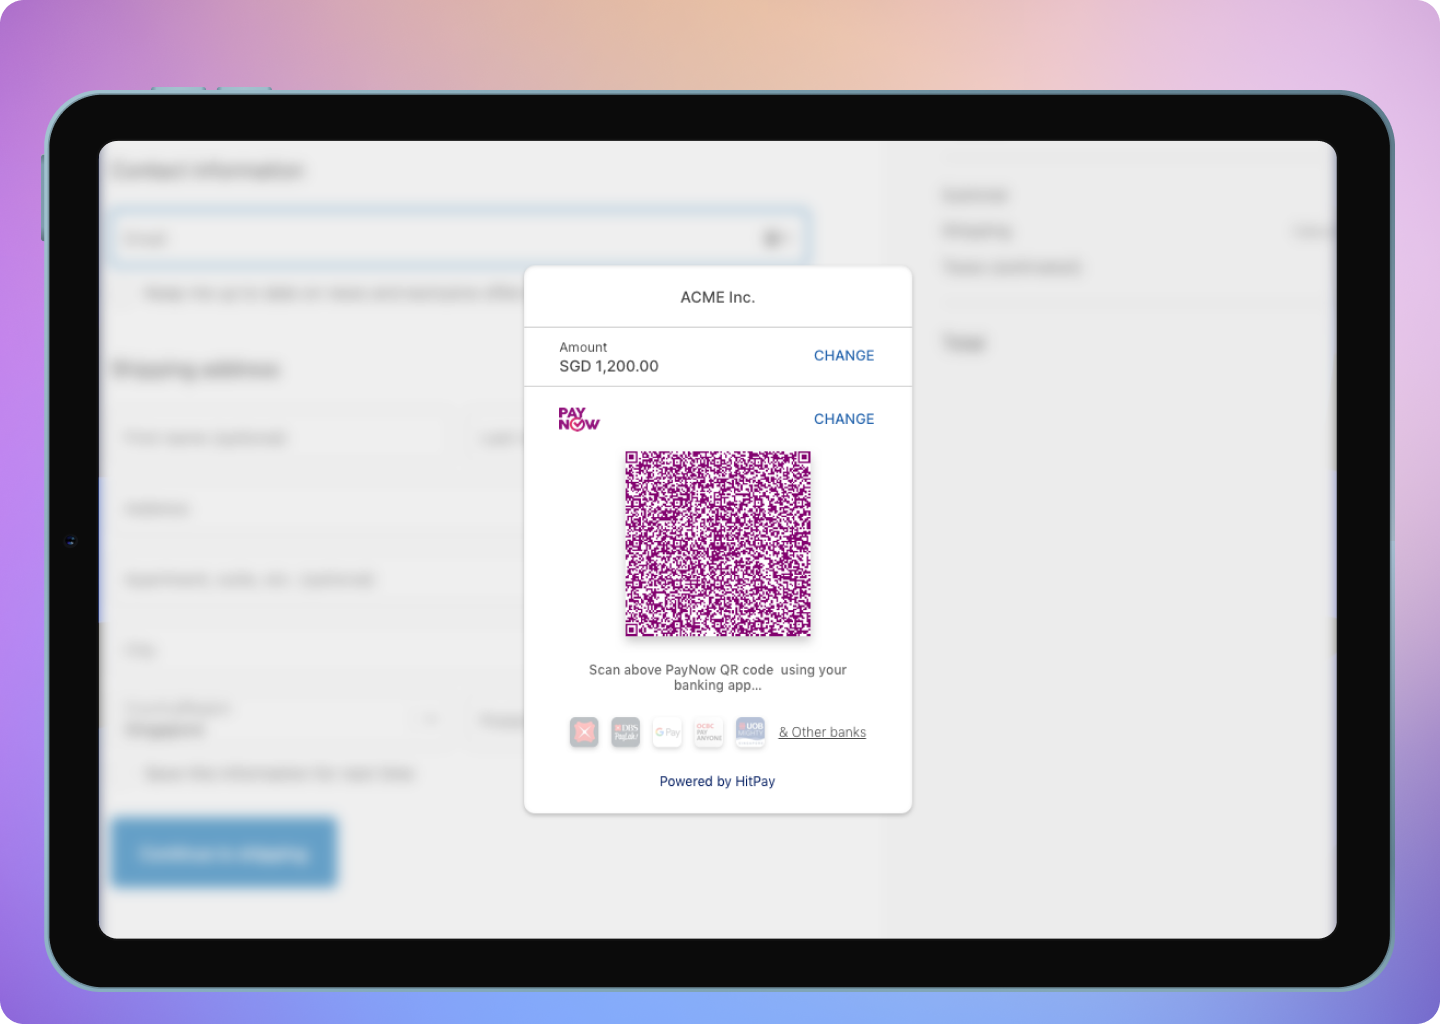
Drop-In UI currently does not support Apple Pay.
FAQs
I have completed the plugin setup but I am unable to proceed to the payments page
I have completed the plugin setup but I am unable to proceed to the payments page
If you have completed the plugin installation and if you still see an error message
Something went wrong please contact the merchant on the checkout page, please make sure to check the following:- In your plugin settings, ensure it's not in test mode (
Live Modeshould be enabled). - Make sure that the
API KeyandSaltValue are correct. You can find them in your dashboard under the "API Keys" Menu https://dashboard.hit-pay.com/. - Ensure that the store
checkout currencyis supported by your account. Click here for more details on the currencies supported. Minimum amountfor each payment method could be different, please ensure that the checkout amount is above the minimum amount.
Does HitPay send an email after the WooCommerce order is confirmed
Does HitPay send an email after the WooCommerce order is confirmed
No, HitPay does not send an email confirmation to your customer if the payment is made through WooCommerce. This is because WooCommerce, by default, sends an email to your customer with the order details. To prevent duplicate emails, HitPay does not send an additional email to your customers. As a merchant, you will receive a payment alert email.
Why does my charges `webhook status` show as failed?
Why does my charges `webhook status` show as failed?
If you are using a payment plugin, after every successful payment, a webhook is sent to your store to acknowledge the payment confirmation. Your order is marked as paid through this webhook.A webhook status showing as "failed" indicates that Hitpay failed to communicate with your server. This can happen for the following reasons:
- Your store may have a security feature that blocked Hitpay's request.
- Your server was unavailable during this time.
- Production:
3.1.13.32,52.77.254.34 - Sandbox:
54.179.156.147
How do I send WooCommerce test store access to HitPay?
How do I send WooCommerce test store access to HitPay?
If you are unable to resolve the WooCommerce issues, you can request HitPay support to help with your debugging. But before that, make sure the following checks are completed:
- Ensure that your credentials are correct, both the API Key and Salt.
- Ensure that you are testing with an amount greater than $1 (or equivalent).
- Make sure the webhook in the HitPay dashboard shows “Success.” Please provide the following details to the HitPay team:
- Debug logs from your WooCommerce store.
- Admin access to your WooCommerce test store (Since our team will be debugging, please avoid sending access to your live store).
- SFTP access to your test store. You can send the details to support@hit-pay.com (Approximate debug time would be 3 to 5 business days).
Why don't I see Apple Pay or Google Pay on my checkout page?
Why don't I see Apple Pay or Google Pay on my checkout page?
On the HitPay checkout page, you will see the option for Apple Pay/Google Pay only once you select
CARDS as the payment method.
Additionally, it will work only if the browser supports the respective method:Apple Pay: Only available on the Safari browser. Ensure you have Apple Pay enabled. Here's a guide from Apple on how to enable Apple Pay on your browser.Google Pay: Only available on the Chrome browser. Ensure you have Google Pay enabled on your Google account.
I set up a payment method, but it's not reflecting on my checkout page. Why?
I set up a payment method, but it's not reflecting on my checkout page. Why?
Here are two checks you can perform to ensure the payment method is visible on your checkout page:
- Navigate to
Payment Gateway>Integrations. Ensure that your payment method is enabled for your respective sales channel. - If you have checkout rules, navigate to
Payment Gateway>Checkout Customization>Payment Method Rulesand ensure your payment method is selected.
How can I support multiple currencies using HitPay and WooCommerce?
How can I support multiple currencies using HitPay and WooCommerce?
To support multiple currencies, you can use a WooCommerce plugin such as the Currency Switcher for WooCommerce. This plugin allows customers to switch between currencies on your store. Once the currency is selected, the HitPay checkout page will automatically display the relevant payment methods for that currency.