Documentation Index
Fetch the complete documentation index at: https://docs.hitpayapp.com/llms.txt
Use this file to discover all available pages before exploring further.
Overview
Customizing the checkout process is essential for maintaining your brand’s identity and improving the user experience. With the Checkout Customization option, you can tailor the appearance of the checkout page to match your brand’s aesthetics. This includes selecting the preferred payment gateway and configuring various elements of the checkout page to align with your design preferences. The following rules can be customized by HitPay merchants:- Themes
- Customer Information
- Enable/Disable Pass-the-fee per Payment Method
- Display Payment Methods by Order of Preference
- Checkout Rules
All the settings saved here will be applicable to all your HitPay Sales Channels/Integrations
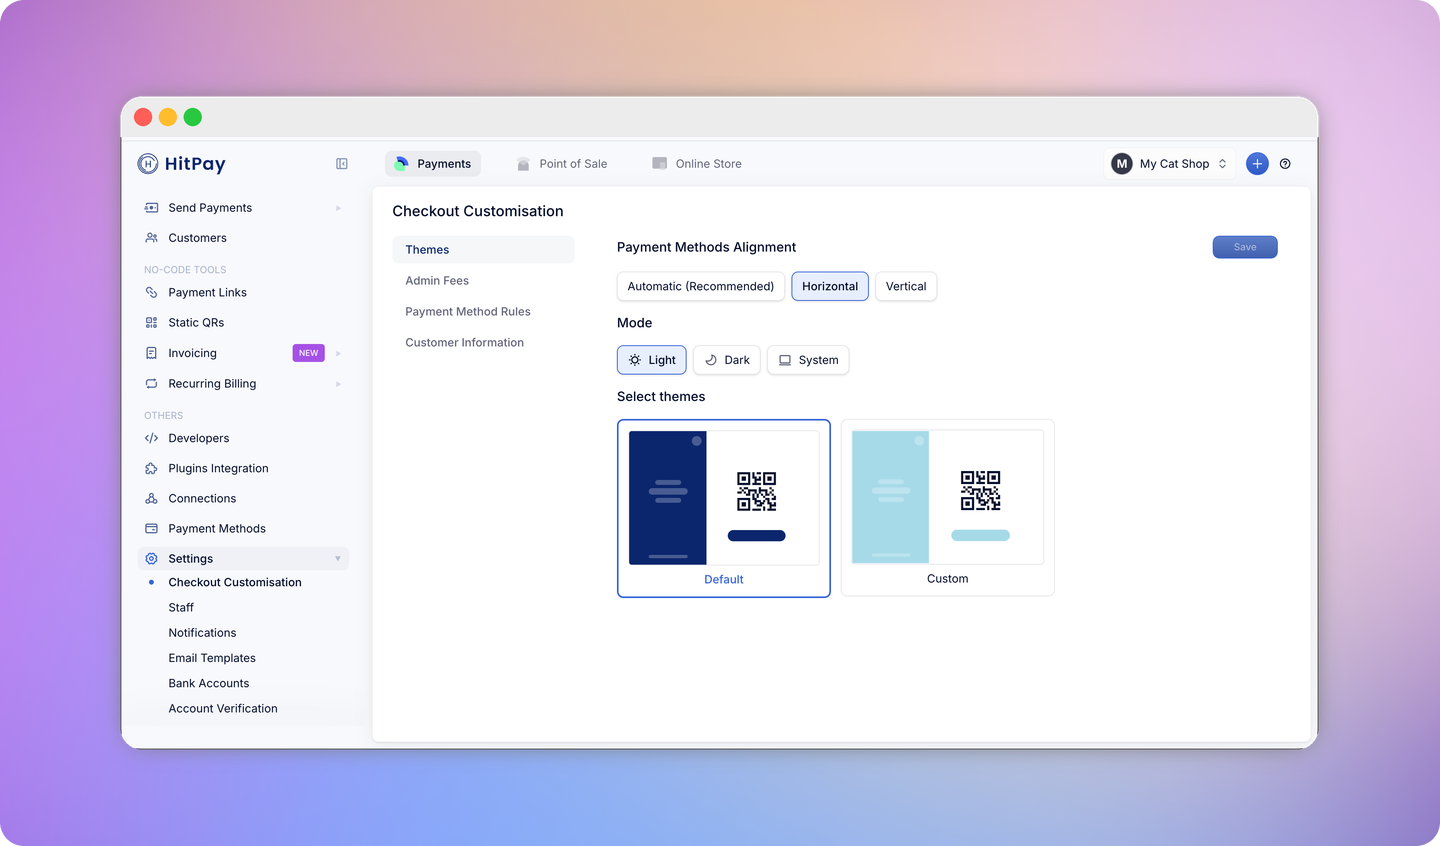
Themes
Payment Methods Alignment
Control how payment method options are laid out on the checkout page. Three options are available:- Automatic (Recommended) — HitPay automatically selects the best layout based on the number of payment methods enabled
- Horizontal — Payment methods are displayed side by side in a row
- Vertical — Payment methods are stacked in a single column
Mode
Choose the colour mode for your checkout page:- Light — Always display the checkout in light mode
- Dark — Always display the checkout in dark mode
- System — Follows the customer’s device preference (light or dark)
Select Theme
- Default — Use the standard HitPay checkout theme
- Custom — Define your own brand colours using the custom colour picker
Enable/Disable Pass-the-fee per Payment Method
This guide provides a detailed walkthrough on how to enable the pass-the-fee feature for specific payment methods during the checkout process. You’ll have the flexibility to select the payment methods for which you want to activate this feature. Set the desired percentage rate to be charged to customers and specify the Sales Channels where these settings should be applied. Additionally, you can customize the text description that will be displayed to customers during checkout.Displaying Payment Methods by Preference
On the HitPay checkout page, you have the ability to arrange payment methods in a specific order based on preference. Only the payment methods that are enabled by you will appear on the checkout page. You can set the order of the payment methods displayed by dragging the payment methods from right to left. The rightmost payment method will be the first one displayed to the customer during checkout.The chosen order of payment methods will apply across all your HitPay Sales Channels and Integrations.
Checkout Rules
Enable/Disable Payment Methods by Total Checkout/Order Amount
Adding Payment Method Amount Rules - You have the flexibility to define up to three payment method amount rules. Each rule lets you specify the range of checkout amounts for which a particular payment method will be enabled or disabled: For instance, you might set the following rule:- Minimum Amount: $0
- Maximum Amount: $1000
- Payment Method: PayNow
Any rules you set will apply across all your HitPay sales channels and integrations.
Display Payment Methods Based on Device
You can also tailor the payment methods presented to customers based on the device they are using for payment. You can customize the available payment methods separately for both Mobile and Desktop devices. This level of customization ensures a seamless and optimized payment experience for customers depending on the device they’re using.The device-based rules you set will be effective across all your HitPay sales channels and integrations.
Customer Information
Control what customer details are collected during checkout. Navigate to Settings > Checkout Customisation > Customer Information to configure these options.- Collect Customer Name — Toggle this on to show a required name field at checkout. When enabled, customers must enter their name before completing a payment.
FAQs
Can I pass the exact fees that Hitpay charges to the user?
Can I pass the exact fees that Hitpay charges to the user?
No, it is not possible to pass the exact fees that Hitpay charges because the fees depend on various factors that are hard to predict before the payment. It is recommended that you set an approximate fee based on your average order value. You can use the example widget to view the approximate values.