

Before you begin
You need a HitPay account. If you don’t have one yet, create an account.Run the check
1
Open Readiness Check
In your HitPay dashboard, go to Labs in the sidebar and click Readiness Check. You can also go straight to checklist.hitpay.dev. Click Start the check.
2
Tell us how you sell
Answer the questions. What you’re asked depends on your earlier answers: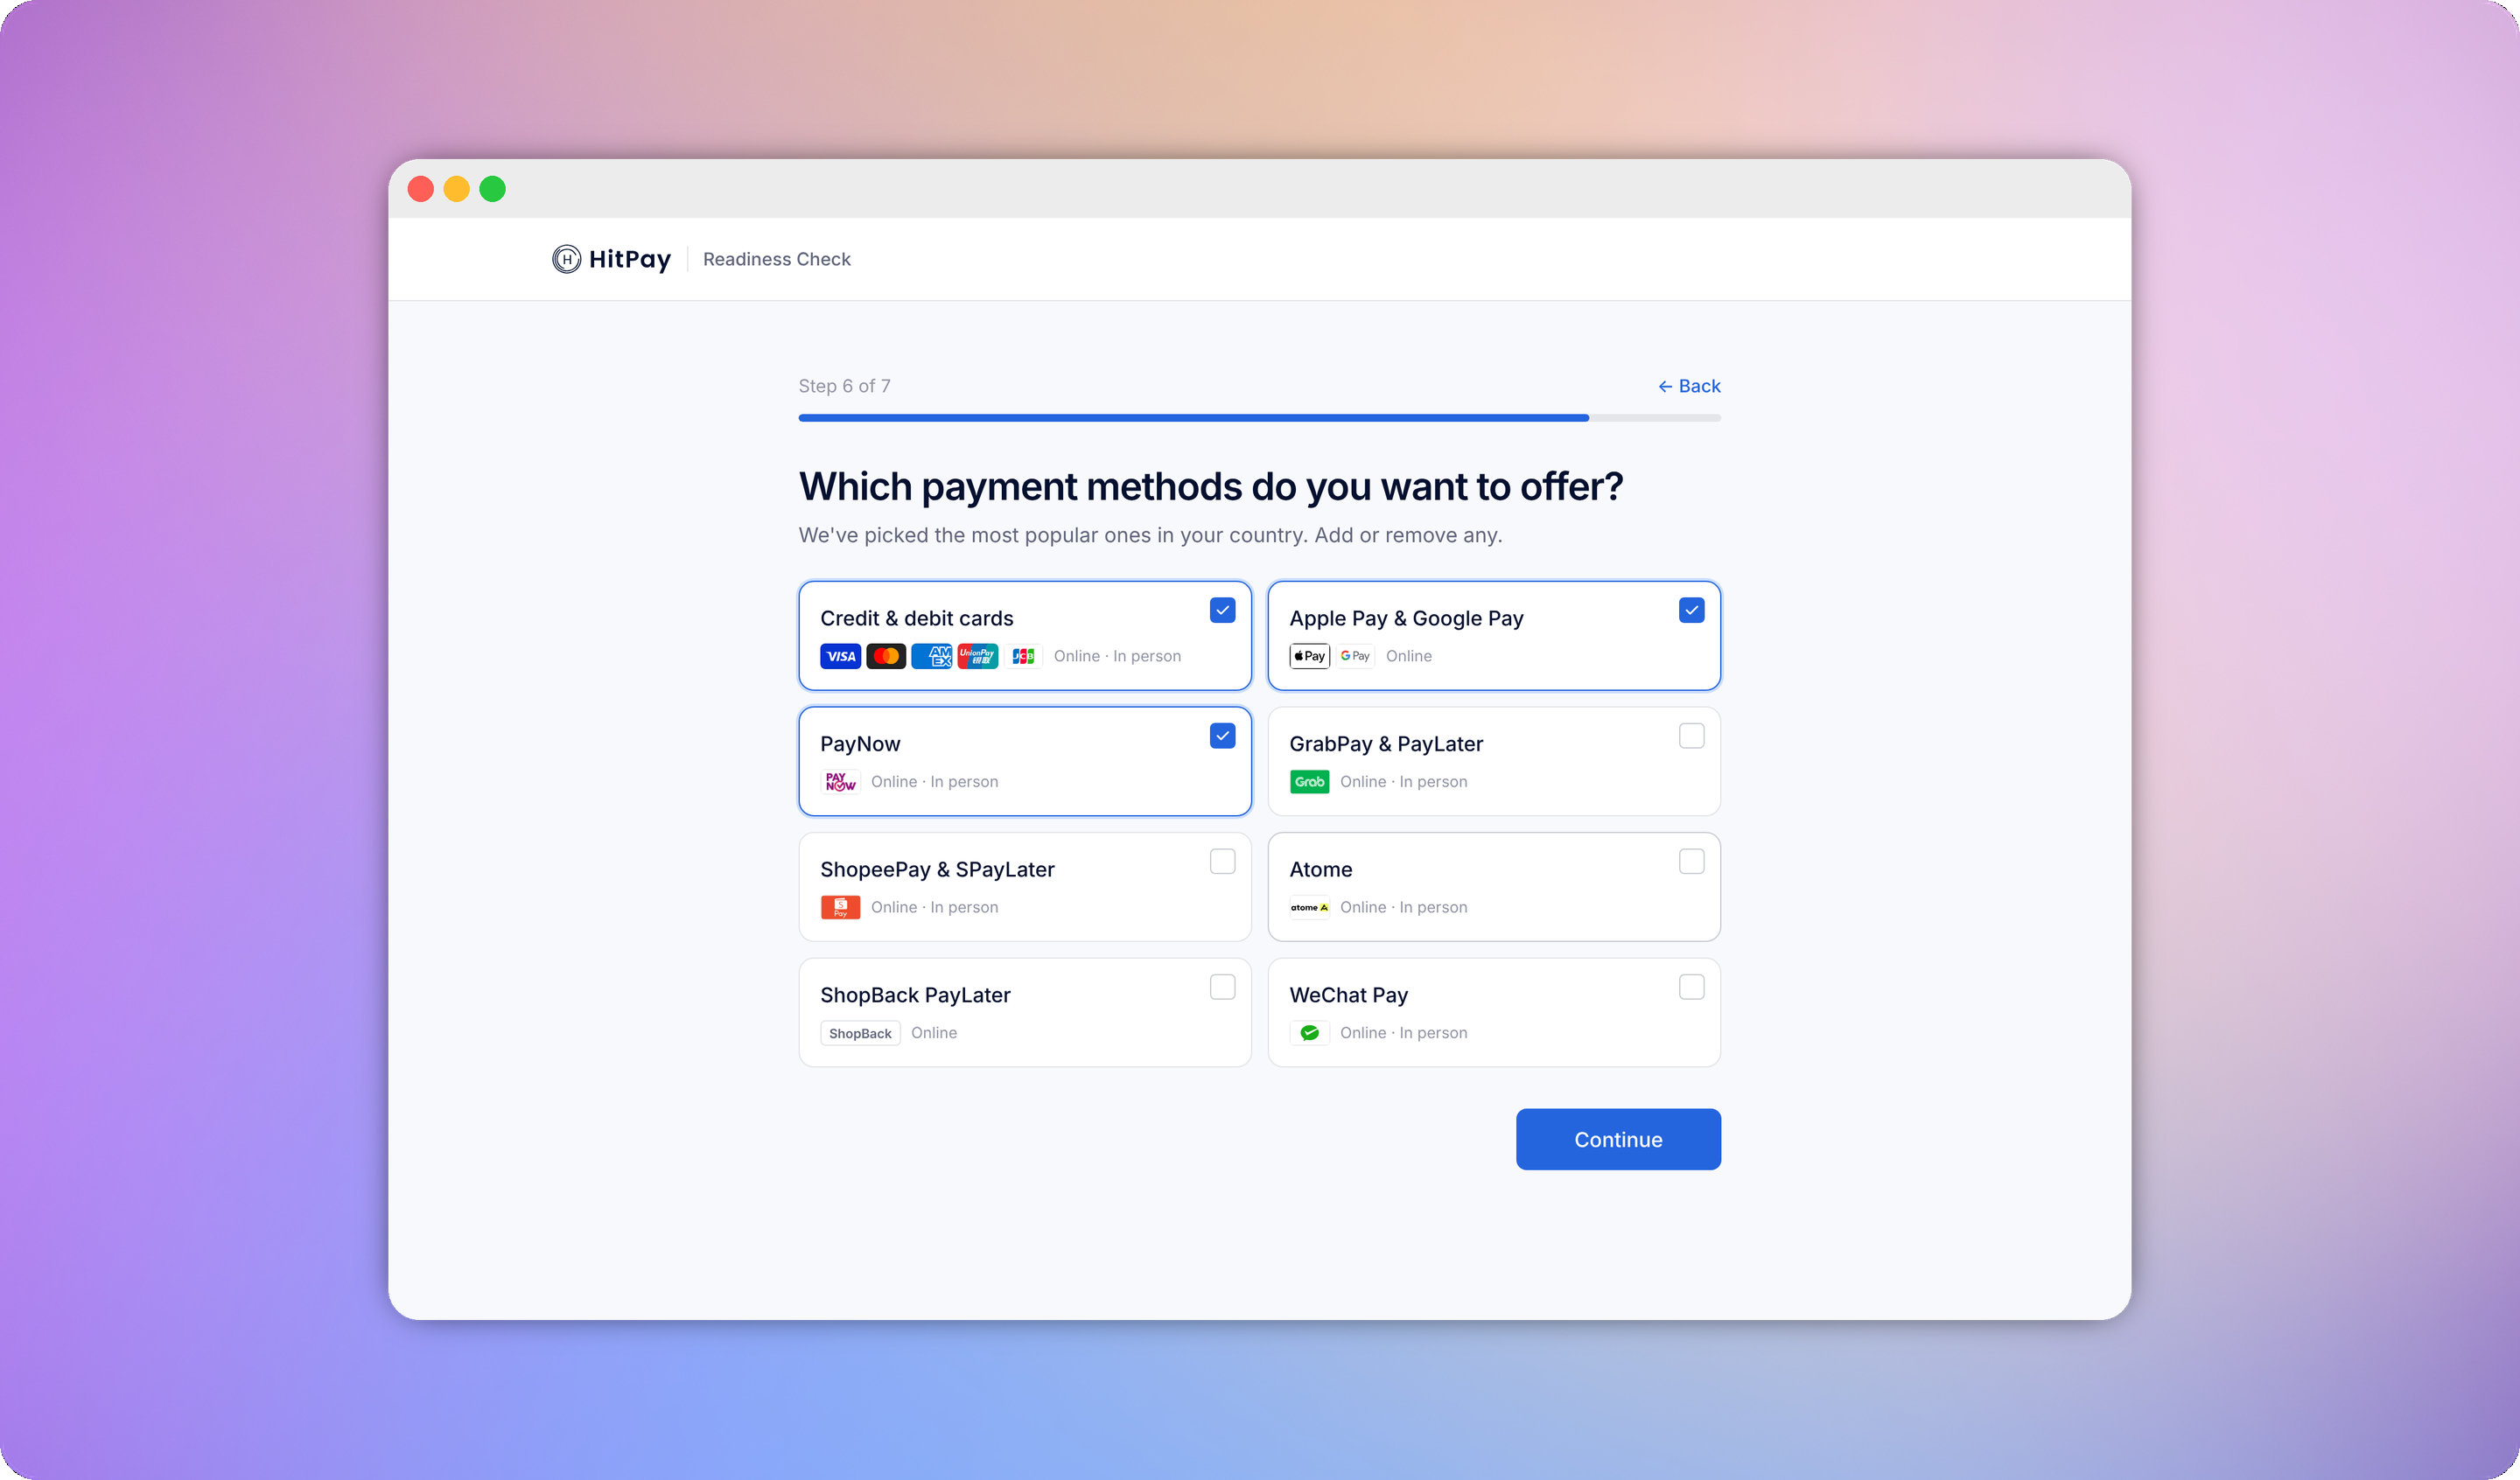
Choose the country your HitPay account is registered in. Payment methods and terminals depend on it, and the report flags a mismatch.
3
Connect your HitPay account
Click Connect with HitPay. You sign in on HitPay’s own site and approve read-only access to one business. The app never sees your password.
4
Read your report
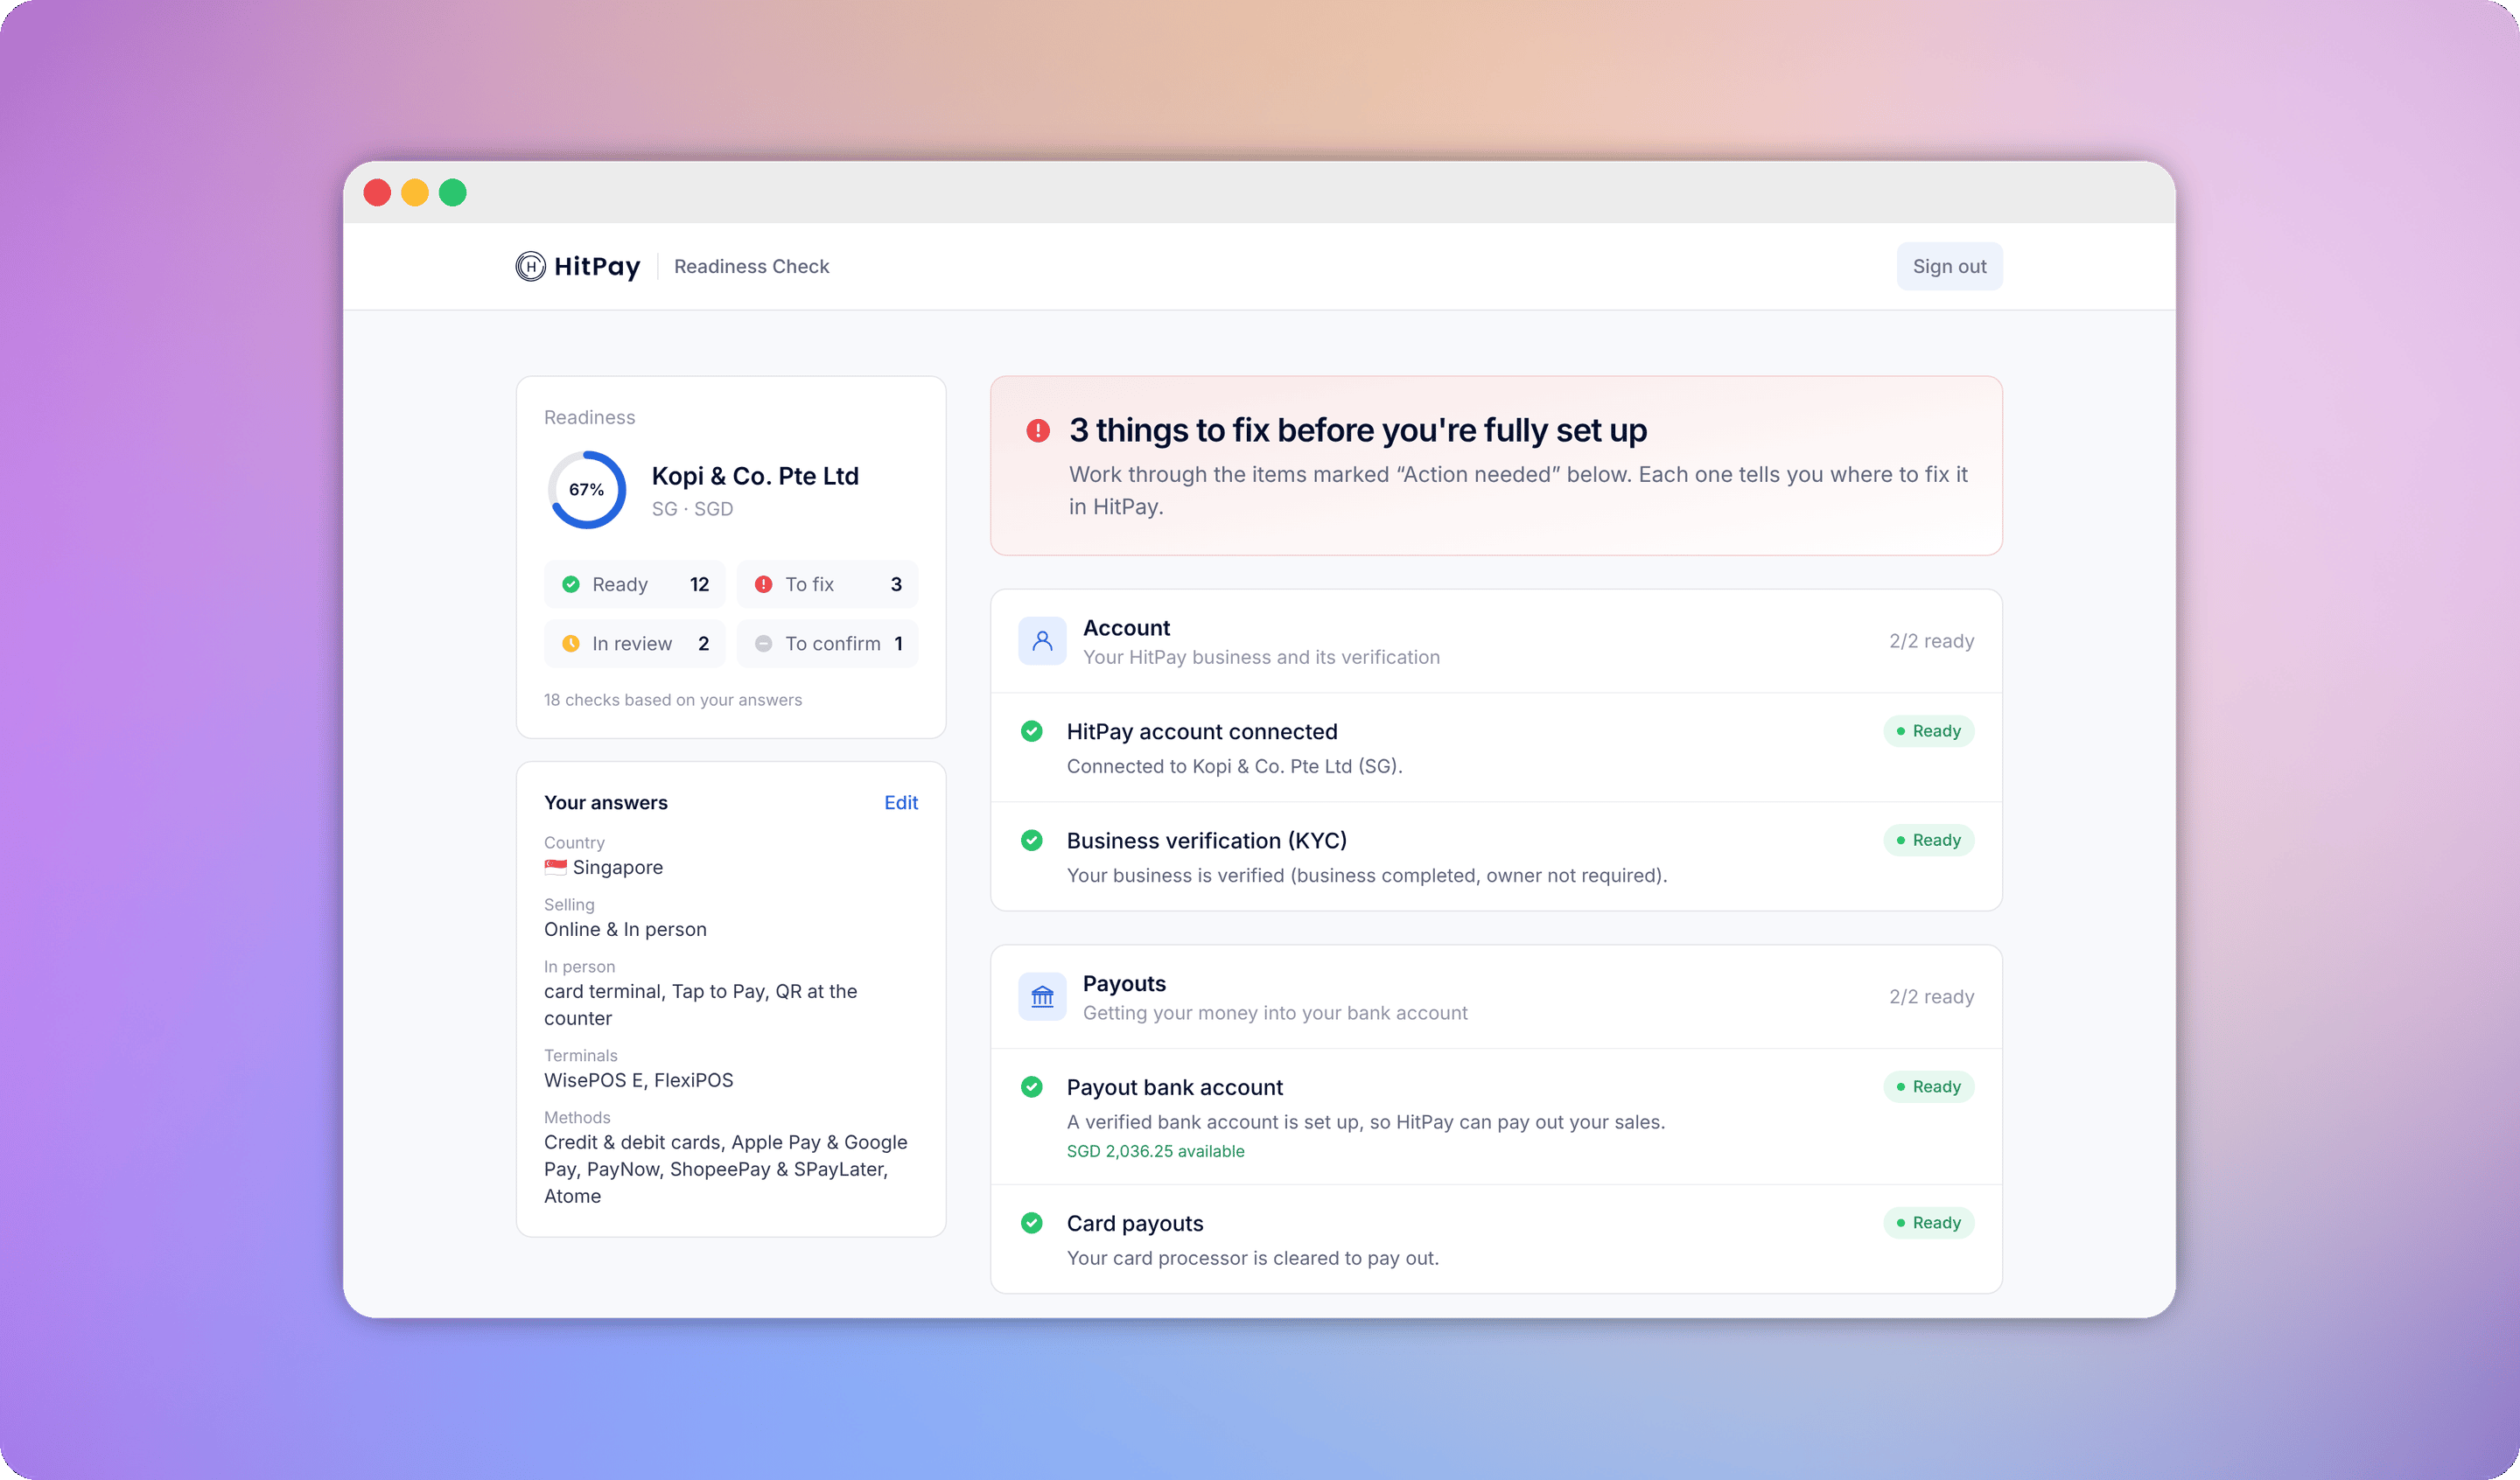
Your report opens with a headline, a readiness score and a checklist grouped into sections. Work through the items marked Action needed first. Each one tells you where to fix it in HitPay.
5
Fix and run it again
After you fix something, click Re-run check at the bottom of the report to see your updated status. To check a different setup, click Change answers.
What the report checks
The report only checks what you said you need. If you don’t sell in person, for example, it has no in-person section.
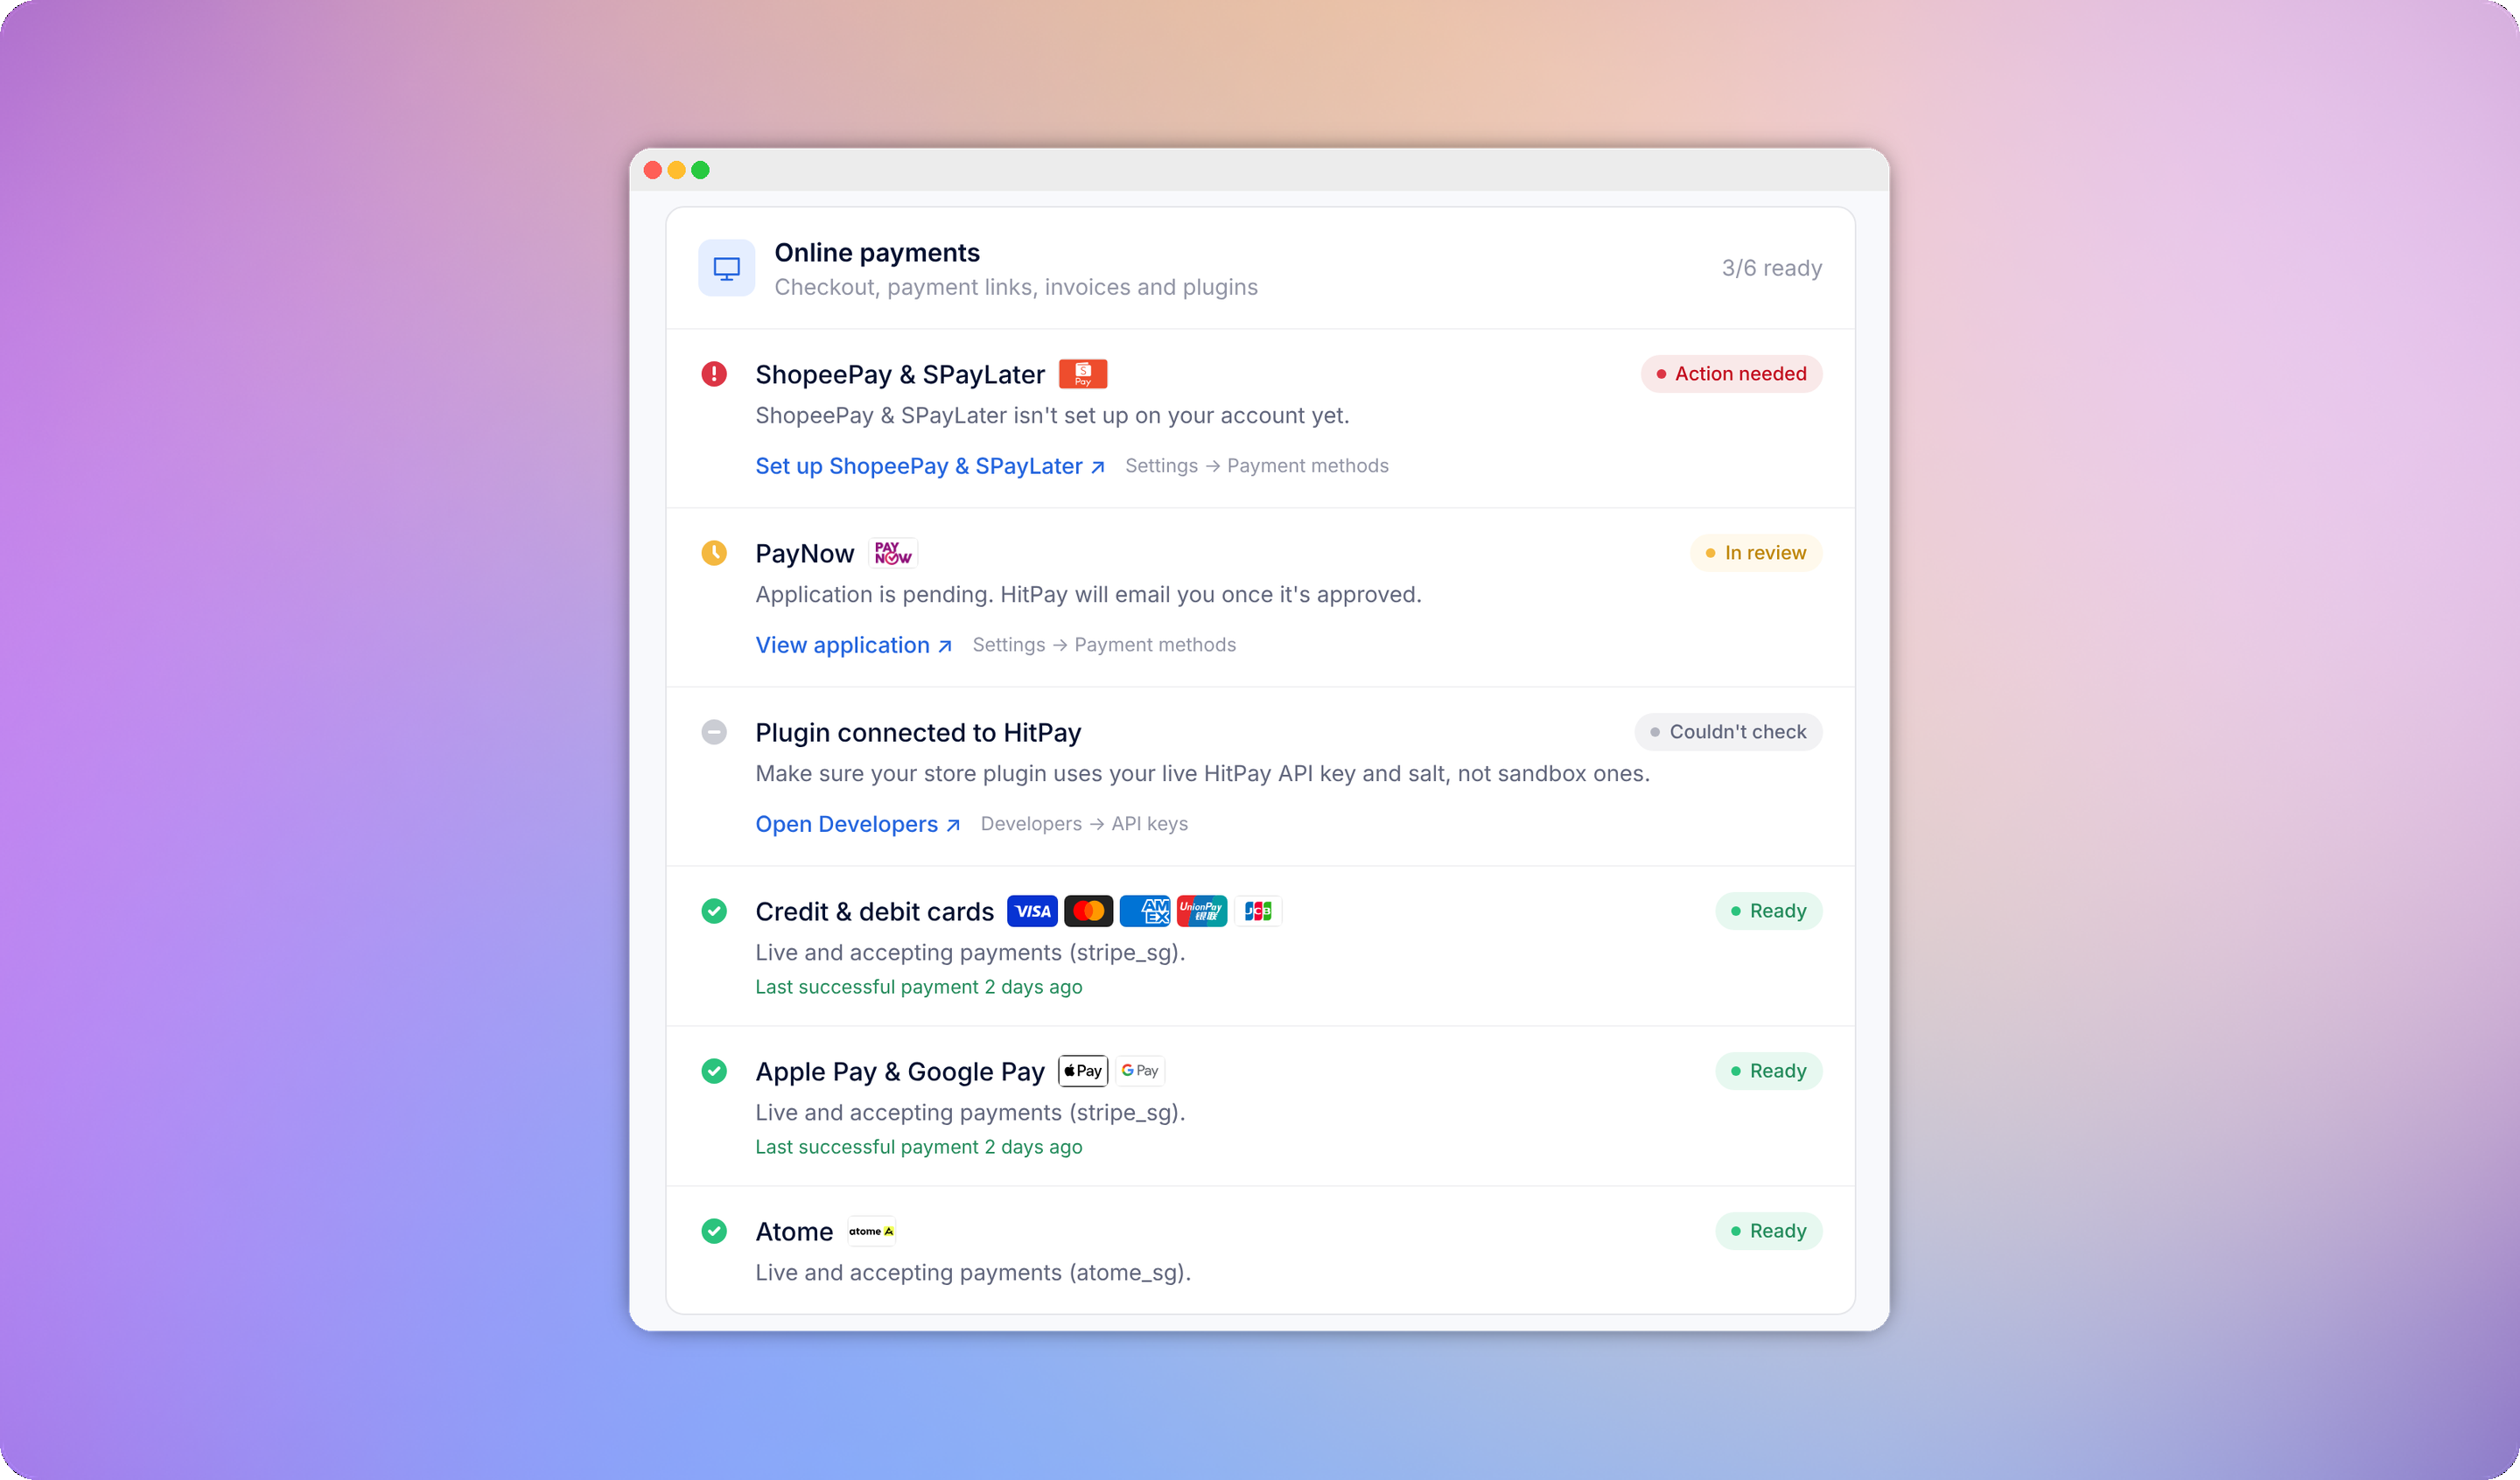
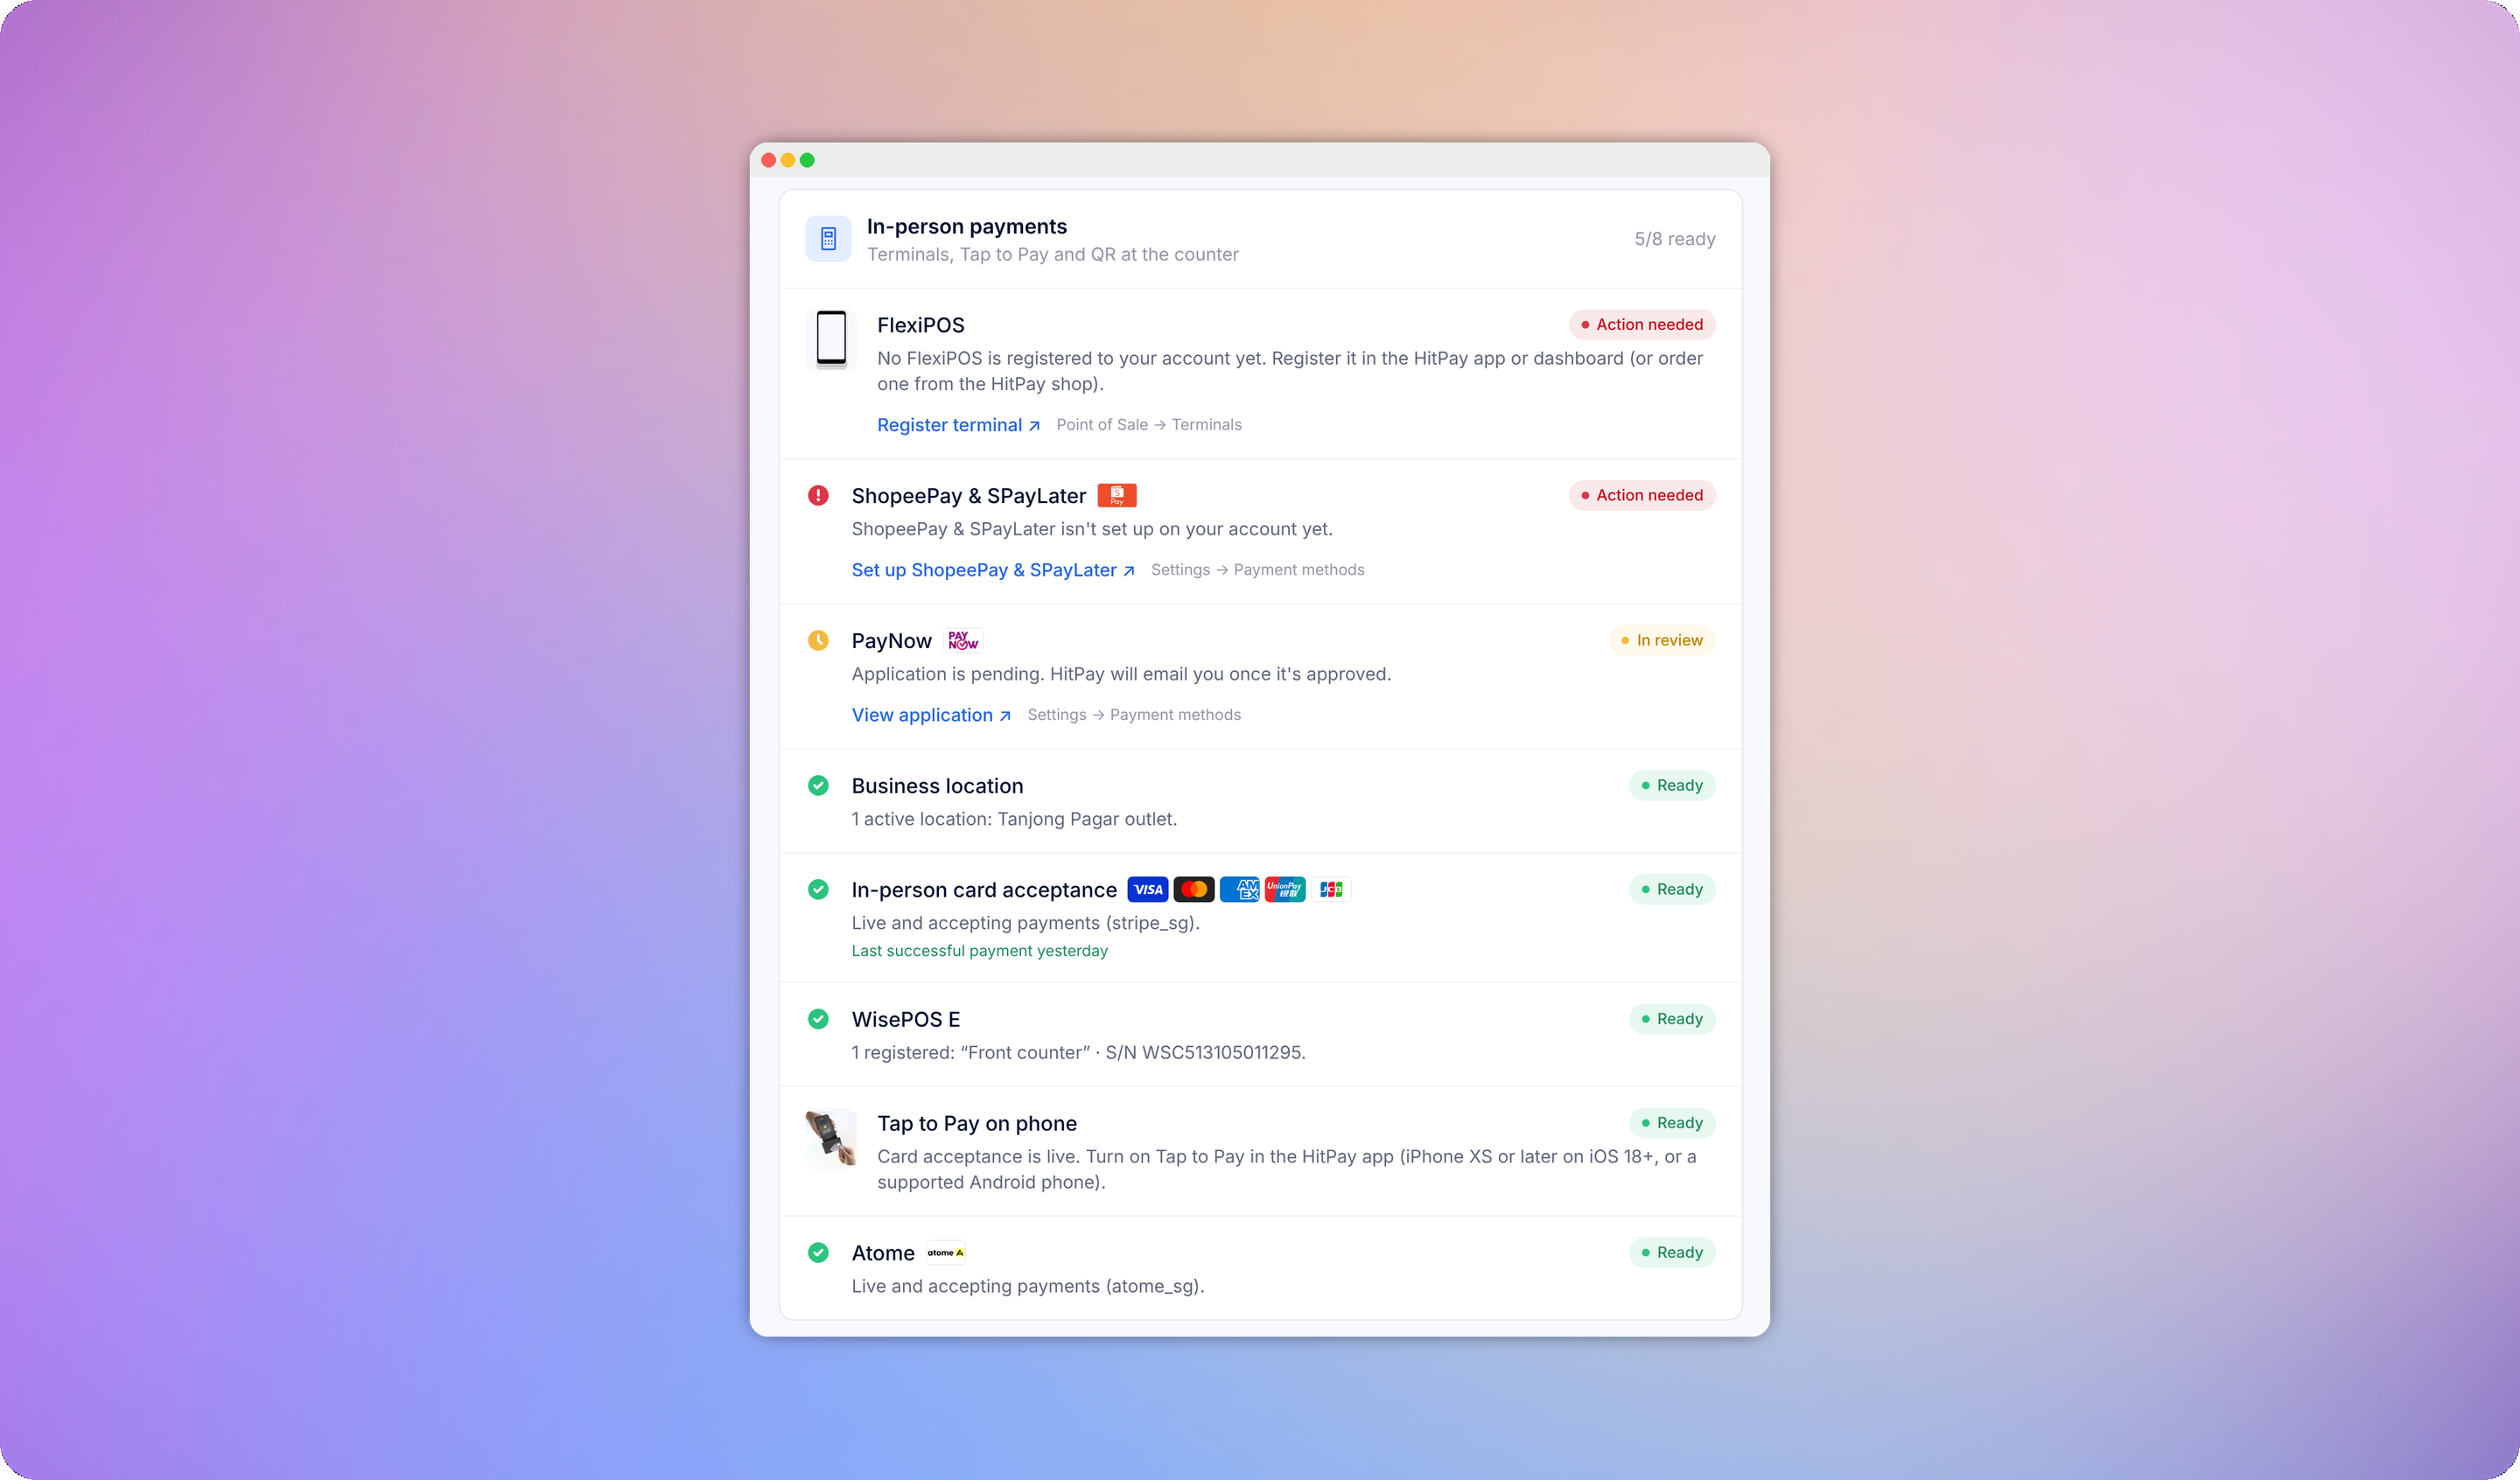
Each payment method you chose gets its own line. Items that need attention are listed first, with a link to the place in your HitPay dashboard where you fix them.
What each status means
The summary at the top of the report counts the items in each status. There, Action needed items are counted as To fix and Couldn’t check items as To confirm.
The readiness score is the share of checked items that are Ready.
A method that shows Couldn’t check can still be working. If you’ve recently taken a successful payment with a method, the report counts that as proof and marks it Ready.
Things the app can’t check
Some parts of your setup aren’t visible to the app, so the report reminds you to check them yourself:- API keys and webhooks. If you use the API, make sure you’ve created a live API key and a webhook for payment events. If you use a plugin, make sure it uses your live API key and salt, not sandbox ones.
- WisePad 3. It pairs with the HitPay app over Bluetooth, so it isn’t listed with your registered terminals. Open the HitPay app to check that it connects.
- Tap to Pay. The report checks that in-person card acceptance is live, which Tap to Pay needs. You turn on Tap to Pay itself in the HitPay app. See Tap to Pay.
Your data
- You approve read-only access on HitPay’s own site. The app can’t move money.
- Your access stays in an encrypted cookie in your browser for 8 hours. Nothing about your account is saved on the app’s servers.
- To disconnect sooner, sign out of the app. You can also revoke its access in your HitPay dashboard under Developers > Connected Apps.
Troubleshooting
Many items say "Couldn't check"
Many items say "Couldn't check"
Some account details aren’t shared with connected apps yet. The report lists what HitPay didn’t share, and each affected item tells you where to check it in your HitPay dashboard.
The report says my business country doesn't match
The report says my business country doesn't match
The country you picked is different from the one your HitPay account is registered in. Click Change answers and choose the right country, because payment methods depend on it.
My terminal isn't found
My terminal isn't found
Check that the terminal is registered to your account and shows as online under Point of Sale > Terminals in your dashboard. If you don’t have a terminal yet, order one from the HitPay shop.
Tap to Pay shows as not available
Tap to Pay shows as not available
Tap to Pay isn’t available in every market. Use a card terminal instead.
I'm asked to connect again
I'm asked to connect again
Your session lasts 8 hours. Connect with HitPay again to run a new check.