Overview
The recurring billing feature on HitPay allows you to set up and manage subscription plans for your customers. This guide provides step-by-step instructions on how to create and manage recurring billing plans.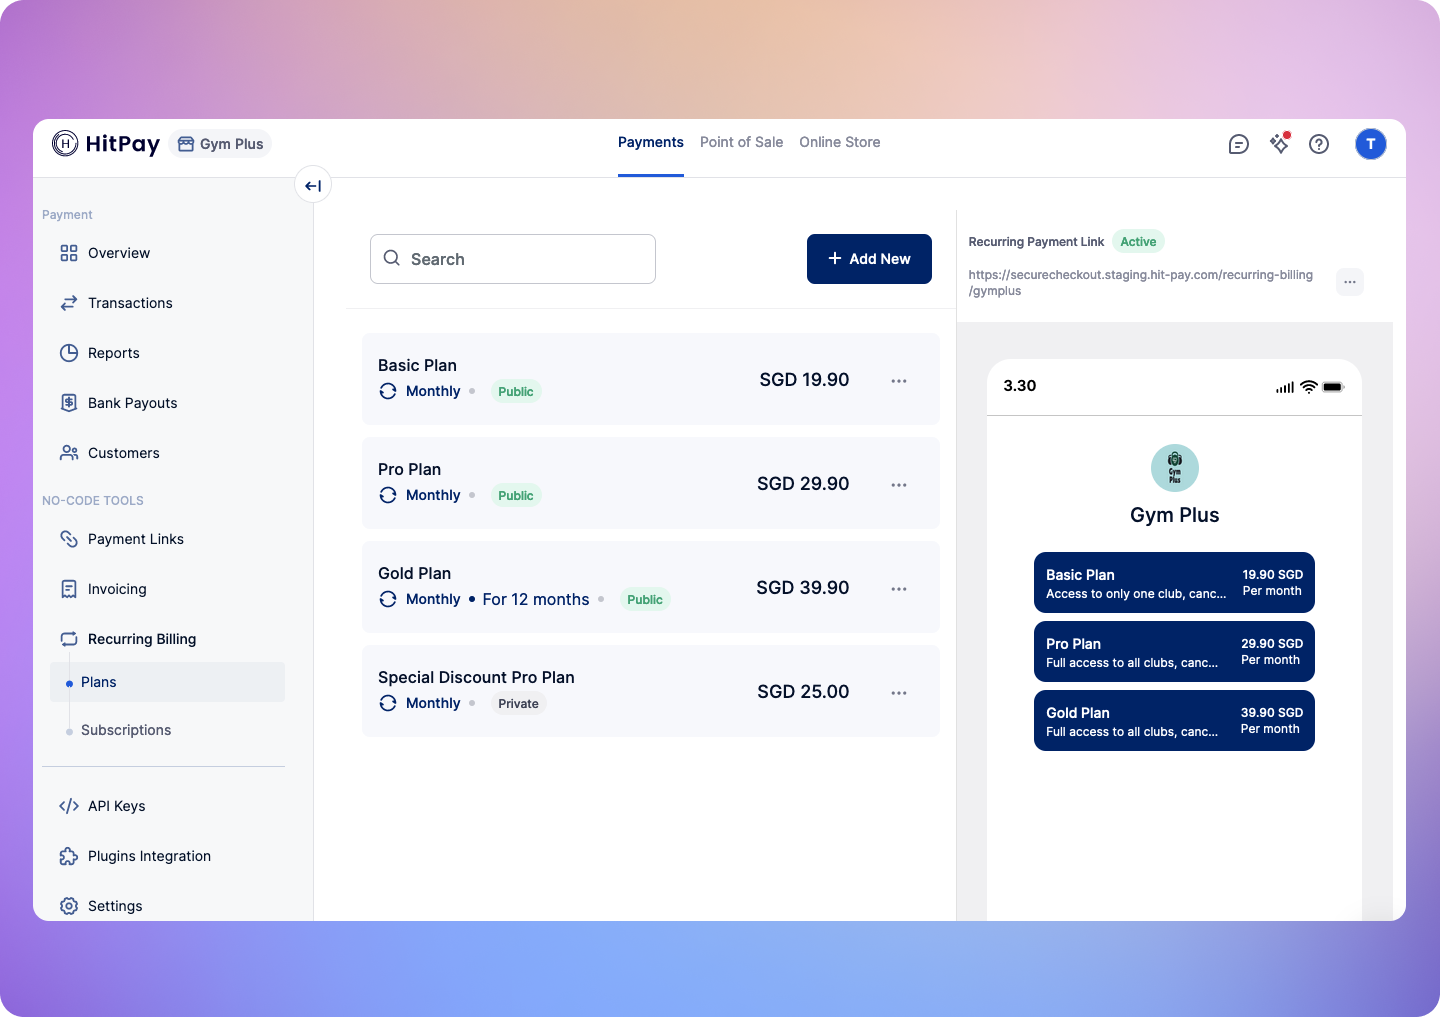
How to Create and Manage Recurring Billing Plans
Step 1: Create a New Plan- Navigate to Recurring Billing from the side menu.
- Click on Plans.
- Click on the Add New Plan button.
- Fill in the required details on the “Add Plan” page.
- Set the Renewal Cycle (billing intervals).
- Specify Times to be Charged (maximum number of deductions for the plan).
- Click on the Save Plan button.
Subscribing Customers to Your Plan
You have two options for adding customers to your plan: Option 1: Sharing the Plan Link (For Public Plans) If your plan is public and you want customers to subscribe themselves, share the plan link with them. This link takes customers to the subscription page where they can sign up for the plan. Learn more about subscriptions in this guide. Option 2: Adding Customer Subscriptions (For Manual Management) If you prefer manually subscribing customers, follow these steps:- Locate and click on the plan.
- Select Create Subscription option. For detailed instructions, see this user guide.
Checking Plan Status
To monitor your recurring billing plan’s performance and status, click on the plan; this will redirect you to a page where you can access detailed information about the selected plan, including plan details, revenue insights, customer overview, and individual customer details. This will provide you with valuable insights into the plan’s performance, revenue generation, and customer subscription status.Customizing your Recurring Plans Page
Elevate your recurring plans page by tailoring it to your unique needs. You can gather specific customer data, define a user-friendly page URL slug, and set up redirection after successful transactions.- Locate and click on the pencil icon to start customizing your page.
- Choose the URL slug to make it more memorable and easier to share.
- Optionally, set up a redirect URL for transitions after successful transactions.
- Choose to collect phone number or address from your customers.
- Check the ‘Add Custom Field’ to collect additional information from your customers. Utilize text, long text, radio buttons, dropdowns, or checkboxes to capture diverse information. Make the fields mandatory or optional based on your needs.
- Click Save Changes
Customizing Checkout Colors
To personalize the color scheme of your recurring plans page:- Go to Settings > Checkout Customisation.
- Select a Theme. Here, you have the option to choose from predefined color themes or create a custom theme that aligns with your brand’s color palette.
- After selecting or customizing your theme, preview the changes to ensure they meet your expectations.
Rearranging your Recurring Plans
Adjust the order that your plans appear on the recurring payment link. This can help you to strategically highlight particular plans or promote special offerings.- Locate your plan.
- Click and hold on the plan, then drag it to your preferred position. Your changes are automatically saved.
How to Attach Your HitPay Recurring Plan to Your Website
Integrating your recurring billing plans into your website provides a seamless payment experience for customers. Here’s a step-by-step process to attach your HitPay recurring plan to your website. Step 1: Create a New Plan- Navigate to Recurring Plans > Plans from the left menu.
- Click on the Add New Plan button.
- Fill in the necessary details on the “Add Plan” page.
- Check the Make it public option.
- Specify Renewal Cycle (billing intervals).
- Specify Times to be Charged (maximum number of deductions for the plan).
- Click on the Save Plan button.
- Under the Recurring Payment Link section, click on the “Edit” icon.
- Enter your website’s URL under the Redirect URL.
- Choose whether to include customer address and phone number fields during payment.
- Locate the plan and click on the Share button to copy the link to your clipboard.
- Access your website’s membership option where you want to add the recurring plan.
- Paste the copied recurring billing link into the desired location.
- Save the changes and publish the updated page to make the HitPay recurring plan link accessible.
- Visit your website and navigate to the membership option with the added HitPay recurring plan link.
- Verify that the link is displayed correctly and functions as intended.
Notifications for Attached Cards
When a customer attaches a card to a plan, you’ll receive an email notification. Additionally, the subscription’s status on the HitPay dashboard changes from scheduled to active. Upon clicking on the subscription, you can view the customer’s attached card details and the first charge in the Timeline section. Add notes to the timeline by clicking Add Note. To see a summary of all charges, including successful, failed, and refunded transactions, check the History Transactions section.FAQs
What happens if an attached card associated with an active plan gets declined?
What happens if an attached card associated with an active plan gets declined?
If an attached card associated with a plan gets declined on the scheduled charge date of the plan, the customer is immediately sent an email requesting them to update their card details using the link.At the same time, the merchant is also notified by email about the failed charge.If the customer fails to attach a valid card within 7 days from the failed charge date, the subscription will move to an inactive status.