

Overview
Approval rules give you an audit trail and keep who submits a payment separate from who authorises it.- Bills submitted by your team always need approval. If an approval rule covers the amount, the bill goes to that rule’s approvers. If no rule covers it, the bill needs the Owner’s approval.
- The Owner’s own bills only need approval if a rule covers them. Otherwise the Owner can pay or schedule them straight away.
Setting up approval rules
Approval rules live under Settings > Approval Rules. Only the Owner can add, edit, or delete rules. Everyone else can view them. Each rule covers an amount range - for example, $0-$1,000, $1,000-$10,000, and $10,000+ - and ranges must be mutually exclusive, with no gaps or overlaps. Each range has one or more sequential approval steps, and each step needs at least one approver - either any user with the Admin role, specific named users, or both (up to 5 approvers per step; the Cashier role can’t approve). A step only activates once the previous step has been approved. Example: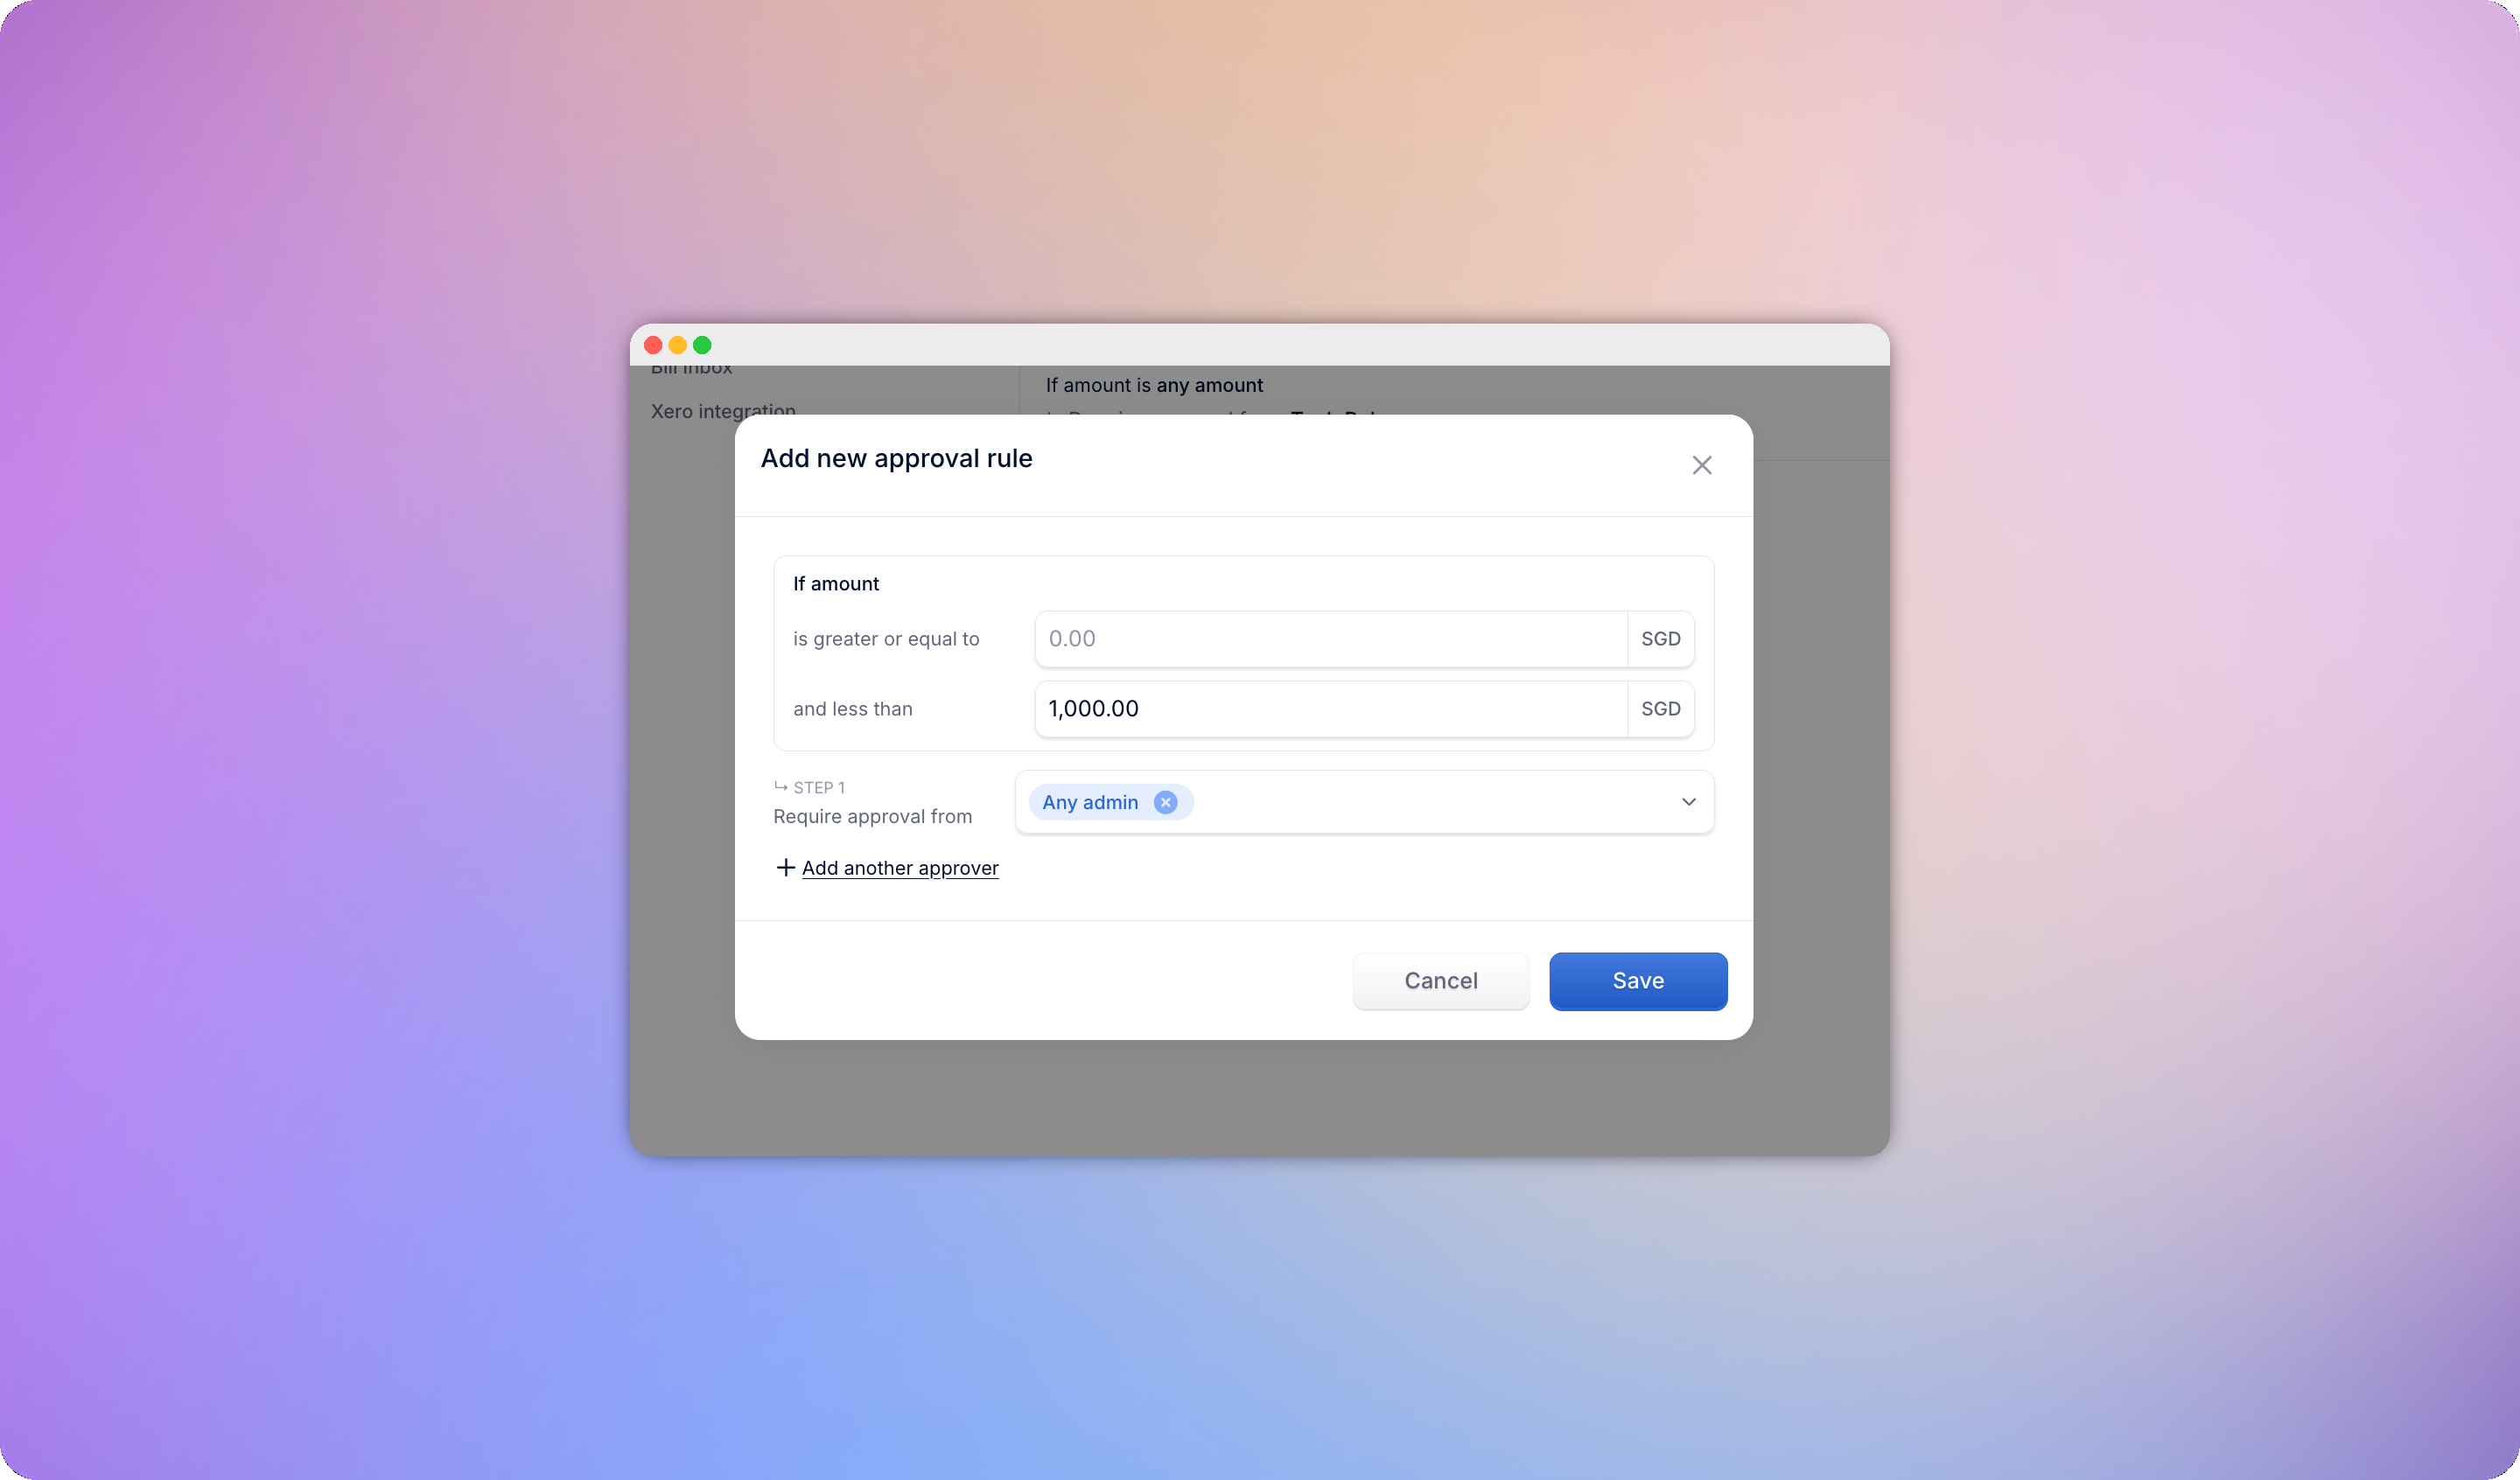
Self-approval skip
If the person submitting a bill is also an assigned approver on a step, that entire step is skipped automatically - the bill advances to the next step they’re not part of. If they’re the only approver across every remaining step, the bill doesn’t need a separate approval and they can pay or schedule it straight away.Approving or rejecting a bill
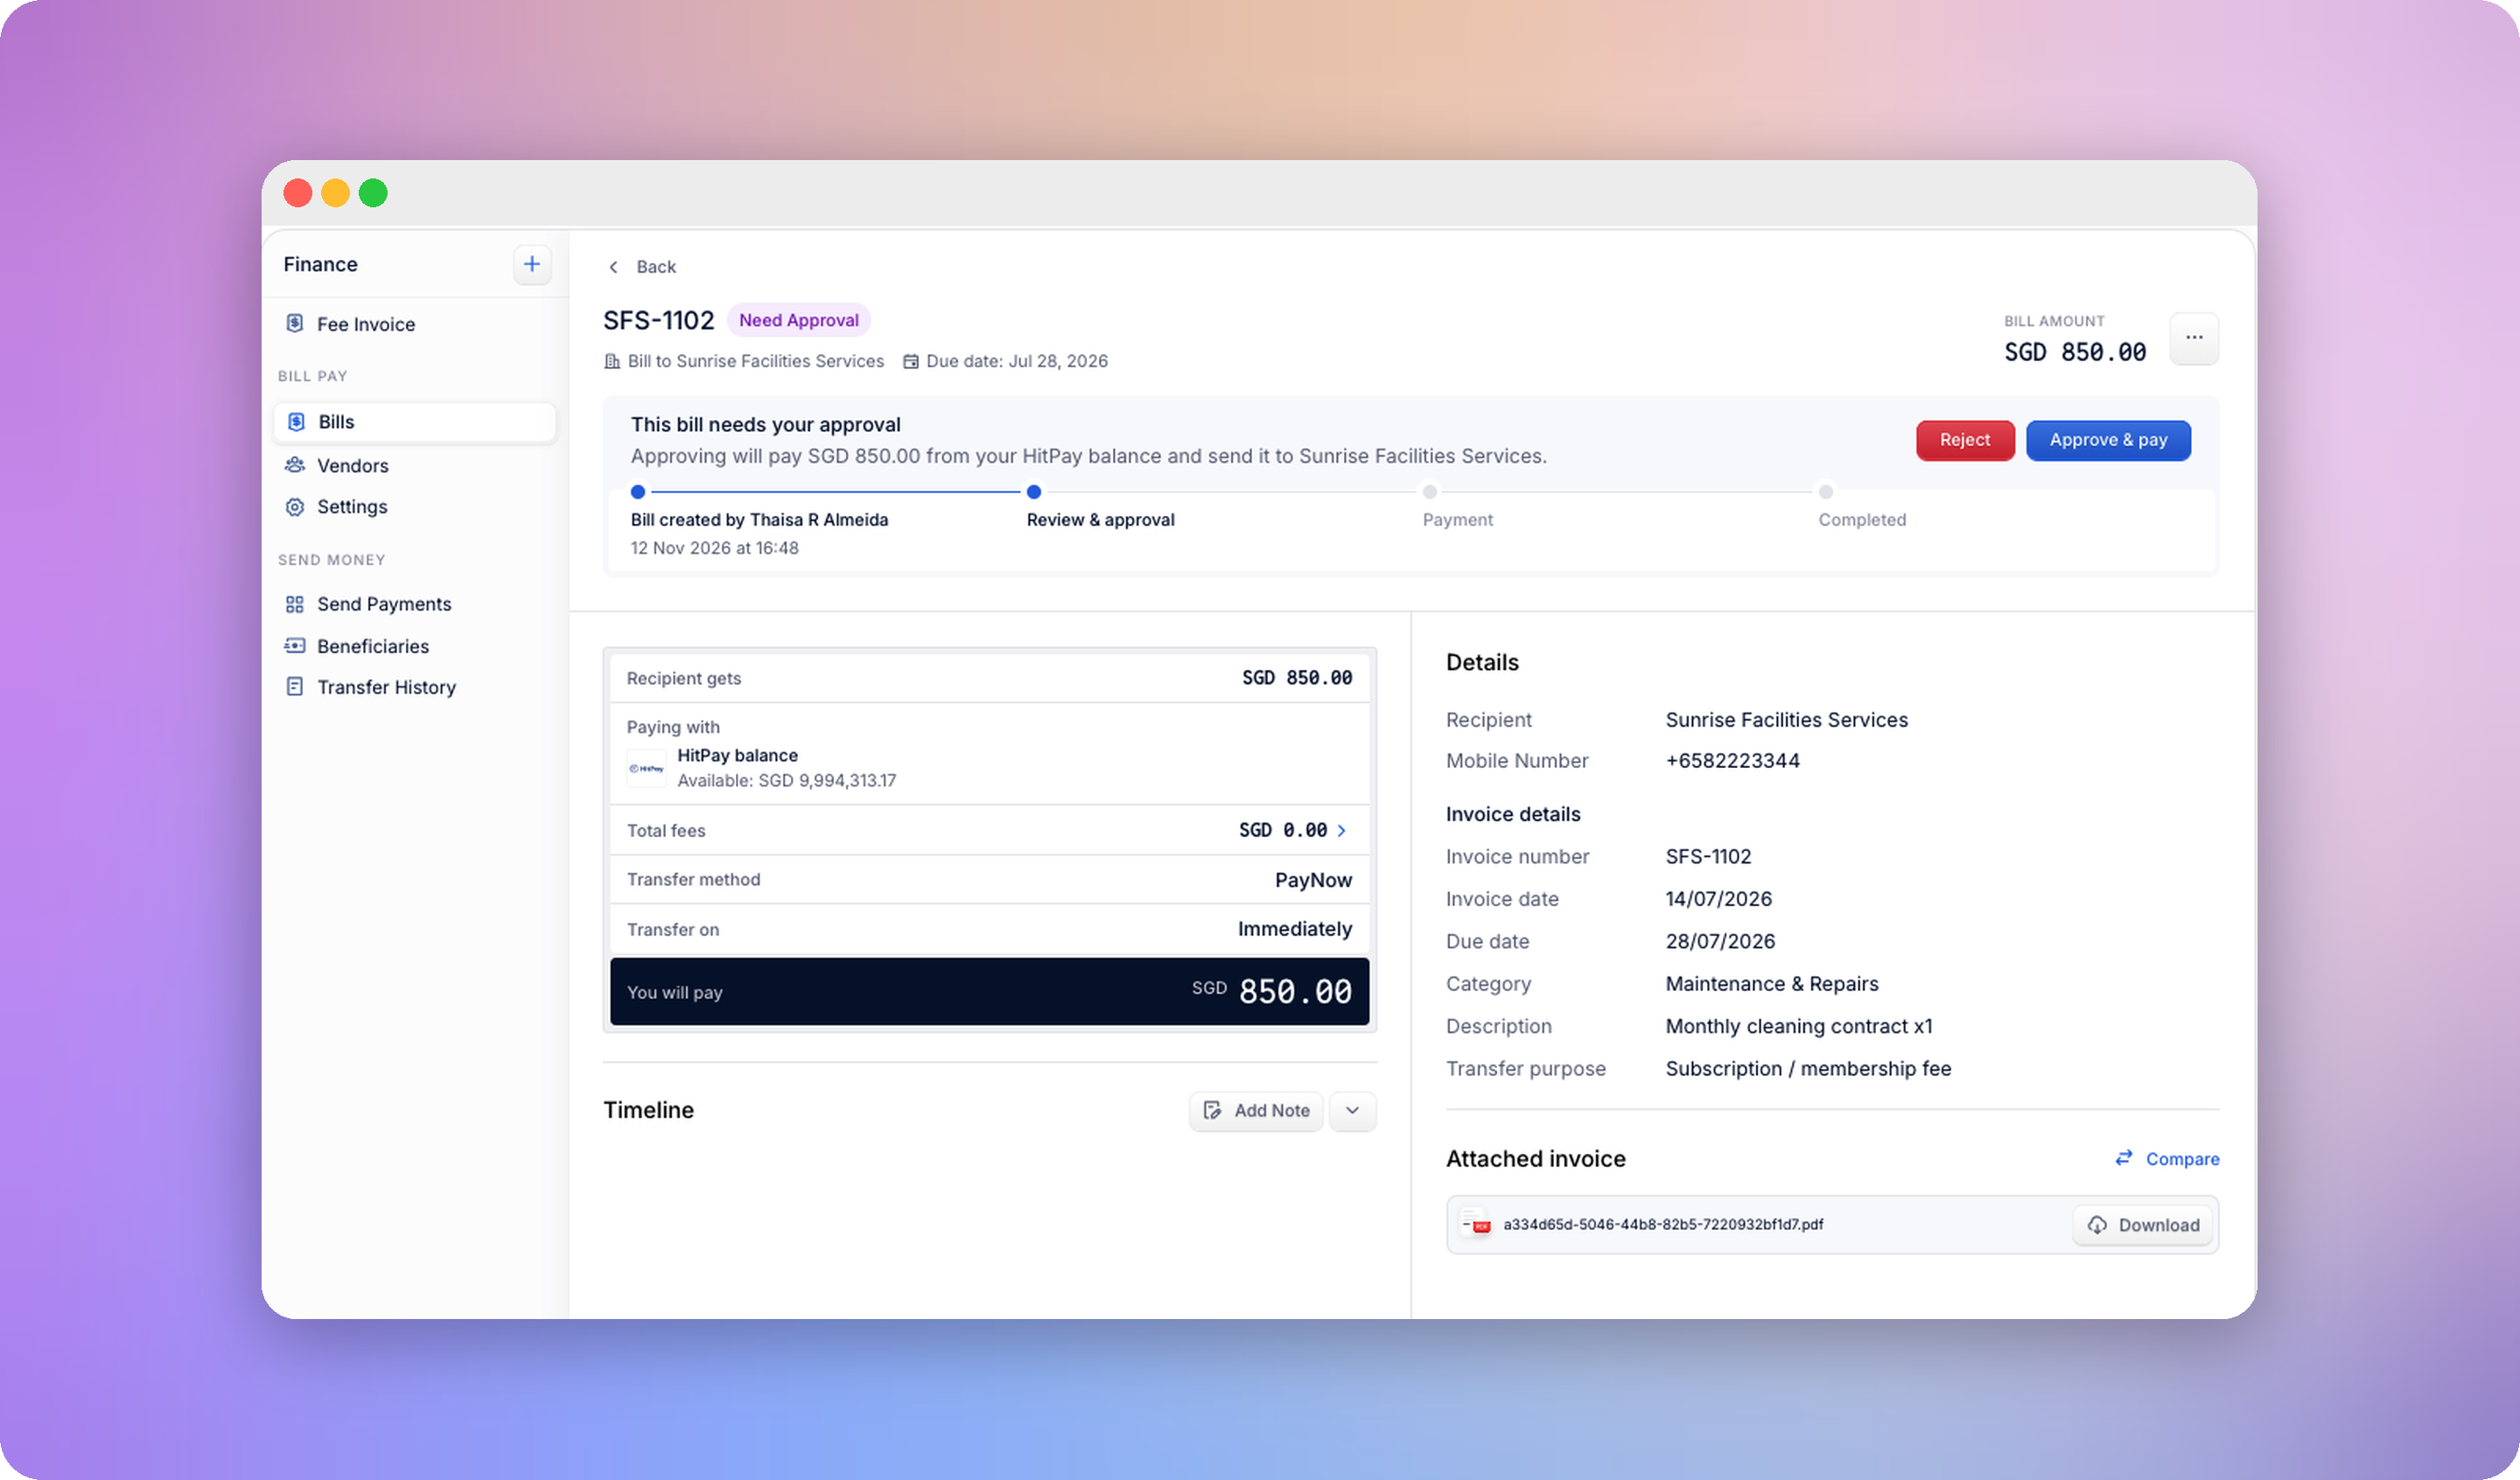
Anyone assigned as an approver sees the bills currently waiting on them, and is notified whenever a bill enters a step they’re responsible for.- Approve - on an earlier step, the bill moves to the next approver.
- Approve & pay - on the last step, approving also pays the bill from your HitPay balance. If the bill has a payment date, it’s scheduled for that date instead. Approving and paying needs a verification code.
- Reject - requires a reason. The bill moves to Rejected, and the submitter is notified.
Awaiting payment
A bill that’s been approved but not paid shows as Awaiting payment. This usually happens when a scheduled payment didn’t go through - for example, because your balance wasn’t enough on the payment date. Pay it with Pay bill once your balance covers it. It doesn’t need approval again. See If a scheduled payment doesn’t go through.Recalling a bill
- Draft bills are directly editable - no recall needed.
- Need approval, Awaiting payment, or Scheduled bills must be recalled before they can be edited. Recalling clears the approval chain and returns the bill to Draft.