About HitPay on Make
HitPay is now available as a public integration on Make.com, enabling you to connect HitPay with thousands of popular apps & services to automate and streamline your payment and order workflows. With the HitPay app on Make, you can build powerful visual automations that trigger based on payment events, update your systems in real time, and eliminate repetitive manual tasks — all without writing a single line of code. Visit Make’s pricing page to learn more about their available plans and features.
Before You Start
Before creating your first scenario, make sure you have:- A HitPay account — sign up at www.hitpayapp.com
- Your HitPay API key (found in your dashboard under Developers → API Keys)
- A Make.com account — create one at make.com
Connecting HitPay to Make.com
Sign in or Create a HitPay Account
If you don’t already have one, create your HitPay account on hitpayapp.com.
Once logged in, go to your Dashboard → Developers → API Keys to generate your API key.
You’ll use this key to authenticate your HitPay connection in Make.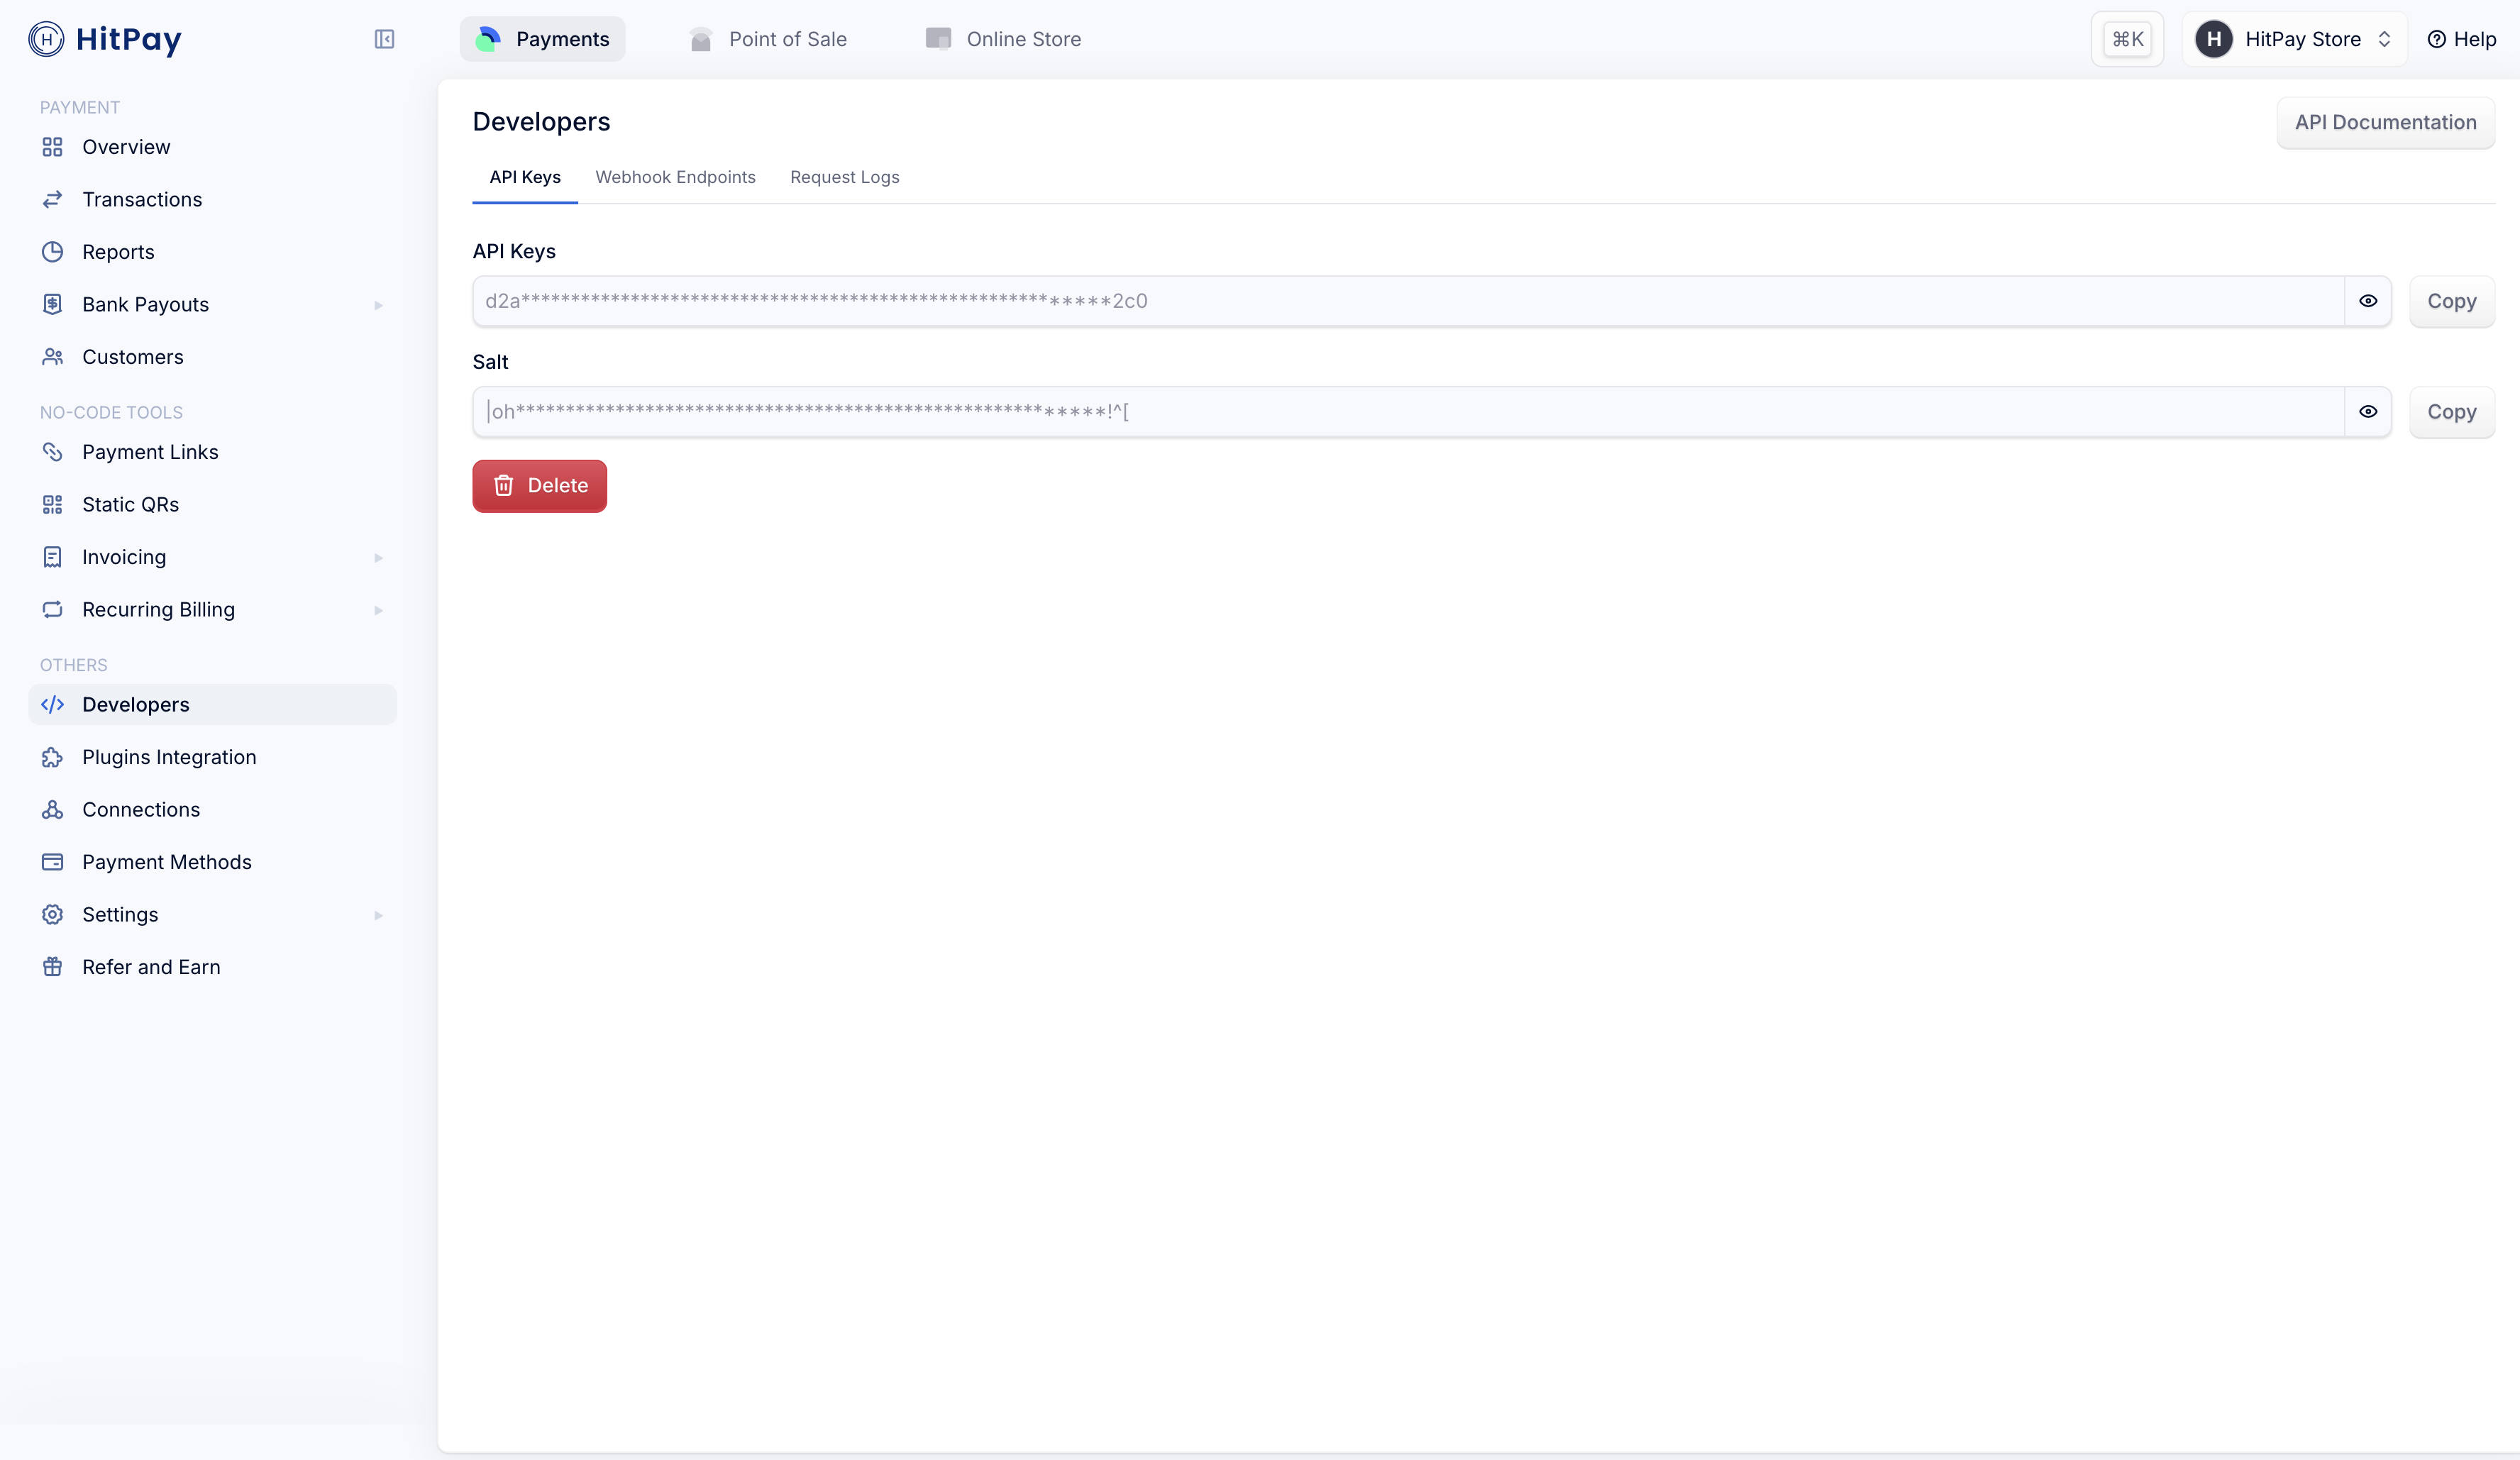
Once logged in, go to your Dashboard → Developers → API Keys to generate your API key.
You’ll use this key to authenticate your HitPay connection in Make.
Connect HitPay to Make.com via API Key
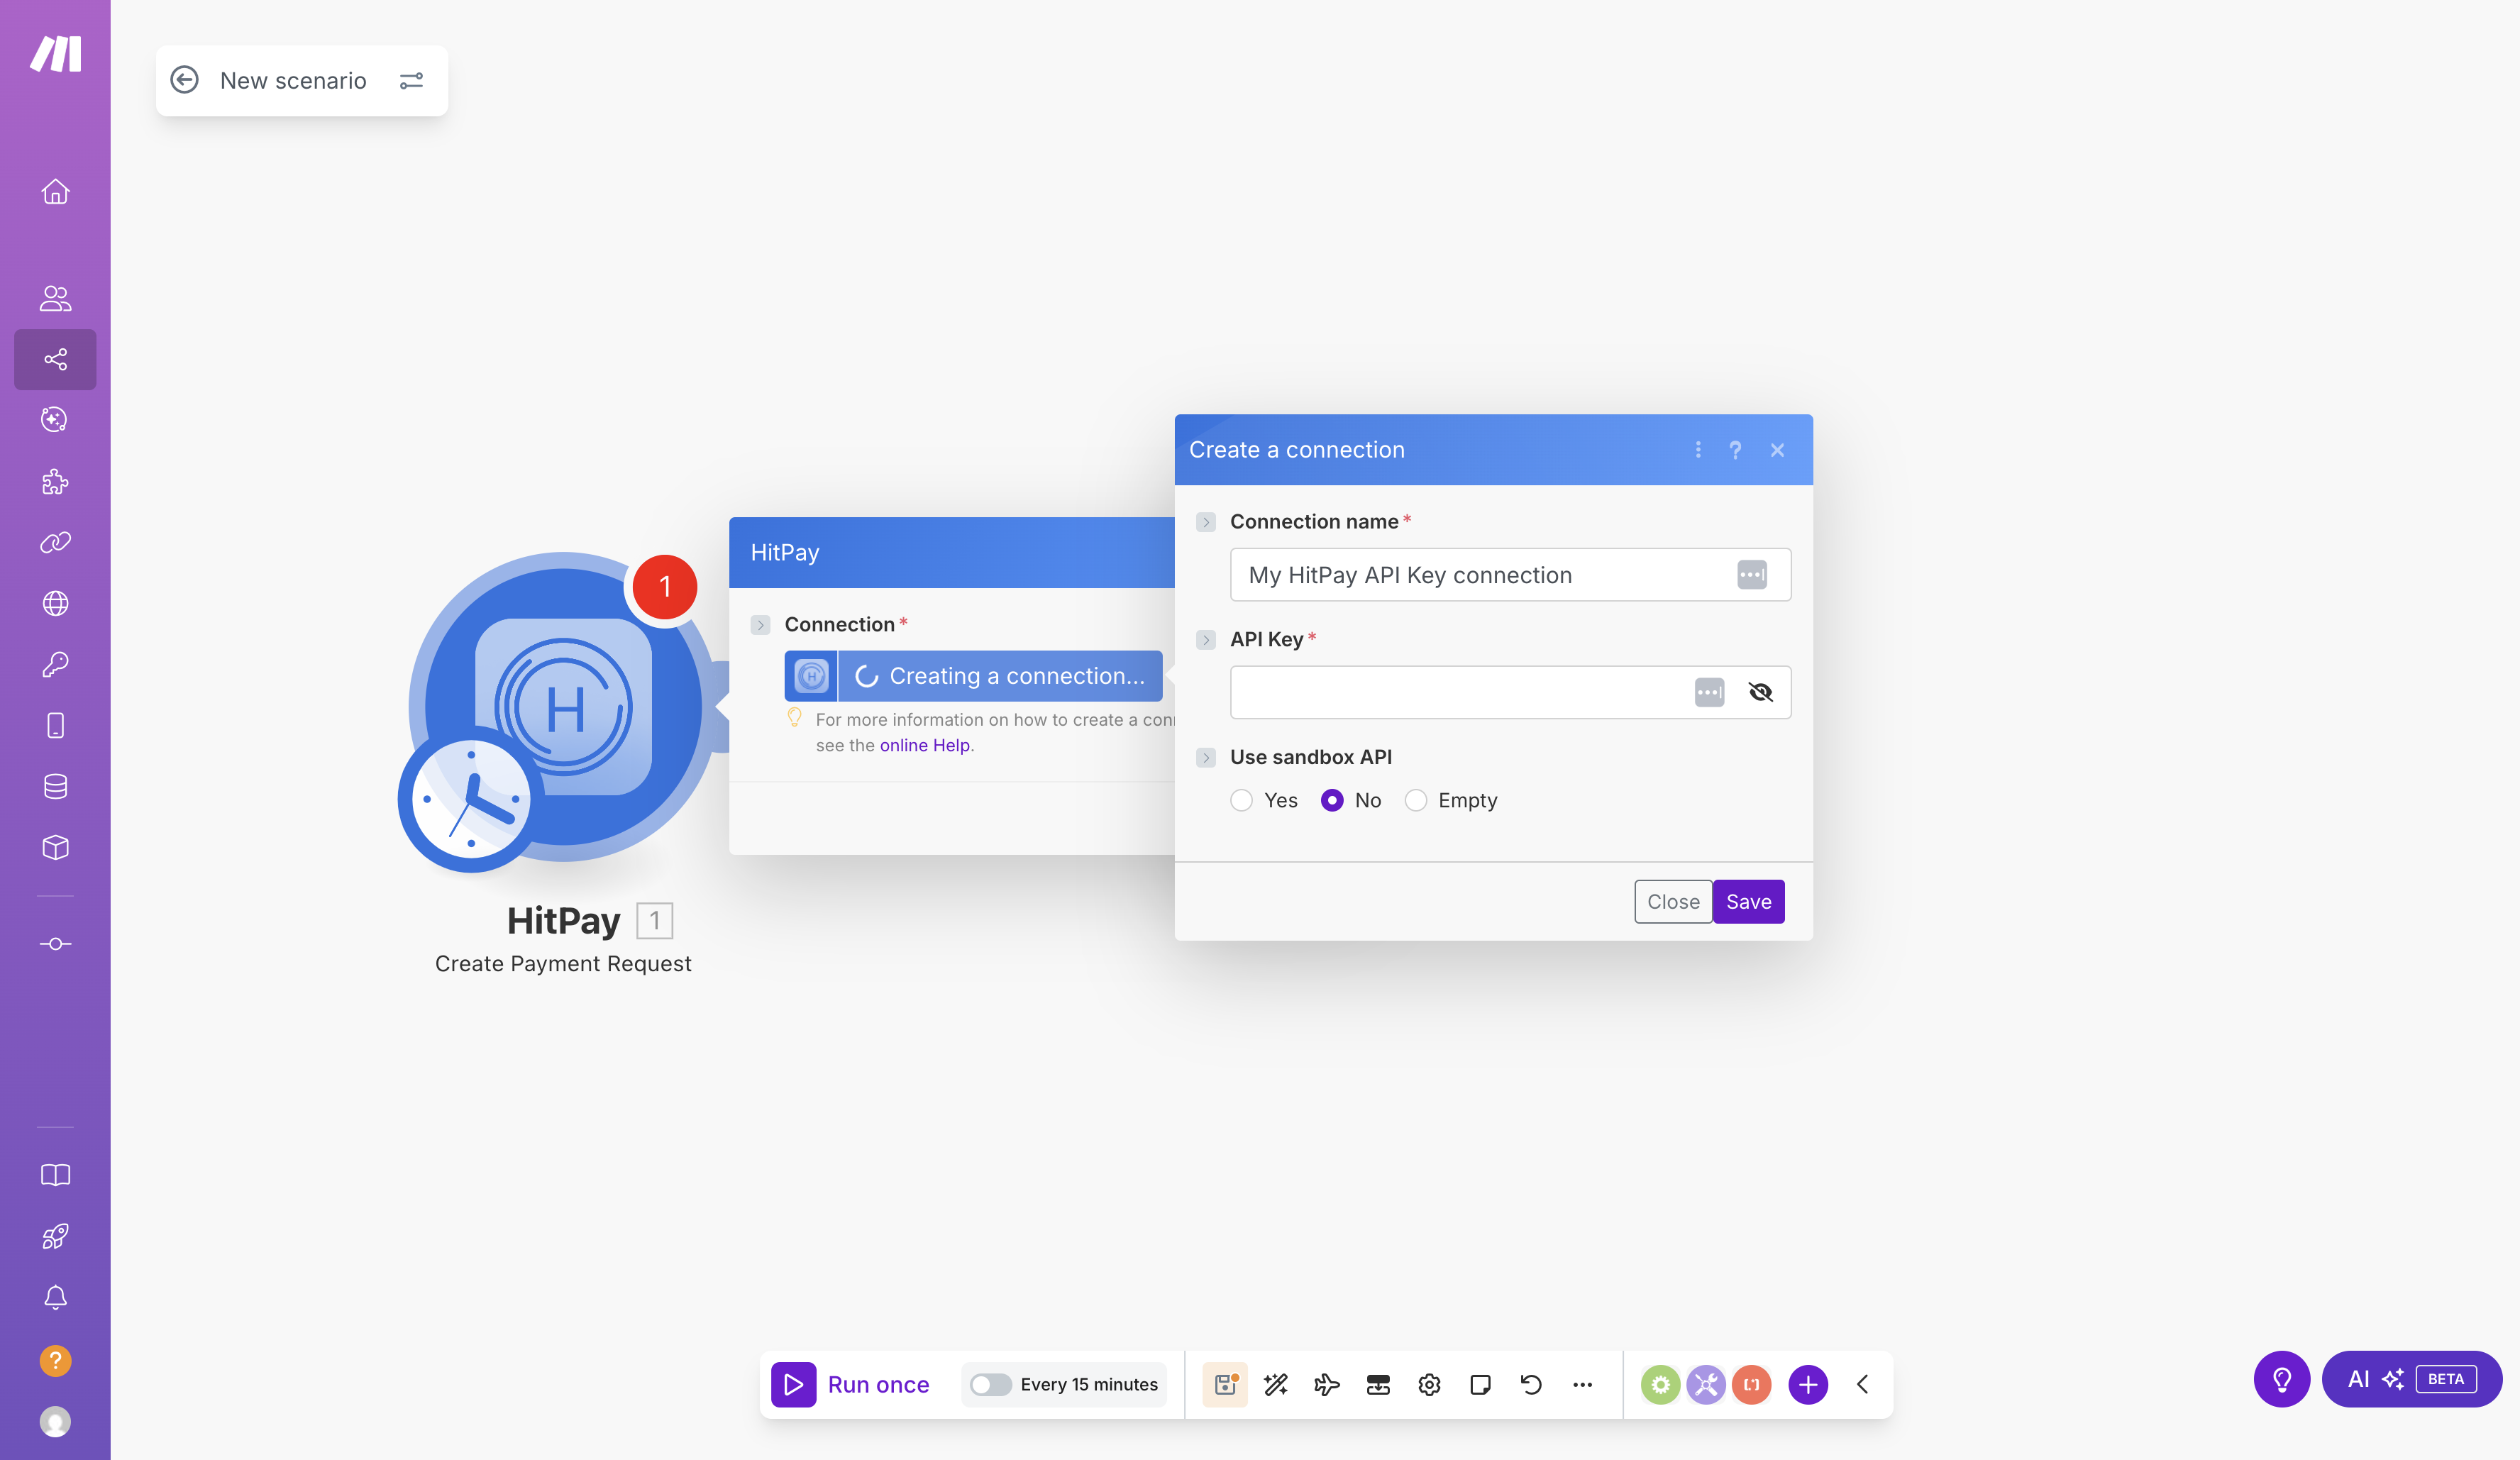
- In Make, create a new Scenario (or open an existing one).
- Add a HitPay module.
- Select your preferred Trigger or Action (for example, Create Payment Request).
-
When prompted, click Create a connection to authenticate.
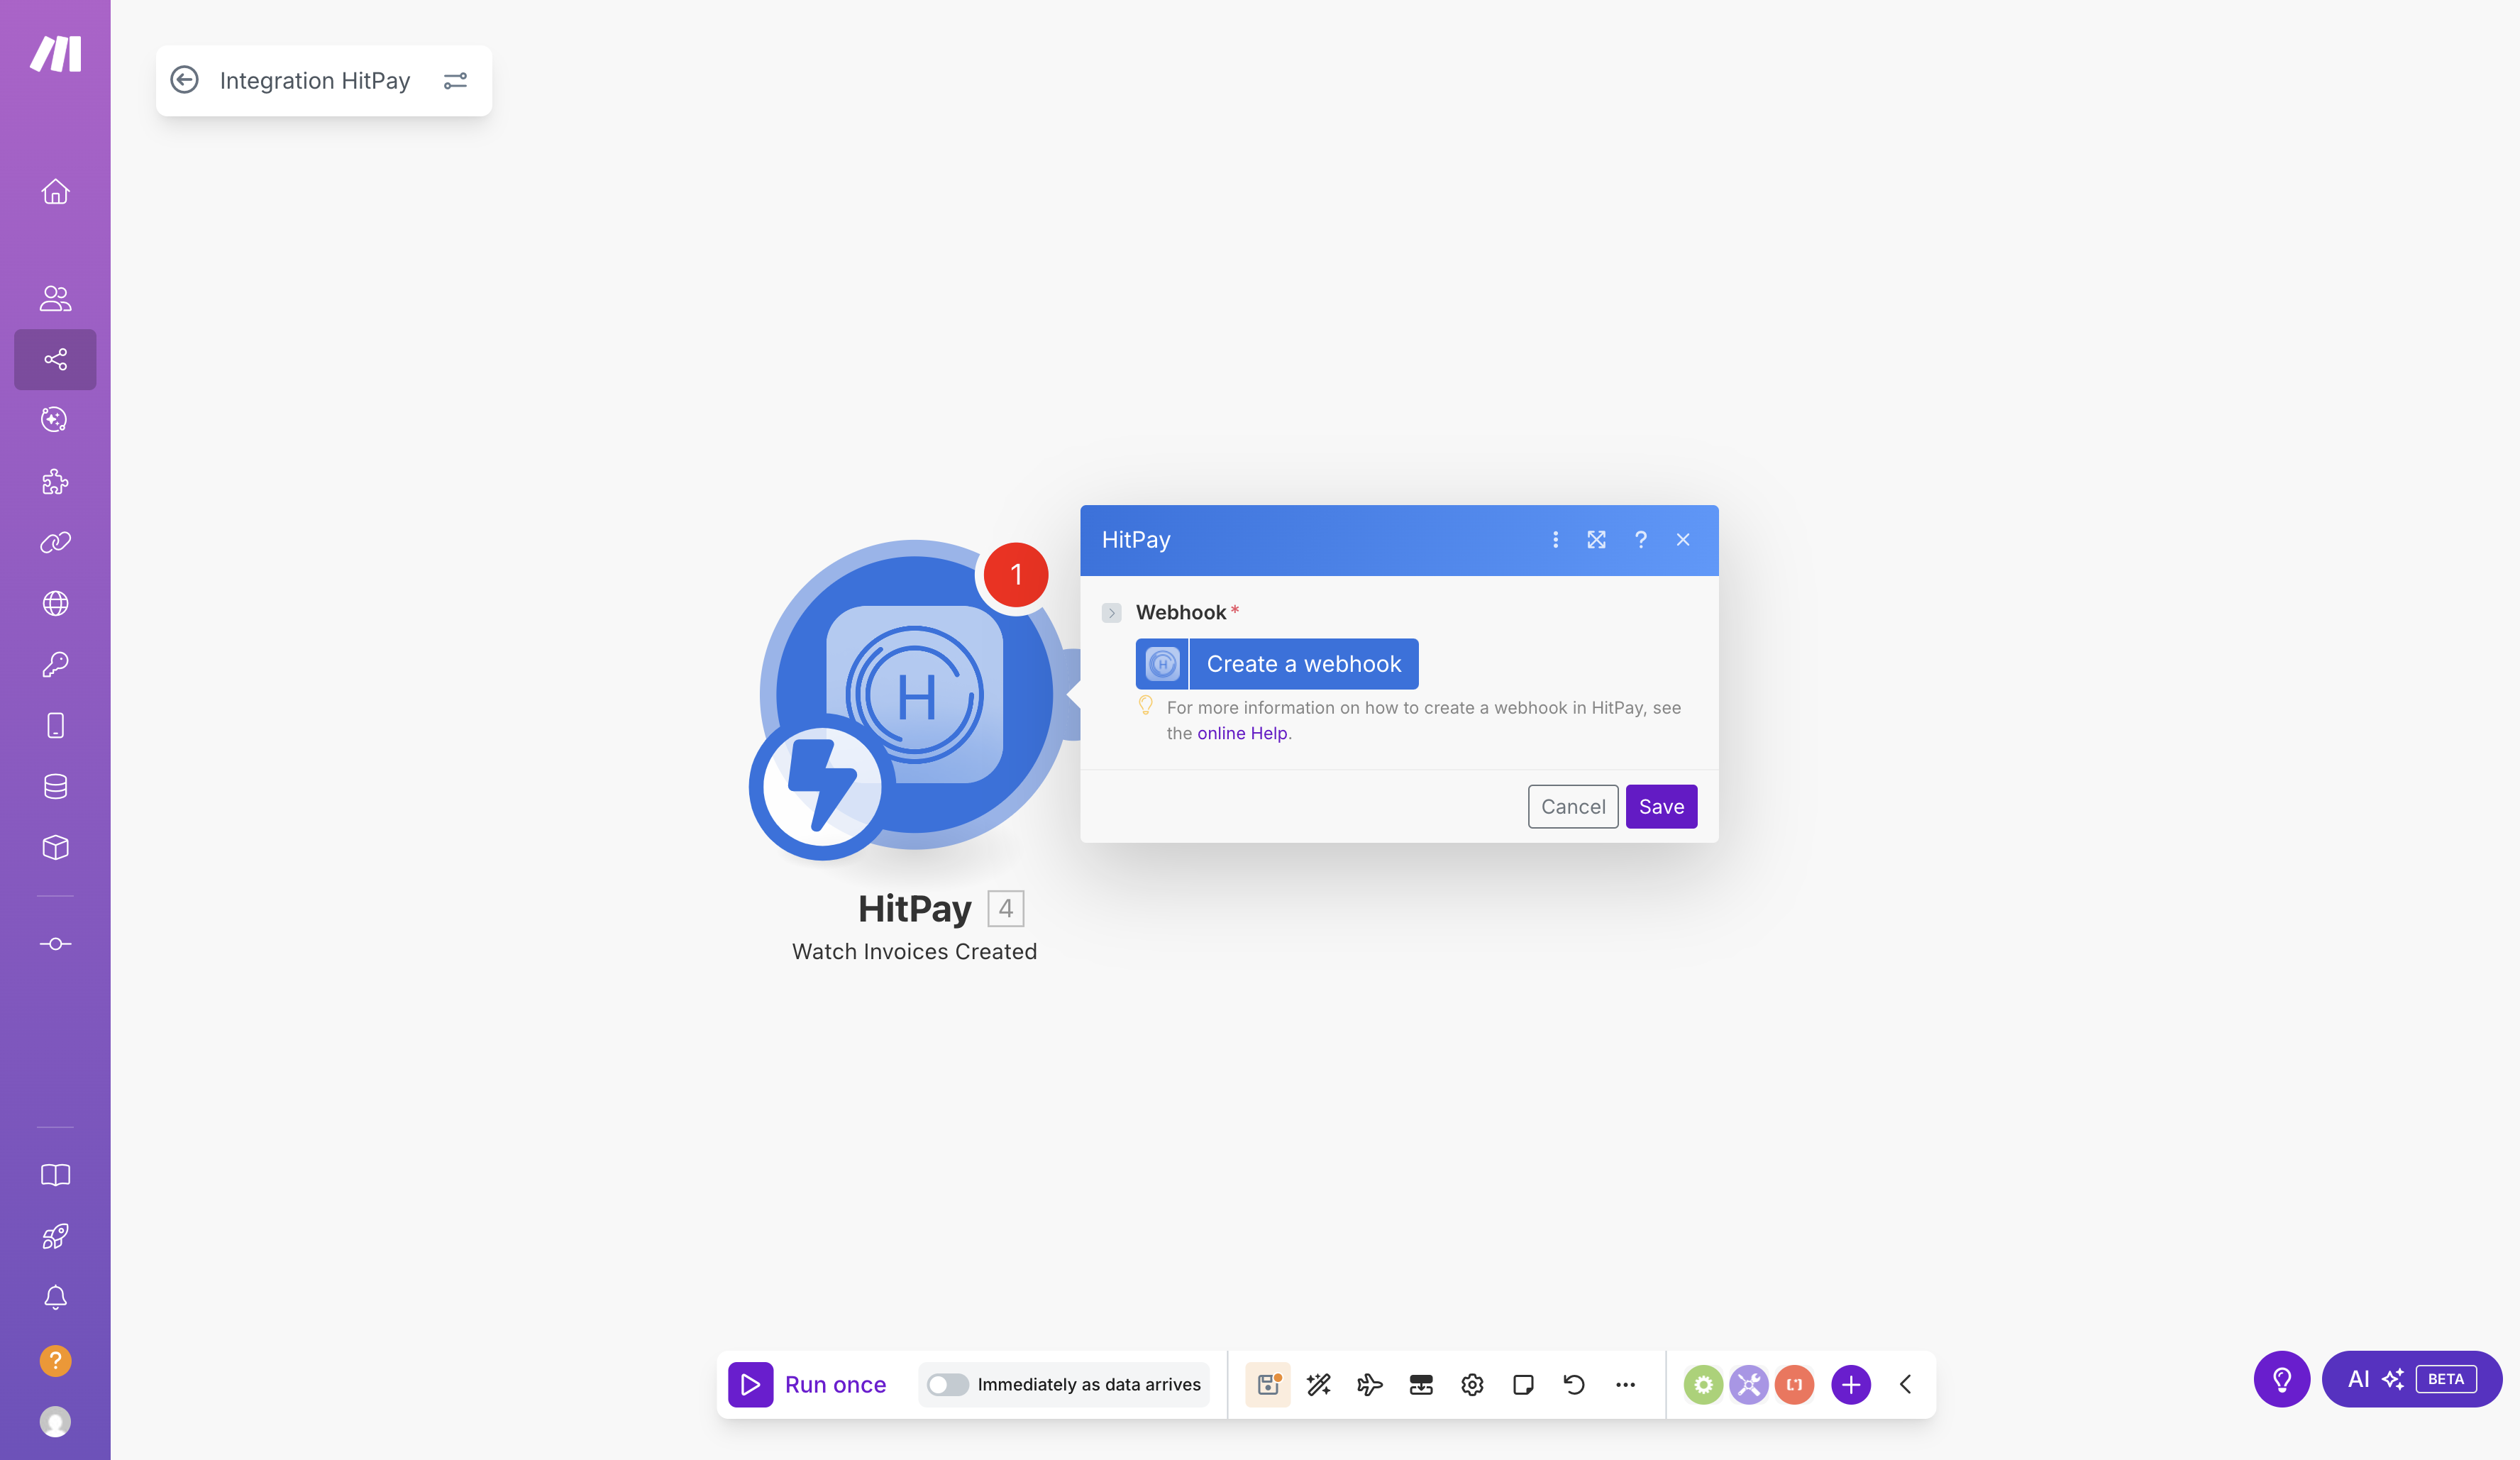
- For triggers, you’ll need to click Create a Webhook first before the connection step appears.
-
Enter your API Key, then choose whether to connect to the Production or Sandbox environment.
Set Up Webhooks for Triggers
Triggers in Make start your scenario whenever a specific event occurs in HitPay — for example, when a payment is created or an order is updated.To set up a webhook:
- Create or open a scenario and select a HitPay Trigger module (e.g. Watch Invoices Created).
- When prompted, click Create a Webhook.
- Give your webhook a name for easy reference.
-
Save your scenario to activate it.
Available Triggers and Actions
Triggers (Start your automation)
All HitPay triggers on Make are instant — they fire the moment the event occurs and sends data to your scenarios via webhook. These events in HitPay can start your Make scenarios:- Watch Charges Created: Triggers when a payment is successfully completed.
- Watch Invoices Created: Triggers when a new invoice is created.
- Watch Orders Created: Triggers when an order is created successfully.
- Watch Payouts Created: Triggers when a payout is successfully completed.
- Watch Updated Charges: Triggers when a payment is refunded/partially refunded.
- Watch Updated Invoices: Triggers when an invoice is marked as paid or partially paid.
- Watch Updated Orders: Triggers when an order status is updated.
Actions (Tasks HitPay can perform)
You can also perform these actions in HitPay through Make:- Create Payment Request: Creates a payment request & generates a new payment link.
- Delete Payment Request: Deletes a payment request.
- Get Payment Request Details: Retrieve details of the specified payment request.
- Make an API Call: Performs an arbitrary authorized API call - this can be used to access HitPay endpoints that aren’t available in Make yet.
- Refund Payment: Process a refund for a specific transaction.
- Update Payment Request: Updates an existing payment request.
Example Workflows
Here are some popular ways businesses use HitPay with Make.com:1. Send Thank You Emails
- Trigger: Charge/Payment Created in HitPay
- Action: Send Email in Gmail or Mailchimp
- Automatically thank customers after successful payments.
2. Log Payments in Google Sheets
- Trigger: Charge/Payment Created in HitPay
- Action: Add a Row in Google Sheets
- Keep a live record of all transactions in a spreadsheet.
3. Notify Your Team
- Trigger: Charge/Payment Created in HitPay
- Action: Send a Message in Slack or Microsoft Teams
- Instantly alert your team when new payments are received.
4. Sync with Accounting
- Trigger: Charge/Payment Created in HitPay
- Action: Create an Invoice in Xero or QuickBooks
- Easily sync all new payments into your accounting system.
5. Update CRM Contacts
- Trigger: Charge/Payment Created in HitPay
- Action: Create or Update a Contact in HubSpot
- Keep customer data up to date automatically.
Tips & Best Practices
- ✅ Test before activating — Test and run your scenarios with sample data before turning them on.
- 🔎 Use filters — Limit automations to only specific transactions, amounts or conditions.
- 🏷️ Label your scenarios — Helps you stay organized as your automations grow.
- 🚨 Enable error notifications — Set up error notifications to get alerts if any step fails.
- ♻️ Review regularly — Update your automations periodically as your business evolves.
Troubleshooting
If something isn’t working as expected:- Double-check that your API Key is valid.
- Ensure your webhook is active and properly linked.
- Try re-authenticating your HitPay connection in Make.
- Check HitPay’s API status or logs for recent activity.
- HitPay Support: support@hitpayapp.com
- Make Support: help.make.com
Support and Resources
- 📘 HitPay API Docs: https://docs.hitpayapp.com
- 💬 Make Help Center: https://www.make.com/en/help
- ✉️ HitPay Support: support@hitpayapp.com
- 👥 Make Community: You can also connect with other Make users in the Make Community