Overview
You can now capture specific customer preferences and requirements for your products with HitPay’s product customisation feature. This allows you to add tailored questions and options to your products, enabling a more personalised shopping experience for your customers. This guide will show you how to set up and manage product customisations effectively.
Product Variants vs Product Customisations
Product Variants
- Definition: Different versions of a product with distinct attributes and unique SKUs.
- Usage: Use this when variations affect the SKU, price, or inventory.
- Example: A t-shirt available in different sizes (S, M, L) and colors (red, blue, green).
Product Customisations
- Definition: Add-ons or personalised options that enhance the base product without changing its core identity or SKU.
- Usage: Use this for options or inputs like custom engravings, specific instructions, or additional toppings that don’t create a separate SKU but may influence the price.
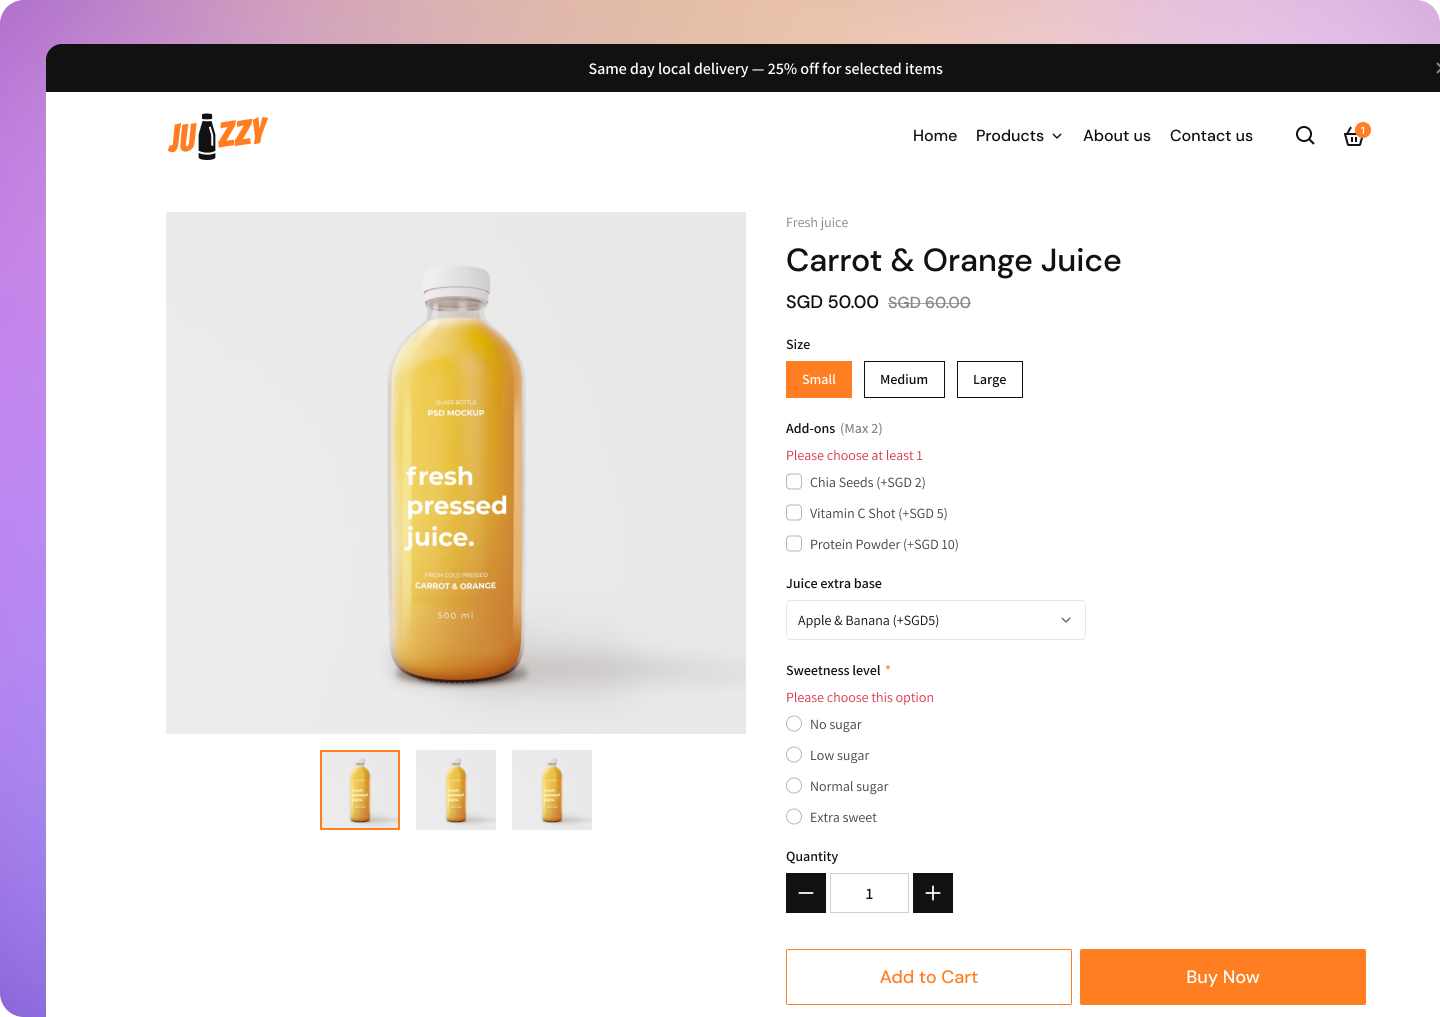
- Example: Custom engraving on a watch, extra toppings on a pizza, or instructions for a juice.
How to Set Up Product Customisations
Adding Product Customisations
- Go to Online Shop > Products > All Products and select a product to add or edit.
- Scroll to the Product Customisation section below the product variants.
- Click Add New to create a new option or select an existing one.
Adding a New Customisation Option
- Fill out the fields in the popup:
- Title: Enter the customisation title (e.g., “Extra Toppings”).
- Option Type: Choose the input type (Checkbox, Radio Button, Dropdown).
- Option Values: Enter values and prices if applicable (e.g., Apple, Orange, Carrot).
- Required Checkbox: Specify if the option is required or optional.
- Selection Limits: Set min/max selections (applicable to Checkbox and if the option is required).
- Click Save Changes to add the customisation option.
- The option will appear in the options list, where you can edit or remove it as needed.
Managing Customisations
- Navigate to Online Shop > Products > Customisation to view all customisation options.
- You can:
- Edit: Update fields with changes affecting all associated products.
- Duplicate: Create a copy of an existing option.
- Delete: Remove the option entirely.
Customer Experience
Selecting Customisations
- Your customers navigate to the product detail page.
- Customers complete all required fields and add the product to their cart. Validation ensures all requirements are met.
Checkout and Order Details
- Customisations are displayed below the product name in the cart and checkout pages.
- Customers receive an order confirmation email with all selected options.