Overview
You can set up shipping and pickup options on your HitPay Point of Sale.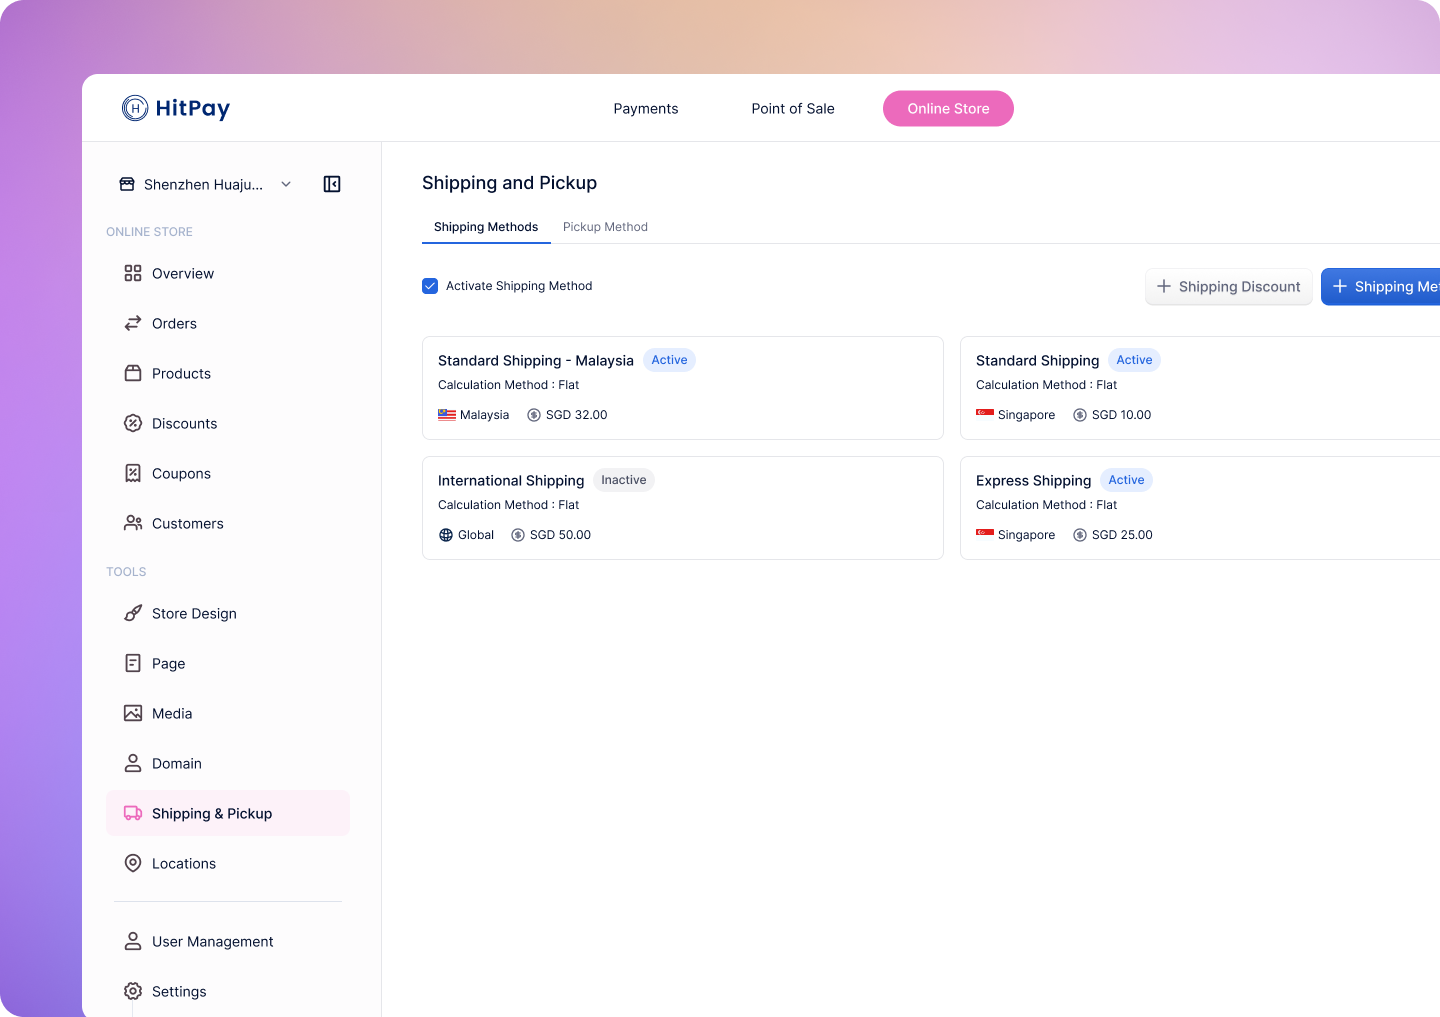
Why configure shipping or pick-up on POS?
Configuring shipping and pickup on your POS app is useful for merchants who offer flexible order fulfillment options directly from their physical store. Here’s some use cases :Purchase In-Store, Deliver Later
A customer visits your physical store to make a purchase but prefers to have the product delivered to their home or another location. With the shipping configuration set up on the POS, the cashier can process the sale in person and mark the order for delivery. This option provides a seamless experience for customers who may be purchasing larger or heavier items that they cannot take with them immediately. For example, a furniture store can sell items in-store and arrange delivery directly through their POS system to complete the transaction.Preorders
A customer calls or contacts your business to place an order for an item that requires preparation or restocking. Instead of taking payment over the phone, your team can create a payment link in the POS and send it to the customer via SMS or email. Once the customer completes the payment using the link, the POS records the order, and it can be tagged for pickup or shipping at a later date when the item is ready.Limitations for HitPay POS
Shipping and Pick Up settings can currently only be configured from web dashboard. Some advanced settings is not be available for POS
- Shipping methods with specific Countries and Regions are not supported. These shipping methods will be treated as available for all countries / regions.
- Shipping methods with calculation & rate is currently not supported. These shipping methods will not be displayed on the POS.
Before you begin
Configure Shipping Settings on Web Dashboard
To configure shipping settings for your HitPay online store, follow these steps: Step 1: Navigate to Shipping & Pickup:- Access the shipping settings by going to your HitPay Web Dashboard and navigating to Online Shop > Shipping & Pickup.
- Click on the “Shipping Method” toggle button to activate shipping options for your online store.
- Click on the Add Shipping Method button to define a new shipping method.
a. Method Name
- Provide a clear and descriptive name for the shipping method to help identify it easily (e.g., “Standard Shipping” or “Express Delivery”).
- The method name will be displayed to customers during the checkout process.
b. Applicable Countries and Regions
- Select the countries and specific regions within those countries where this shipping method will be available.
c. Calculation & Rate
- Choose how the shipping costs will be calculated:
- Flat Fee: A fixed rate applied to all orders regardless of weight or quantity.
- Fee Per Unit: A rate applied based on the number of units ordered.
- Weight-Based: A rate calculated based on the total weight of the order. For this option, you must ensure that each product in your store has a weight assigned, as the system uses these weights to determine shipping costs. For more information, refer to the Shipping or Pickup Required section.
- After selecting the calculation method, input the relevant rates and ranges to be applied.
d. Description
- Optionally, add a description for this shipping method to provide additional context or information to customers (e.g., “Delivered within 3-5 business days”).
- The description will be displayed to customers during the checkout process.
- Enhance the customer experience by offering the option for customers to choose their preferred delivery date and time. This can be particularly useful for businesses offering time-sensitive products or services.
- After enabling this feature, customers will be able to select their preferred delivery date and time slot during the checkout process.
Set Up Pickup Locations for Your Store
- Navigate to Online Shop > Shipping & Pickup > Pickup.
- Click on the “Activate Pickup Method” checkbox to activate pickups for your store.
- Click on + Pickup Location.
- Enter the pickup name and select a location from the dropdown menu labeled “Locations” which lists all available locations from Online Store > Locations.
- If the desired location is not listed, you can add a new location directly from this dropdown menu by clicking on ‘Add New’.
- Repeat steps 3 and 4 to add multiple pickup locations.
- To manage existing pickup locations, navigate to the Pickup Locations tab.
- Active/Inactive Locations: Active locations will appear as an option on the checkout page, and inactive locations will not.
Setting Time Slots For Pick-Ups & Shipping Methods
- Shipping
- Pickups
- When you’re in the “Add/Edit Shipping Method” page, click on the “Delivery date and time slots” toggle to enable time slots for the shipping method.
- Select the day(s) allocated for shipping.
- Set a time slot for the selected days.
(Optional) Specify the number of slots available; once all slots are filled, customers can’t choose that time slot.
- Click Save/Create Shipping Method to save your changes.
Calendar Settings for Pick-Up or Shipping Methods
After enabling time slots, you can configure advance calendar settings for the pickup or shipping mode. These settings include advance days, cutoff time, maximum days, and blackout dates:-
Advance Days: The Advance Day setting allows you to specify the number of days required for order preparation before shipping or pickup. This ensures that you have enough time to fulfill the orders.
To configure advance days:
- Enable the “Advance Day” option.
- In the field provided, enter the number of days required for order preparation.
The current day is day 1. If orders are fulfilled immediately, leave advance settings disabled.
-
Cutoff Time: The cutoff time option is available only when the Advance Day setting is enabled. It allows you to set the latest time of day by which customers can place their orders for shipping or pickup.
To configure cutoff time:
- Enable the “Cutoff Time” option
- Enter the desired time in the provided field
-
Maximum Days: The Maximum Days setting specifies the time frame in which customers can place their orders. Dates beyond this specified time frame will not be available for selection during the checkout process.
To configure maximum days:
- Enable the “Maximum Days” option
- In the “Days” field, enter the maximum number of days within which customers can place their orders.
This restricts the available dates for pickup during checkout.
-
Blackout Dates: The Blackout Dates setting allows you to specify dates when the shipping or pickup option will be unavailable, such as holidays or non-working days.
To configure blackout dates:
- Enable the “Blackout Dates” option
- In the “Blackout Dates” section, enter the start and end dates of the blackout period
- Click on the + button to specify additional blackout periods if needed
- To remove a blackout date, click on the “Delete” icon next to the respective date