Account Setup
Shopcada users can easily enable HitPay’s payment gateway in their online store to start accepting popular payment methods quickly. Before you begin integrating HitPay payments into your Shopcada store, you need to set up your HitPay account and ensure some prerequisites are met:- If you haven’t already, create an account on HitPay.
- Ensure that you have the necessary payment methods activated in your HitPay account.
- Make sure the payment methods you want to offer are enabled in your PretaShop sales channel.
Integration Guide
Once your HitPay account is ready, follow these steps to integrate the HitPay Payment Gateway with Shopcada:Step 1: Access Shopcada Admin Settings
Navigate to your Shopcada Admin Settings and click on Payment Methods under Settings.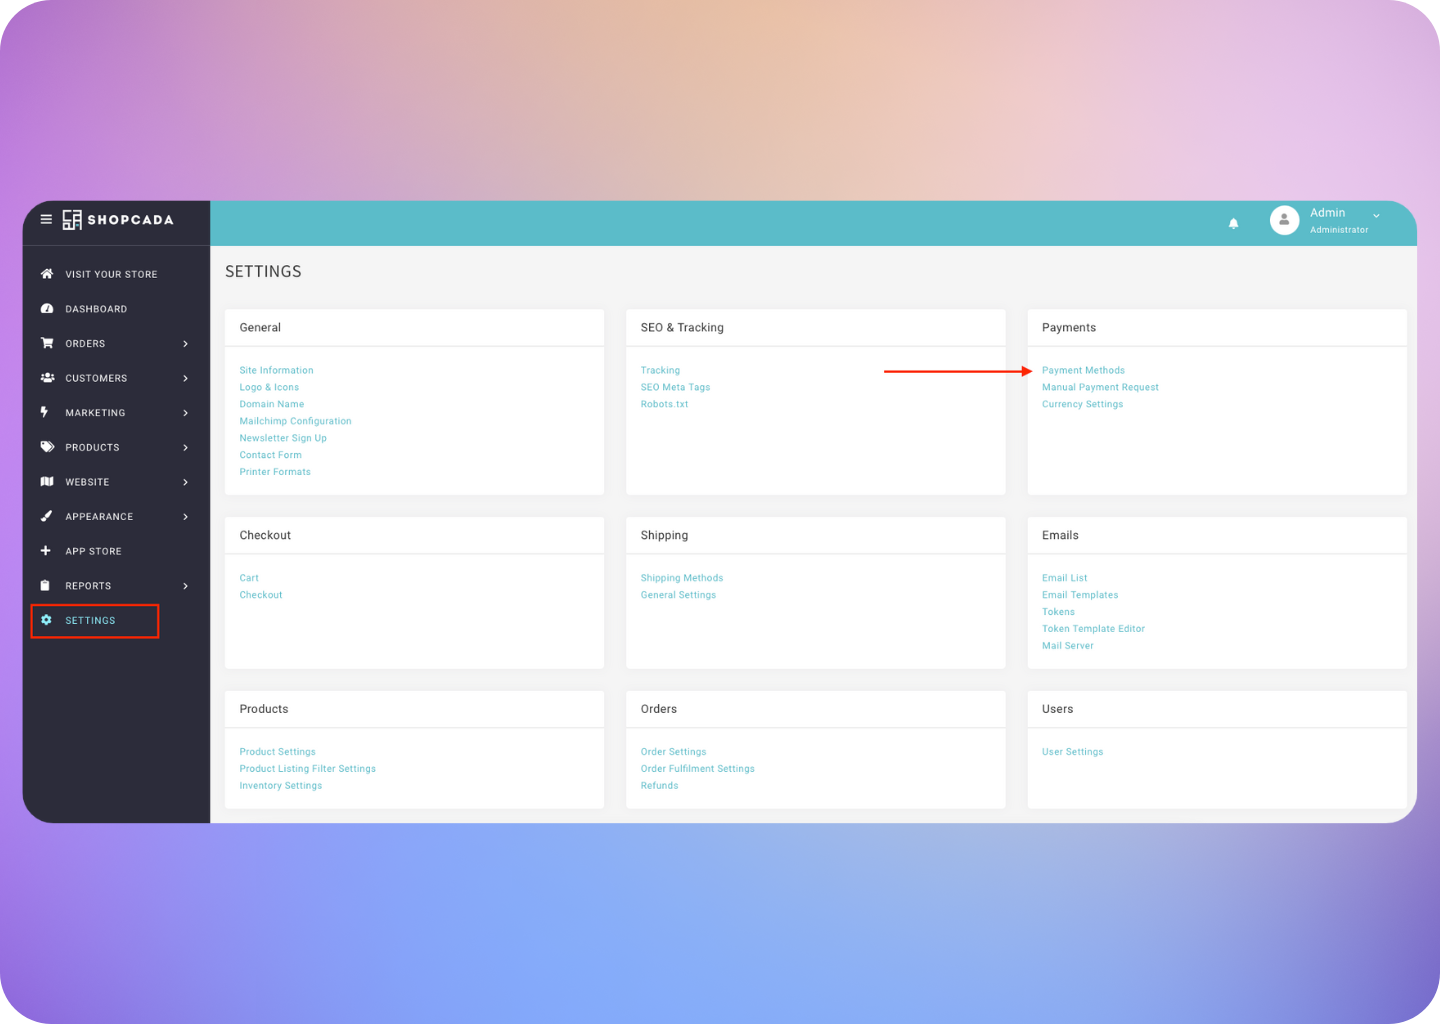
Step 2: Configure HitPay Settings
Click on HitPay Settings.
Step 3: Provide API Keys and Salt
Copy and paste the HitPay API keys and Salt values into the highlighted fields in Shopcada. You can find your HitPay API Key and Salt Keys by navigating to Developers > API and Salt Keys in the HitPay dashboard. Click Save Configuration.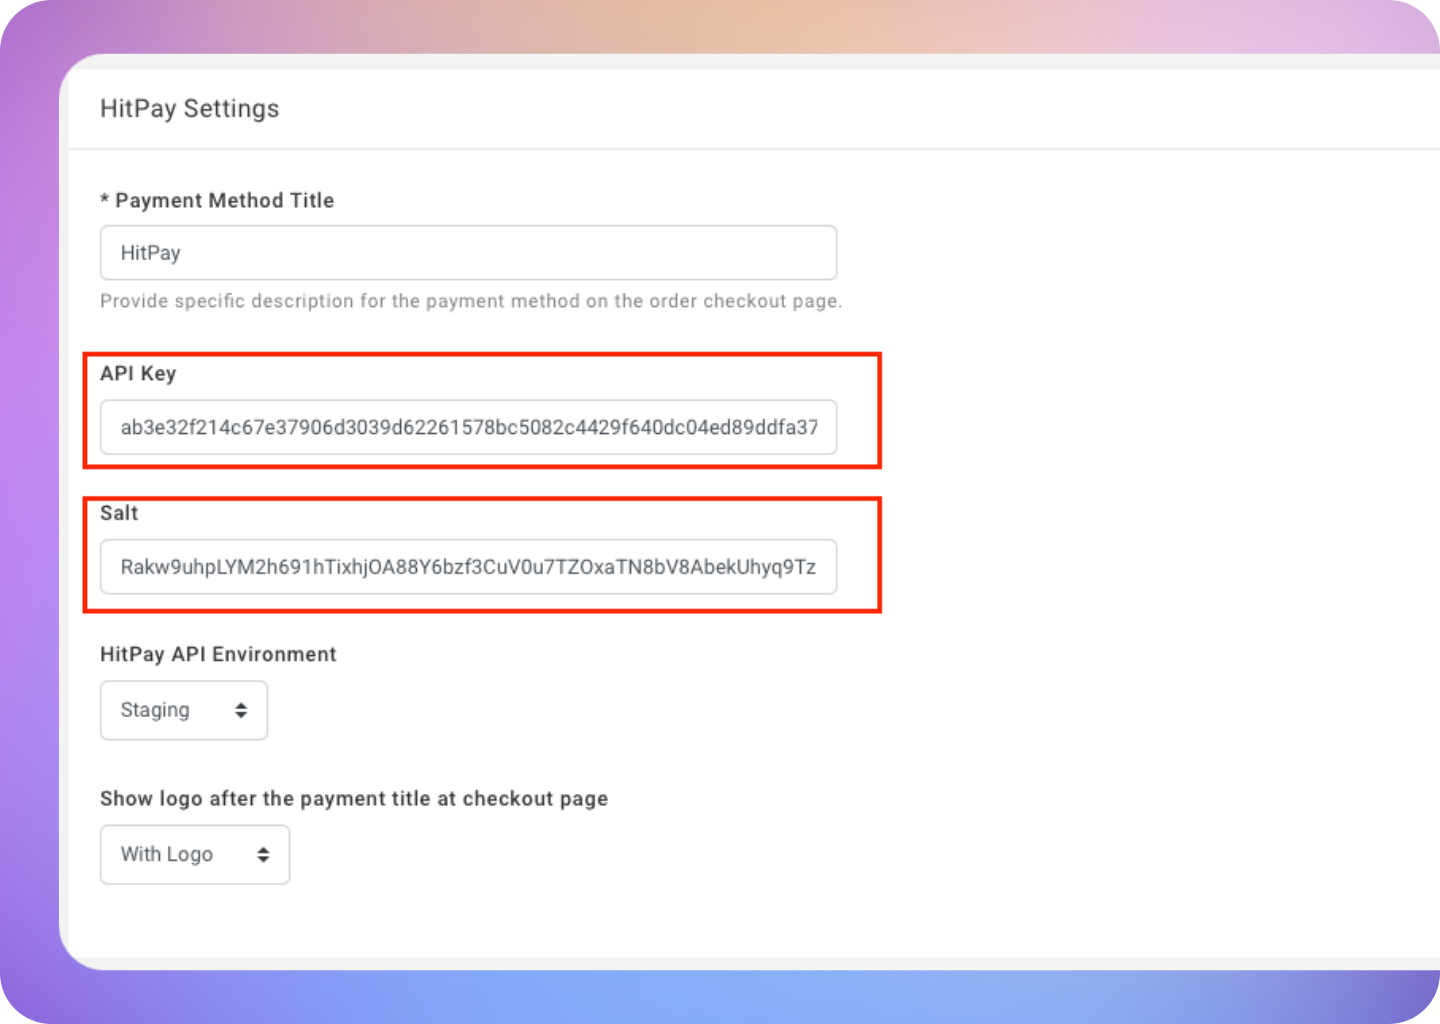
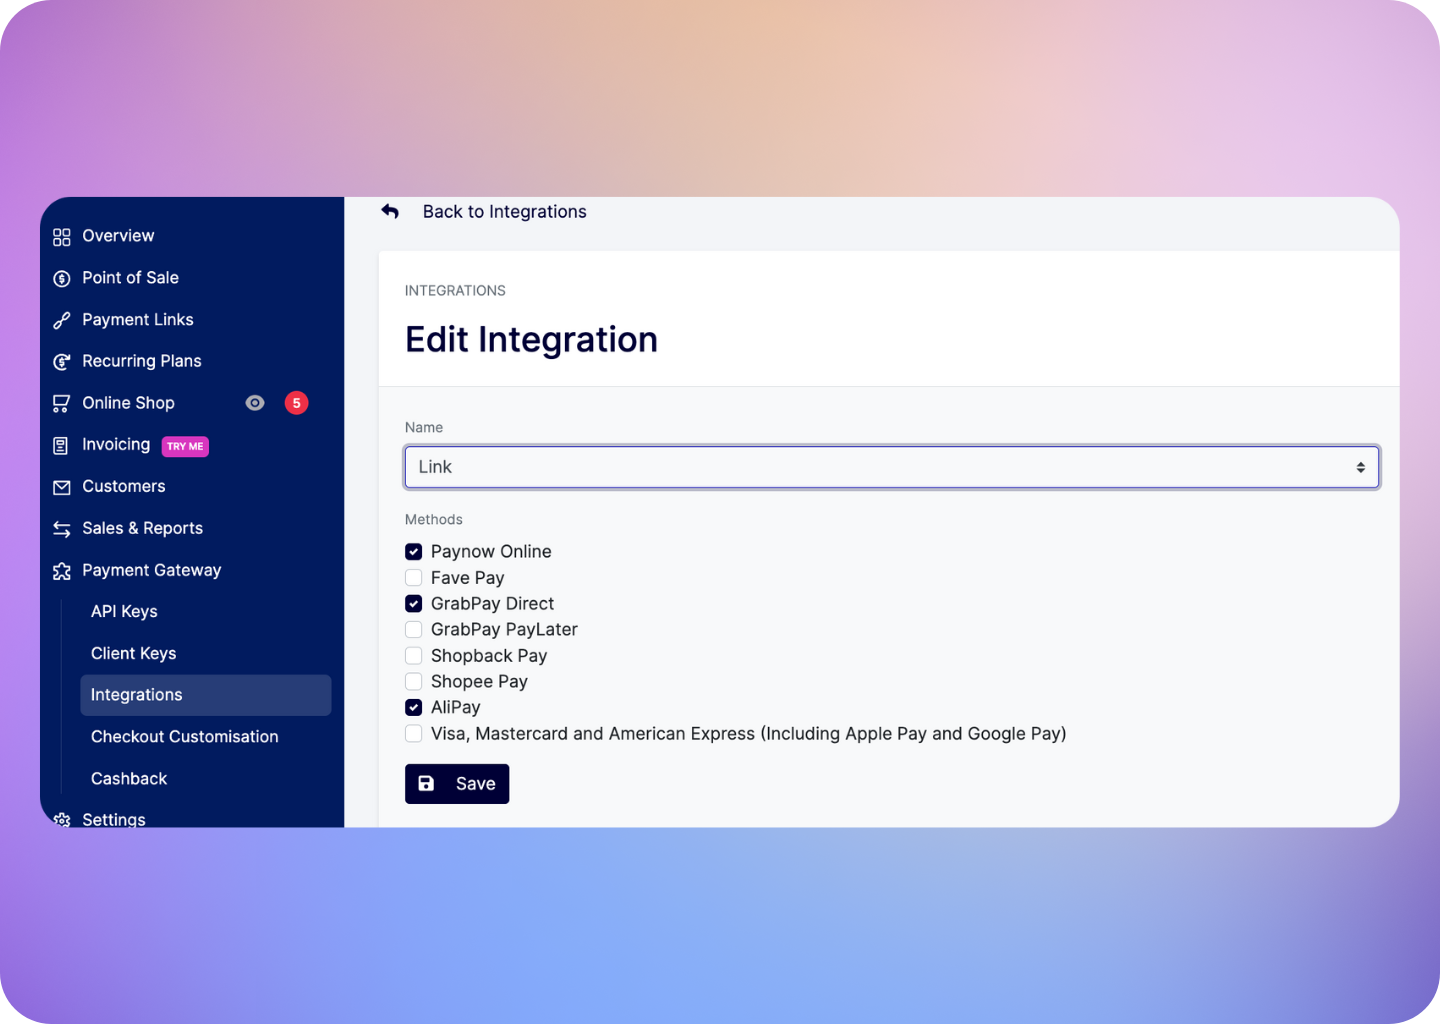
Step 4: Enable/Disable Payment Methods
Configure your payment methods for Shopcada Checkout by updating your Integration Settings for Links and Payment Request API. Please note that these settings will also affect other Links and Payment Request APIs, such as direct payment links generated from your dashboard or custom-built websites integrated with HitPay via API Integration.

Step 5: Start Accepting Payments
Your HitPay settings are now configured, and you can begin accepting payments with HitPay through your Shopcada online store! 🎉Refunds
In Shopcada, refunding transactions is a two-step process. You’ll need to process the refund in the HitPay dashboard and manually update your Shopcada order as refunded. Important Note: Successful refunds must meet the criteria of the payment method used. For more details, check out the refund process documentation.
Processing Refunds in HitPay
Follow these steps to process refunds using the HitPay dashboard:- Navigate to Bank Payouts > Transactions.
- Click on the transaction you would like to refund.
- Click on the Refund button.
- Confirm the refund by clicking on the Confirm button and wait for the refund success message.
Please Note: Initiating a refund from the HitPay dashboard will not automatically update your Shopcada order. You must manually update the order status in Shopcada as well.
Shopcada Refund Process
In Shopcada, refunds cannot be initiated from the dashboard. Instead, follow these steps to process refunds:- Process the refund in the HitPay dashboard as outlined above.
- Manually mark the corresponding order as refunded in your Shopcada dashboard.
FAQs
Does HitPay send an email after the Shopcada order is confirmed
Does HitPay send an email after the Shopcada order is confirmed
No, HitPay does not send an email confirmation to your customer if the payment is made through Shopcada. This is because Shopcada, by default, sends an email to your customer with the order details. To avoid sending duplicate emails, HitPay does not send an additional email to your customers. As a merchant, you will receive a payment alert email.