Documentation Index
Fetch the complete documentation index at: https://docs.hitpayapp.com/llms.txt
Use this file to discover all available pages before exploring further.
Account Setup
Before you begin integrating HitPay payments into your WHMCS store, you need to set up your HitPay account and ensure some prerequisites are met:- If you haven’t already, create an account on HitPay.
- Ensure that you have the necessary payment methods activated in your HitPay account.
- Make sure the payment methods you want to offer are enabled in your WHMCS sales channel.
Installation
https://github.com/hit-pay/WHCMS-extension After following the installation guide on Github, ensure that you complete your Integration Settings for WHCMS to complete the integration to your website: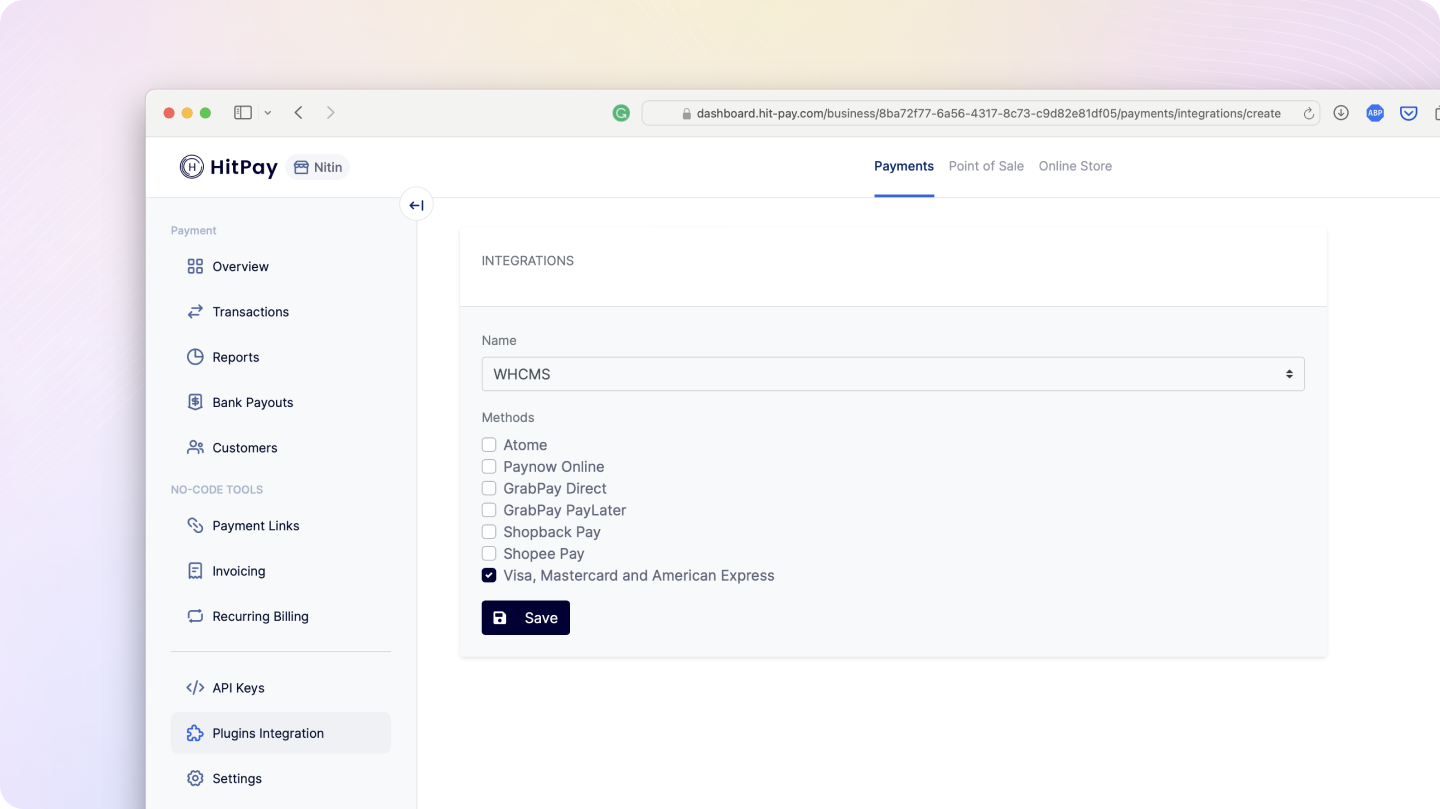
FAQs
Does HitPay send an email after the WHMCS order is confirmed
Does HitPay send an email after the WHMCS order is confirmed
No, HitPay does not send an email confirmation to your customer if the payment is made through WHMCS. This is because WHMCS, by default, sends an email to your customer with the order details. To prevent duplicate emails, HitPay does not send an additional email to your customers. As a merchant, you will receive a payment alert email.
Why don't I see Apple Pay or Google Pay on my checkout page?
Why don't I see Apple Pay or Google Pay on my checkout page?
On the HitPay checkout page, you will see the option for Apple Pay/Google Pay only once you select
CARDS as the payment method.
Additionally, it will work only if the browser supports the respective method:Apple Pay: Only available on the Safari browser. Ensure you have Apple Pay enabled. Here's a guide from Apple on how to enable Apple Pay on your browser.Google Pay: Only available on the Chrome browser. Ensure you have Google Pay enabled on your Google account.
I set up a payment method, but it's not reflecting on my checkout page. Why?
I set up a payment method, but it's not reflecting on my checkout page. Why?
Here are two checks you can perform to ensure the payment method is visible on your checkout page:
- Navigate to
Payment Gateway>Integrations. Ensure that your payment method is enabled for your respective sales channel. - If you have checkout rules, navigate to
Payment Gateway>Checkout Customization>Payment Method Rulesand ensure your payment method is selected.